Understanding Common Issues with Broken Screws
When working on a woodworking project, the last thing you want is to come across a broken screw. It’s like hitting a bump on a smooth road – suddenly, you’re pulled out of your calm workflow and into problem-solving mode. Screws typically break due to a few common reasons: the force applied was too high, causing over-tightening; the screwdriver didn’t fit the screw head properly, resulting in a stripped screw; or the wood’s hardness was underestimated. These problems can leave you with a snapped-off screw head or a shank deeply embedded in the wood, making it seem like the screw is taunting you from its wooden fortress. Understanding these potential issues is the first step toward avoiding similar problems in the future and approaching the current issue with knowledge and strategy.
Dealing with a broken screw requires a mix of patience, the right tools, and at times, some clever thinking. It’s not just about using force; it’s about addressing the problem with a thoughtful plan. Whether you’re dealing with a stripped screw head that has lost its grip or a broken shank hidden beneath the surface, each problem presents its own challenges. Stripped screws taunt you with their smooth, grip-less heads, while broken shanks play a frustrating game of hide and seek. But don’t worry – with the right techniques, even the most stubborn screws can be persuaded out of their hiding spots. Recognizing the intricacies of these common issues allows you to tailor your approach, turning a potential project-stopper into a minor setback.
Essential Tools for Removing Broken Screws
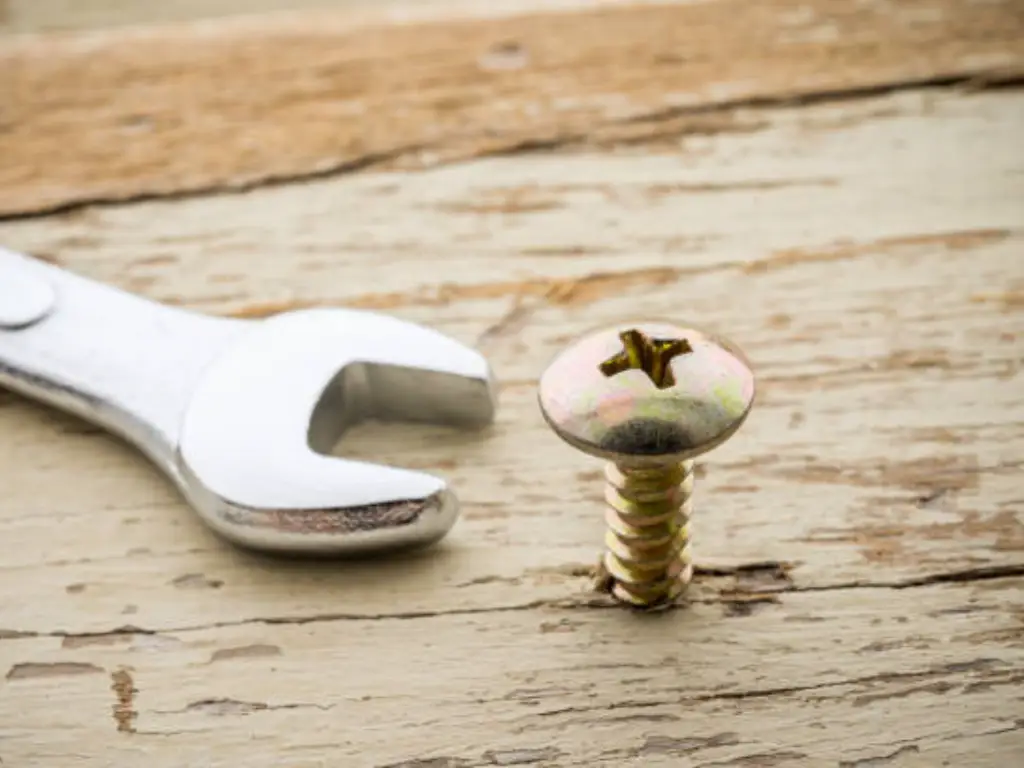
Removing a broken screw from wood is like getting ready for surgery. Just as a surgeon needs a well-equipped tray of instruments, your toolbox should have the right tools for this precise task. You’ll need pliers for twisting out a partially exposed screw, screw extractors for hard-to-reach screws, and drill bits made for dealing with stripped or broken screws. A hammer might also be useful for gently tapping tools into place or aiding in extraction.
Different scenarios call for specific tools. A rotary tool with a cutting disk is useful for making precise cuts around the screw head, and penetrating oil can act as a lubricant to ease the screw’s release. Using a high-quality screwdriver that fits the screw head snugly can prevent stripping, reducing the chances of frustration in future projects. Grips and wrenches can provide the needed leverage when all else fails. It’s not about having the most expensive tools, but having the right tools and knowing when and how to use them. This preparation and understanding turn the process from trial and error into targeted extraction, minimizing damage to your woodwork and preserving your sanity.
Method 1: Using a Rubber Band for Extracting Stripped Screws
The rubber band method for removing a stripped screw falls into the category of hidden, little-known DIY tricks. Here’s how it works: take the width of a small piece of cardboard and imagine compressing that flexibility into a rubber band. When placed flat on top of the screw head—whether it’s a Phillips head screw or one with a stripped head frustratingly above the wood surface—the rubber band acts as an improvised grip. Insert the tip of your screwdriver (or for more force, the chuck of a power screwdriver) into the rubber band and start turning. As you exert pressure and rotate slowly, the rubber band molds into the crevices of the stripped screw head, providing the unexpected grip needed to persuade the screw to turn. It’s a simple yet remarkably effective technique that hides a sophisticated understanding of friction and material compatibility beneath its simple execution. This approach works best for screws that haven’t been over-tightened but have suffered wear and tear from being screwed into a type of wood that doesn’t agree with the delicate threads of a steel screw.
| Pros | Cons |
| Little-known DIY trick for stripped screws | Works best for screws not over-tightened |
| Provides improvised grip for screw removal | May not be effective for tightly fixed screws |
| Hides sophisticated understanding of friction and material compatibility | Limited application for various screw types |
| Effective for screws suffering wear and tear | Ineffective for screws that are tightly fixed |

Method 2: Using Pliers to Remove Exposed Screws
At times, the only thing stopping you from removing a troublesome screw isn’t a lack of tools, but finding the right one. That’s where pliers—specifically, grip pliers—come into play. When the broken head of a screw sticks just above the surrounding wood surface, grip pliers are vital. By clamping their jaws around the exposed screw shaft, they act as an extension of your strength, forcibly turning the screw counterclockwise. This method, characterized by direct confrontation, requires patience and skill. Dealing with the screw, especially a stripped one with a head mockingly perched above the wood, tests your determination. With grip pliers firmly attached around the screw’s shank, every careful twist becomes a negotiation with the physical world, a display of human ingenuity over unyielding steel. The process isn’t just about extraction; it’s about grasping the dynamics of force, understanding the specifics of the screw’s material (whether it’s a resistant steel screw or a more forgiving fastener), and the wood’s willingness to let go. By wielding the pliers, you’re not simply removing a screw; you’re engaging in a tactile conversation with the materials at hand, where patience and a steady hand determine the outcome.
| Pros | Cons |
| Vital for removing exposed screws | Limited application for tightly fixed screws |
| Acts as an extension of strength | May not work for screws deeply embedded in wood |
| Provides a direct confrontation with troublesome screws | May require strong force, risking wood damage |
Method 3: Leveraging Different Screwdriver Techniques
You might think a screwdriver is just a screwdriver, right? But when dealing with broken screws, it’s your savior. When faced with a stubborn screw without a head or one with a stripped head, how you use your screwdriver matters. Consider the rubber band method: placing a thick rubber band between the screwdriver and the stripped screw head can provide just enough grip to turn it out. It’s the old “if you can’t beat ’em, join ’em” approach—using the screw’s weakness (a damaged head) to your advantage.
But the story doesn’t end there. If the rubber band trick doesn’t work, it’s time to improvise with what I call the “MacGyver technique.” Gently use a hammer and a sharp, narrow chisel to carve a new slot into the top of the screw head. This gives you a fresh landscape to work with—a clean slate, so to speak. Now, your flathead screwdriver has a new groove to hold onto, providing a second chance to free the stubborn screw. This approach demands a delicate touch, as excess force can harm the wood or worsen the screw head. Like a sculptor crafting a masterpiece, your work here requires precision and patience, turning the frustrating task of screw extraction into an art form.
| Pros | Cons |
| Effective method for stripped or headless screws | Requires precision and patience |
| Adaptable and creative approach to handle stubborn screws | Possibility of harming wood or worsening screw condition |
| Utilizes the screw’s weakness to advantage | Requires a delicate touch and careful force |

Method 4: Harnessing the Power of Hammering
Now, let’s explore a technique that might seem a bit rough but is filled with precision—hammering. Don’t imagine a scenario where your workshop becomes chaotic. This method is about applying calculated force, not causing destruction. Picture a screw with a broken head, lurking just under the wood surface, with a shard still peeking out, defying delicate attempts. A soft but firm tap with a hammer on the back of a screwdriver placed at the center of the screw head is like a polite but firm eviction notice. It’s akin to giving the screw a gentle nudge, signaling it’s time to leave its wooden home.
This approach utilizes the subtle power of vibration and strategic impact, aiming not to damage the surrounding area but to unsettle the screw. The goal is to shake the corrosion or release the tight grip anchoring the screw, offering a peaceful solution to what could otherwise become a battle with your project. Imagine coaxing the stubbornness out of the screw, persuading a tight jar lid off with a gentle tap rather than a display of strength. When luck is on your side, this gentle persuasion is all it takes for the screw to give in, paving the way for the strategic use of pliers or, for particularly stubborn screws, the precise intervention of a screw extractor tool. The key is moderation; using just enough action to make a point without overdoing it. Like adding spice to a recipe, the right amount of force can enhance the outcome, while excess can overpower the intended result. In the delicate process of removal, subtlety is your most powerful tool, ensuring the screw’s departure is as smooth as the rest of your craftsmanship.
| Pros | Cons |
| Utilizes precision and calculated force | Risk of overdoing force or causing damage |
| Offers a gentle and subtle method for screw removal | May not be effective for all types of screws |
| Doesn’t cause destruction, only strategic impact | Requires moderation and a careful approach |
| Provides a peaceful solution to stubborn screws | Subtle process may not work for extremely stubborn screws |

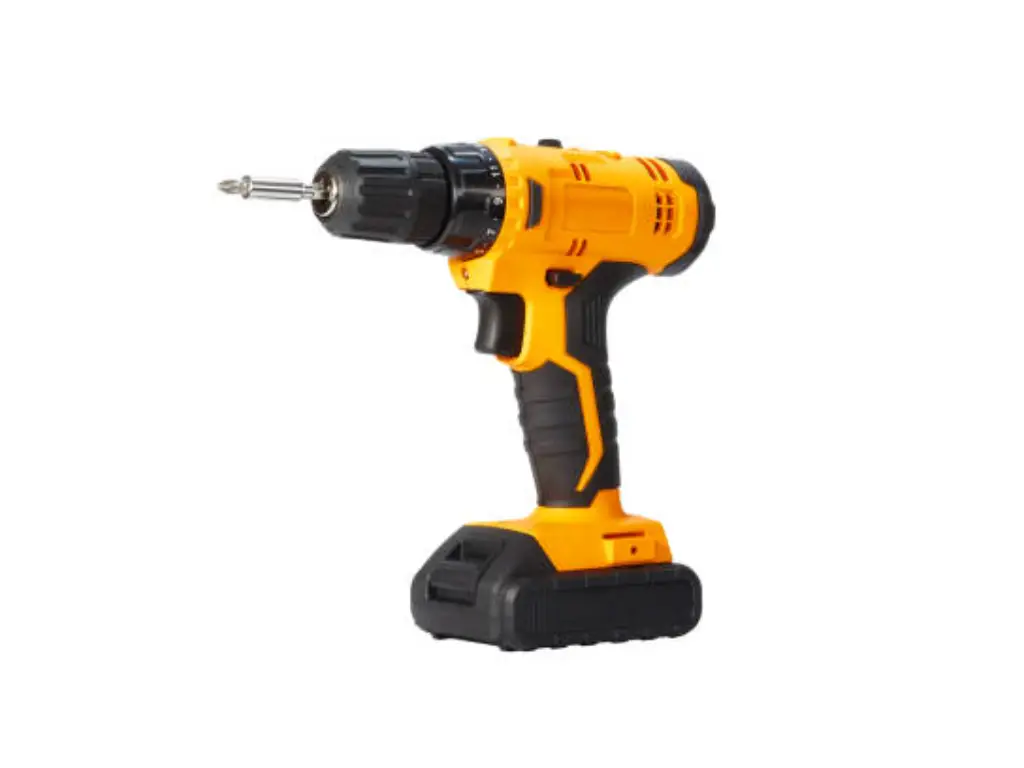
Method 5: Employing a Drill and Drill Bit for Removal
Moving to a more assertive approach means embracing power tools, especially a power drill. Picture a face-off against a steel screw with a broken head deep in your project. It’s time to equip yourself with a drill bit slightly narrower than the screw shaft, setting the stage for precise action. Your mission? To create a starter hole right in the center of the screw head. This move isn’t about brute force; it’s a carefully calculated strike meant to weaken the enemy without expanding the battlefield or harming the innocent wood around the conflict area. It demands a mix of composure and precision, as if you’re defusing a bomb with little time left. Only steady hands and unwavering determination lead to success.
After drilling, the path forward varies based on the situation. Sometimes, drilling alone weakens the screw’s grip, allowing for its extraction with tools like pliers or the delicate touch of a screw extractor tool. Placing the extractor tip into the new hole offers a fresh grip, presenting a diplomatic solution to coax the screw out. It’s like negotiating with a cat stuck under the couch—patience and the right leverage can eventually lead to a peaceful resolution.
| Pros | Cons |
| Employs precision and calculated force | Requires careful and steady hand |
| Provides an assertive approach for screw removal | May not work for all types of screws due to size or condition |
| Offers a method to weaken the screw’s grip | Requires additional tools for complete extraction |
| Can weaken the screw’s grip for extraction | May require alternative methods for deeply lodged screws |
Method 6: Utilizing a Rotary Tool for Precision Extraction
In the realm of precision, a rotary tool showcases its abilities like a skilled hand with a scalpel. Faced with a severely damaged screw head that defies conventional tools, a rotary tool equipped with a cutting disk emerges as the hero. The goal? To carve a new slot on the damaged screw head, creating a fresh opportunity for engagement. This task requires precision and steadiness, aiming to restore the possibility of extraction without harming the surrounding wood. It’s a delicate balance between preservation and rescue.
This method turns the daunting into the achievable, juxtaposing fine craftsmanship against home repairs. The precise incision must be clean and deliberate, akin to a surgeon’s cut or a sniper’s focus, leaving no room for error. When the screw starts to turn under the firm grip of a screwdriver nestled in the newly carved grooves, it’s a small victory. The satisfaction from using the perfect combination of tool and technique highlights the importance of matching the problem with the right solution. In these moments, the rotary tool goes beyond its mechanical nature, becoming an extension of the wielder’s will and a testament to the virtues of precision and foresight.
| Pros | Cons |
| Showcases precision in screw extraction | Requires careful and precise application |
| Provides an alternative to conventional tools | May not work for all types of screws due to condition or size |
| Highlights the importance of matching the right solution | May not be practical for novice or inexperienced users |
| Becomes an extension of the user’s will and a testament to precision | Delicate process that requires precision and foresight |
Method 7: Using a Screw Extractor for Stubborn Screws
Now, this is where we bring in the specialized tools. A screw extractor is like the superhero of toolboxes, designed specifically for those moments when all hope seems lost. Imagine this: You’re facing a broken screw that’s mocking your futile attempts to remove it. Here comes the screw extractor, ready to save the day. The process involves drilling a small hole into the top of the broken screw. This hole isn’t just any hole—it’s the entry point for your extractor. Once the hole is prepared, you insert the screw extractor and turn it counterclockwise. The extractor’s threads grip the stubborn screw firmly, saying, “Not today, screw.”
The beauty of the screw extractor lies in its simplicity and effectiveness. It’s like having a secret weapon that knows exactly how to handle the enemy. But, as with any superhero, the key is knowing when to call them into action. Using a screw extractor requires a careful balance of pressure and patience. Too much pressure, and you might damage the wood around the screw or snap the extractor itself—a tragic twist in our hero’s tale. But get it just right, and you’ll feel a sense of victory as the screw lets go, finally freed from its wooden prison. It’s a method that might need more setup and care, but when dealing with a particularly stubborn screw, the screw extractor is a tool you’ll be glad to have in your toolbox.
| Pros | Cons |
| Specifically designed for stubborn screws, like a superhero of toolboxes | Requires a careful balance of pressure and patience |
| Effectively removes stubborn screws | Excessive pressure can damage wood or snap the extractor |
| Acts as a secret weapon for challenging screws | Potential risk of damaging the screw or the surrounding area |
| Offers a reliable way to handle difficult screws | Careful precision is essential for successful removal |
Method 8: The Trough-Drilling Technique for Broken Screws
Picture a screw so cleverly broken that traditional methods fail against it. It’s time to consider the trough-drilling technique, an unconventional method that involves guiding your drill bit around the broken screw to isolate it from the wood. This requires a gentle touch and steady hand to weaken the screw’s grip without damaging the piece you’re working on.
Once you’ve created this trough, you can use a flat tool, such as a small chisel, to carefully pry or lift the screw out. It’s a bit like delicate surgery, navigating around vital structures to remove a troublesome foreign object. The trough-drilling technique demands bravery and a willingness to venture off the beaten path to achieve your goal. When executed with precision and care, it can be an effective solution to a seemingly insurmountable problem. This method emphasizes the importance of creativity and adaptability in woodworking—a, a reminder that sometimes, thinking outside the box can provide the answer you’ve been searching for.
| Pros | Cons |
| Provides an unconventional solution to challenging problems | May not be practical for all screw types or conditions |
| Offers a creative and adaptable approach for woodworking | May require alternative methods for particularly stubborn screws |
Method 9: Removing Broken Screws Using Locking Pliers
When you’re locked in a standoff with a partially exposed screw stubbornly clinging to wood, locking pliers become your ally in this intricate removal process. The beauty of this method lies in its simplicity and the raw mechanical advantage it offers. You clamp down on the visible screw segment, the pliers’ jaws biting into the metal with unwavering resolve, locking into place with a satisfying click. As you apply gradual, firm force, it becomes a battle of persistence. The screw, having resisted for so long, begins to yield under the unrelenting pressure—a testament to the power of leverage and grip.
The moment the screw begins to move, even just a bit, marks the turning point. You’ve broken its hold, and from there, it’s only a matter of time and patience. The victory, when you finally unscrew that last thread and free the screw, is immensely gratifying. You’ve applied one of the oldest principles in the book—leveraged force—and and emerged victorious.
Yet, this method isn’t without its nuances. It demands a keen eye for the right gripping point and an understanding of how much pressure to apply. It’s a delicate balance, a test of finesse dressed as a display of brute force. This primal approach underscores a fundamental aspect of problem-solving. Sometimes, it’s not about possessing the most sophisticated tools or technologies; it’s about applying simple, time-tested techniques with precision and patience. The locking pliers method embodies this philosophy, offering a straightforward solution to what often appears to be a complex problem.
| Pros | Cons |
| Utilizes leverage and grip for effective removal | Balance of finesse and force is crucial |
| Provides raw mechanical advantage for removing screws | May not work for extremely stubborn or specific screws |
| Marks a victory through leveraged force | Requires knowledge and understanding of pressure application |
Method 10: Drill-Free Extraction for Broken Screws
In some cases, freeing a broken screw doesn’t involve direct confrontation but rather indirect persuasion. This is the world of drill-free extraction methods—techniques that focus on changing the screw’s environment to encourage its release. One intriguing approach involves the application of heat. By carefully applying heat to the screw, you expand the metal slightly, different from the wood’s reaction to the same heat.
It’s like convincing a houseguest to leave by making the room uncomfortably warm. The screw, feeling the heat, becomes more pliable, more willing to move. Coupled with lubrication—think penetrating oils or a dab of grease—you reduce friction and facilitate the screw’s exit. It’s a finesse game, played with fire and fluid, where you’re altering the conditions to make staying put less appealing.
Another approach, less about temperature and more about leveraging vibration, involves tapping around the screw with a hammer. This isn’t about brute force but rather a strategic application of shock waves to loosen the screw’s grip on the wood fibers. It’s as if you’re politely but firmly requesting the screw’s departure. These methods, both heat expansion and strategic tapping, showcase the art of subtlety in woodworking and repair. They remind us that, frequently, the solution to a stubborn problem isn’t more force but smarter force.
By altering the environment, using knowledge of physics, and exercising ingenuity, you can achieve results that brute strength alone might never attain. It’s a lesson in the virtues of patience, thoughtfulness, and a deeper understanding of the materials and forces at play—a reminder that sometimes, to remove a stubborn screw from wood, you need to think outside the toolbox.
| Pros | Cons |
| Offers an alternative to direct confrontation | May not work for all types of screws due to size or condition |
| Demonstrates the art of subtlety in woodworking | May take time and precision for effective results |
| Encourages a use of smarter force over brute strength | Requires a deeper understanding of materials and forces |
Prevention Tips to Avoid Stripping Screw Heads
In our constant struggle with stubbornness, prevention remains our most powerful shield. To stop the frustrating story of the screw head wearing down or the shank breaking mid-job, a thoughtful approach is like skillfully navigating through a deluge unharmed. Start by selecting the right screw type, ensuring it fits the task and material. This match is as crucial as finding the right key for a lock; it sets the stage for success. Using a screwdriver or impact driver that fits snugly within the screw head is also essential, guarding against the disappointment of a stripped screw head.
Further reinforcement can be achieved by strategically pre-drilling pilot holes, especially when working with dense hardwoods. This technique paves the way for smooth entry and significantly reduces the risk of a break. A touch of lubrication—like wax or soap—eases the screw’s passage, combating the enemy of friction. Knowing when to stop your drive, when to ease off the torque to avoid damaging the screw, is a skill refined by patience and finesse, much like managing life’s pressures.

Innovative Solutions for Removing Screws with No Head
Despite our best efforts to prevent it, screws will persist in rebelling, challenging us with broken heads and stripped threads, drawing us back to the battlefield. Fear not, for we have a diverse array of innovative solutions at our disposal. Among these tools, the left-handed drill bit stands out, designed to embed itself into the screw shaft while coaxing the broken piece out, an ingenious combination of drilling and extracting. Additionally, crafting notched halves around the remains of a stripped screw with a sharp chisel or using heat from a torch to expand and loosen its grip illustrates the various paths to victory over adversity.
If the screw continues to resist, the application of penetrating oils like Liquid Wrench can infiltrate even the most stubborn joints, offering promises of freedom to the stripped screw remover as it engages with the extractor threads. For screws that defy standard measures, the largest screw extractor takes the stage, challenging larger screws to a duel of might. In moments of despair, when the threaded antagonist is deeply lodged within its wooden fortress, a cross shape or deep hole can signal a new strategy, using glue or a plug to create a handle where none exists, offering leverage where it seemed lost.
Conclusion
Removing a broken screw from wood is more than just physical work. It’s a test of patience, creativity, and determination. With the right tools, a bit of creativity, and perseverance, even the most stubborn screw can be overcome. Victory lies not just in strength but in the strategic use of knowledge and resources. Let’s turn those frustrating moments into opportunities for triumph, one screw at a time.


