What Is a Cabinet Hardware Jig and What Does It Do?
A cabinet hardware jig is a dedicated woodworking tool and cabinetry to make precise and repeatable holes to fit cabinet handles, knobs, and pulls. It is used as a positioning aid to place holes accurately, on the face of cabinets, drawers or inset panels, dictating the precise location place hardware will ultimately reside. The jig eliminates the possibility of misaligned holes or uneven spacing that are common with inexperienced users by locking in the desired position and having adjustable measurements. This is particularly relevant in kitchen remodels and custom cabinetry where accuracy is paramount.
With the evolution of hardware installation standards in recent years, higher precision and the use of highest grade materials, faster and repeatable results are required. An only cabinet hardware jig, such as the most accurate cabinet hardware jig, fulfills these requirements by having steel drill guides, adjustable positioning blocks and usually permanent etched measurements to ensure long term accuracy. Such tools as the True Position tools series, completed jigs, or the Cabinet Hardware Jig Max enable the user to get repeatable results, whether one is working on a couple of cabinets or an entire kitchen. Replacing pulls during a home remodel or finishing a custom high-end build, this tool makes hardware placement accurate all the time.
Why Use a Jig When Installing Cabinet Hardware?
Then why use a cabinet hardware jig at all? The brief reply: accuracy, consistency, and productivity. Hardware installed using tape measures or by eyeballing it will result in an uneven alignment. A jig eliminates guesswork as it allows you to place marks on the location of holes with precision guarantee; this could be when installing single-hole knobs, bar pulls, and even longer pulls on tall pantry cabinets. Clearly etched rulers and fast center extension features allow first-timers to get factory-level accuracy with no second-guessing every time they drill. This makes the jig an indispensable part of the tool kit for any serious woodworker or installer.
Without a jig, doing it can easily become sideways, let alone sugarcoating it. Consider off-center drilling, asymmetrical hardware heights on doors, and in the worst case, needing to replace a drawer front because the holes are too near the edge. And commercial-wise, time is money. The fast assembly of a cabinet hardware jig, which includes the rapid center extension, makes it an essential tool for any cabinet professional and installer who must remain fast but not at the expense of quality. Add to this, models that have longer lasting thumb screws and improved end stop features, there is no longer any slippage during the job, like with older or imitation jigs. When you need efficiency and consistency in your hardware installation, the jig is not an option, it is the only tool you can use to achieve next level carpentry.
Cabinet Hardware Jig Components and Common Types
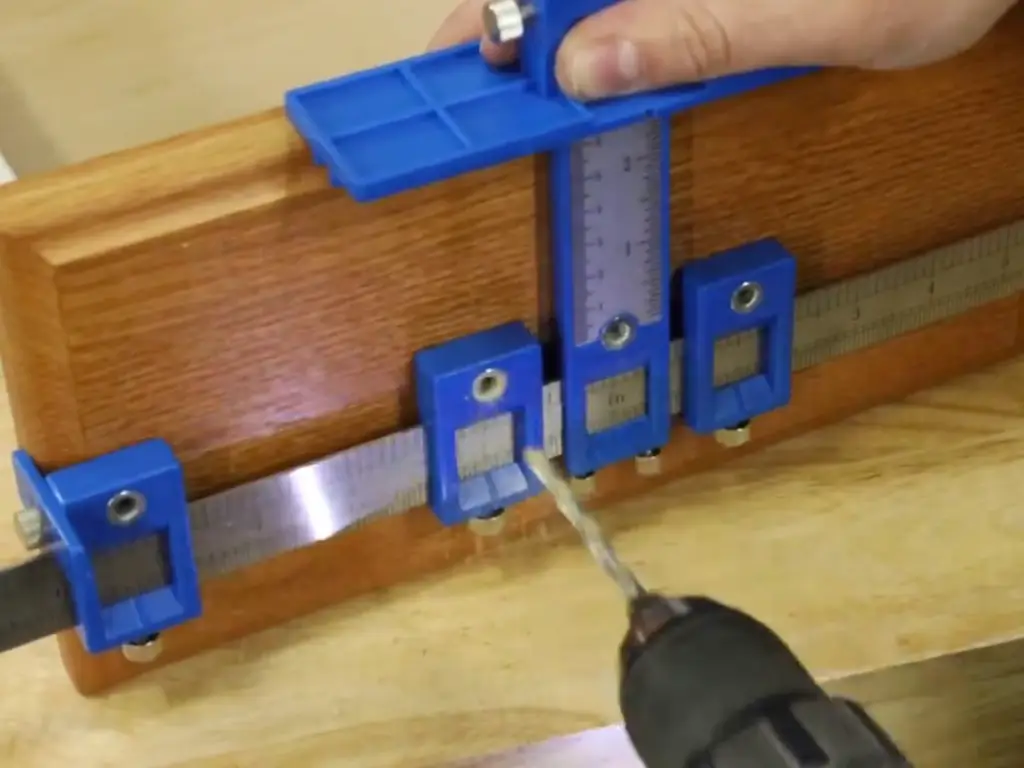
A cabinet hardware jig is composed of several core components engineered to ensure precision:
- Measurement rulers: Usually marked with both metric and imperial scales
- Horizontal slider arms: Allow accurate adjustment of hole spacing
- Vertical alignment bar: Ensures correct vertical placement from door or drawer edge
- Drill guide bushings: Typically made of hardened steel to maintain alignment and resist wear
- Locking knobs and stabilizers: Prevent unwanted shifting during use
Some jigs also include:
- Protective overlays for calibration zones
- Sacrificial plates to reduce splintering during drilling
These structural features work together to provide consistent and professional-grade installation.
Recommended Jig Types for Different Scenarios
Choosing the appropriate jig depends on the context of use:
Home improvement vs. industrial application:
| Usage Scenario | Recommended Jig Type | Features | Suitable For |
| Home Improvement | Basic T-style Jig | Simple setup Lightweight Fixed measurement guides | Occasional DIY, home projects |
| Industrial / Commercial | Adjustable Metal Jig with Calibration | Reinforced build strength Certificate of calibration Durable thumb screws | Factories, repeat installs, pro workshops |
Single-hole vs. multi-hole hardware:
| Usage Scenario | Recommended Jig Type | Features | Suitable For |
| Single-Hole Hardware | Simple Budget Jig | Minimal adjustments needed Easy alignment Often plastic-based | Knobs, one-hole handles |
| Multi-Hole Hardware | Adjustable / Pre-drilled Multi-point Jig | Support for 96mm, 160mm, or custom centers Sliding guides or pre-drilled stops | Pulls, D-handles, long bar handles |
Beginner-friendly vs. Professional-grade:
| Usage Scenario | Recommended Jig Type | Features | Suitable For |
| Beginner Friendly | Entry-level Plastic Jig | Fixed spacing Few moving parts Low learning curve | First-time users, basic renovations |
| Professional Grade | Modular, Micro-adjustable Jig | Micro-adjustment dials Modular sliders Compatible with a wide range of cabinet styles | Professional cabinet makers, contractors |
Matching the jig to your project’s specific needs will improve efficiency, accuracy, and overall installation quality.
How to Properly Use a Cabinet Hardware Jig: Step-by-Step Tutorial
Your best friend in this endeavor is a cabinet hardware jig which allows you to have precision and repeatability in the installation process. Whether it is cabinet doors or shaker drawer fronts, these steps will guide you to achieve clean professional-looking results consistently.
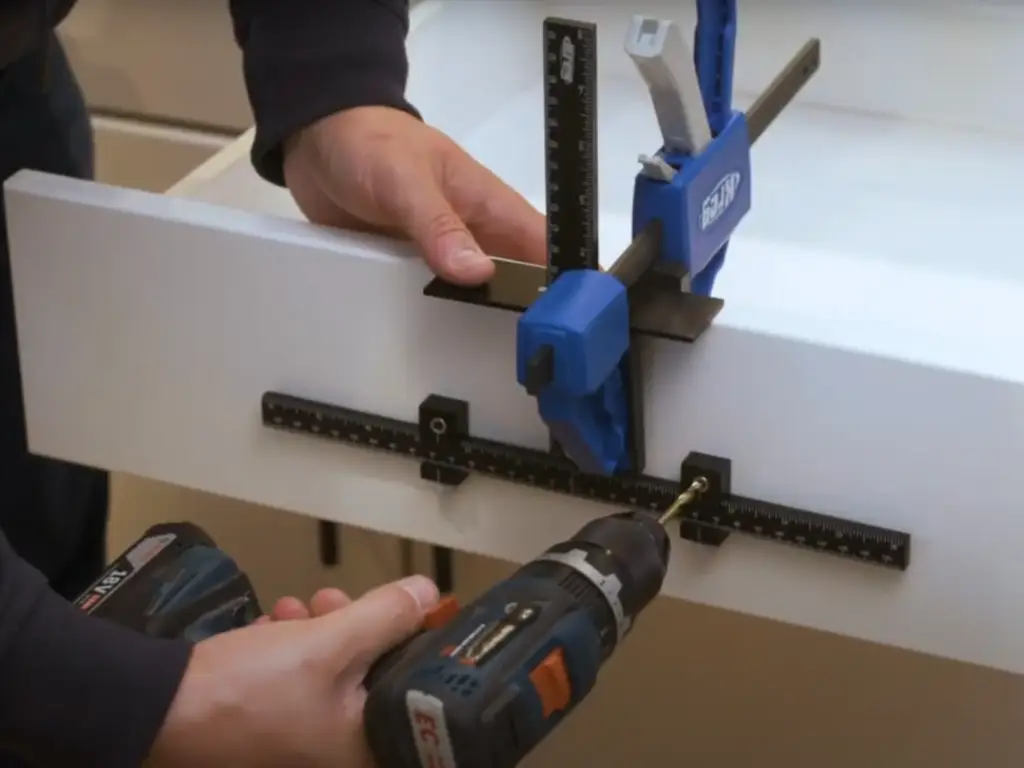
Step 1: Position the Jig on the Cabinet Door or Drawer Front
Begin by selecting the appropriate section of the cabinet, either a door or a large drawer front face, and affix the cabinet hardware jig firmly to it. When working on cabinet doors, position the jig so it is vertical on the edge. In the case of drawers, it must be horizontally centered on the center of a large drawer front face. Any built-in rulers or permanent etching on the jig can be used to help in this process for marking hole locations. When using an inset panel of drawers or shaker fronts be careful to achieve the correct visual balance for the location to place hardware.
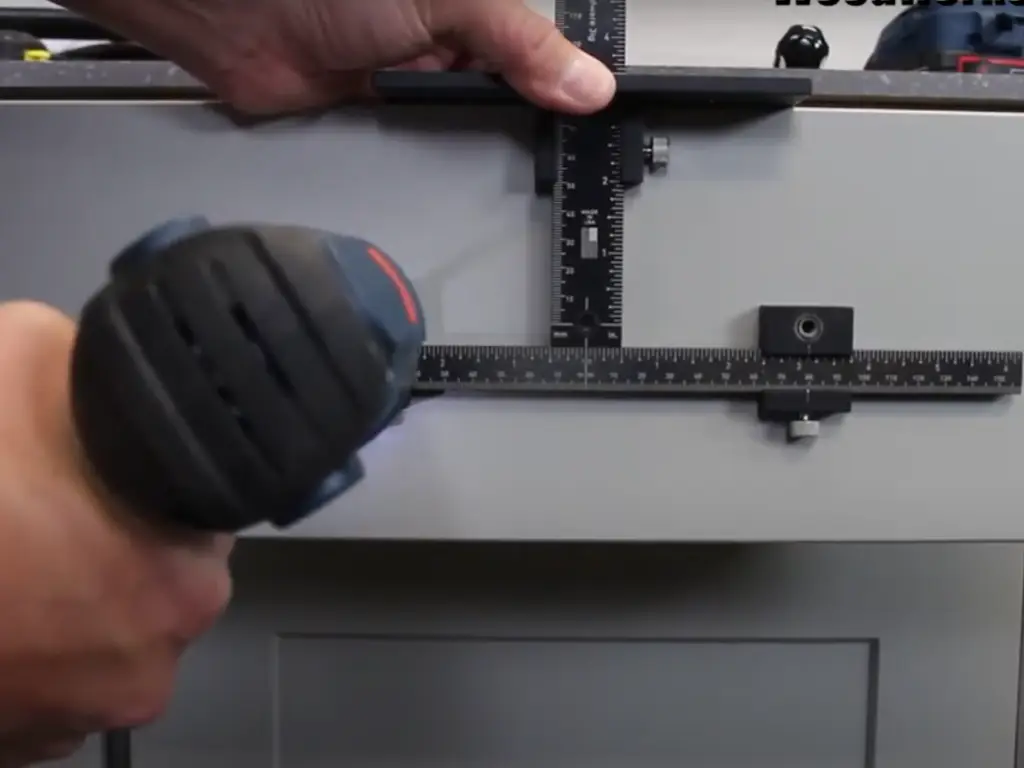
Step 2: Adjust Measurements and Align the Guides
Position the jig so that the hardware holes will be located where you want them using the measurement scales and sliding rails on the jig. Measure again to ensure the length of handle is correct against the spacing of the marked holes on the jig, particularly with multi-hole pulls such as 96mm or 160mm centers. On still longer pulls, ensure the jig is set up to allow the entire spacing or fit an extension, should your model allow it. Do not forget to mirror measurements left vs. right doors before drilling the next hole!
Step 3: Lock the Jig in Place
After the initial calibration, lock everything in place with the sturdy thumb screws or the jig locking mechanism. Not doing so is a common issue—a loose jig can mess up alignment and lead to drilling accidents or skewed hardware placement. When everything is locked down, holes are placed accurately. On some models, redesigned end stops enhance clamp-jaw stability improvement in this phase.
Step 4: Drill Pilot Holes Using the Built-In Steel Guides
Put your drill bit inside the steel drill guides or magnetic bushings. This avoids bit wandering and minimizes excess wood chips. Put a sacrificial block of scrap wood behind the panel to prevent splintering on exit. Only apply light pressure, especially with harder materials or painted surfaces. Remember to use protective stickers if your jig has any to protect the finish.
Step 5: Install the Hardware
After you have drilled your pilot holes, cleaning the jig and brushing off the debris. Now push your cabinet handles, knobs or pulls into the holes. Screw them in place, keeping the heads of the screws flush. In case you are utilizing recessed panel grips or industrial cabinet fittings, see that they are seated well. Do a stability test and re-do the procedure with the jig to get repeatable results on all the other doors or drawers.
Common Mistakes and Overlooked Details When Using a Jig
Not even the best cabinet hardware jig can help you against user error. Among the common problems? Not reflecting handle positions on left and right cabinet doors. They all may seem to be the same, but orientation is important, very important. In case your jig is not flipping or mirroring readily, mark your template twice. And be sure to lock the jig, too! It is easy to become carried away with the excitement and drill with the jig only half tight and then wonder why the holes are canted or oversize because of the extra wood chips, despite the promise of a quick setup. Applying much pressure can also exacerbate these issues. In extreme cases, a loose jig can even lead to drilling injuries if the drill bit binds or skids unexpectedly.
Drill bit compatibility is another problem that has been ignored. Bits vary in quality, and the incorrect bit will result in stripped-out holes or screw heads. Often, investing in a complete accessory kit that includes high-quality bits designed for jigs, often found neatly organized in a hard plastic case, can prevent these issues. Also, jigs, particularly the re-used ones, require the occasional adjustment. A high-quality original cabinet hardware jig with permanent etching and magnetic bushing covers may be just a hair out of calibration without recalibration. Resources like Fine Woodworking Magazine and channels like Essential Craftsman often highlight the importance of these maintenance checks. In severe situations, this may involve the rearrangement of doors or drawer faces. And, last but not least, don’t ever overlook the utility of a sacrificial block of scrap wood behind the panel–it saves the exit of the end of the hole, resulting in cleaner finishes.
What Types of Hardware Can a Cabinet Jig Be Used For?
Versatility is the key here. A good cabinet hardware jig is not limited to installing knob fixtures only; it serves well as a spacer for many types of hardware, ensuring accurate placement for multiple styles throughout different projects.
A cabinet jig is invaluable in achieving consistent design visual uniformity across multiple cabinet variations for residential and commercial cabinetry projects.
| Hardware Type | Description & Jig Application | Key Benefits of Using a Jig |
| Single-Hole Knobs | The most fundamental application, ensuring each individual knob is perfectly centered and aligned. | Guarantees consistent height and horizontal placement across all doors/drawers. |
| Double-Hole Knobs | For knobs that require two mounting points, the jig precisely sets the distance between the two holes, ensuring symmetry. | Eliminates measurement errors for multi-point knobs, ensuring they sit flush and straight. |
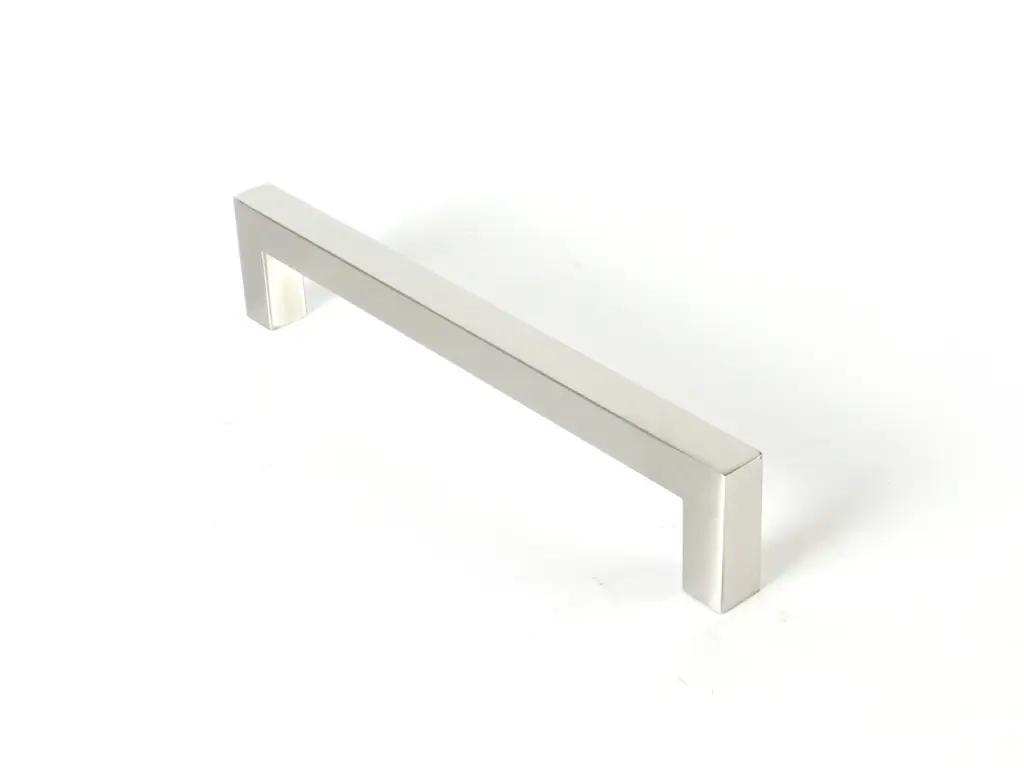
| Bar Pulls & Standard Handles | Accommodates various lengths of bar pulls and standard handles. The jig adjusts to the specific center-to-center spacing required. | Achieves perfect horizontal or vertical alignment and consistent spacing, crucial for a professional look on multiple units. |
| Recessed Panel Grips | Used in modern minimalist designs, these often require specific cutout or drilling patterns that a jig can accurately guide. | Ensures precise positioning and clean cuts/drills for integrated, flush hardware. |
| Industrial Cabinet Fittings | If the jig supports the necessary robust spacing and depth, it can aid in the installation of heavier, industrial-style hardware. | Provides the stability and accuracy needed for larger or heavier duty fittings. |
| Complex Multi-Point Layouts | Advanced jigs with rapid center combo accessories allow for layouts with multiple equidistant holes, common on large pantry drawers or wide fronts. | Simplifies complex drilling patterns, ensuring all holes are perfectly aligned and spaced for large or specialized hardware. |
| Shaker Drawer Fronts | Specifically useful for installing handles on the rails of popular shaker-style drawer fronts, maintaining perfect alignment with the frame. | Helps maintain the aesthetic integrity of shaker style, avoiding drilling into the recessed panel. |
| Varied Cabinet Types | Applicable across different cabinet door (overlay, inset) and drawer front constructions. | Ensures adaptability and uniform design aesthetics across an entire kitchen or furniture set, regardless of cabinet style. |
Most jigs also have options such as large end stops and custom new shaker drawer spacers that further increase the versatility of the jig to whatever style the job may require. This flexibility provides a consistent design look and feel irrespective of the hardware or the type of cabinets.
What Should Manufacturers Look for When Choosing Quality Jigs and Hardware?
As a manufacturer, a good cabinet hardware jig should provide repeatability in large scale production. First one: durability of materials. The steel building is usually more precise and long-lasting than plastic. Brands using the best quality materials will have a low failure rate, particularly in repeat commercial applications. Precision and adjustable tolerance is another huge consideration. Without it, your whole batch can be off by millimeters, which is not acceptable in high end builds.
After-sales support is also vital. Seek vendors that have a full refund policy, provide replacement parts or even technical support on big orders. The compatibility is also important- a good jig must be able to fit in different types of cabinets, inset panel of drawers to frameless Euro-style cabinets. There are also manufacturers who consider aerospace precision and certificate of calibration on jigs to guarantee their clients on the quality standards. In simple terms, low-quality jigs result in rework, refunds, and loss of reputation in the manufacture of cabinetry.
What Value Can We Offer for Your Cabinet Hardware Installation Needs?
Although having a high-quality cabinet hardware jig will help to prepare the stage to make the perfect installations by drilling the holes perfectly, the success of your project will depend on the quality of the hardware used. Even the finest hole carefully installed is not much good unless it is finished off with a pull or knob. Here at Maxave, we pride ourselves in the production of high quality cabinet hardware, where attention to detail, longevity, and visual coherency are of the utmost importance. It is this commitment that sees our hardware not only appear magnificent but also fit together with the high standards that your precision jig has produced, to fulfill the promise of a perfect installation.
The unique thing about Maxave is that we will always remain focused on providing the hardware that actually enables flawless performance. We know the importance of the correct dimensions, accurate screw threads, and a good finish to prevent headaches during installation. All of our products are subject to strict quality control and ensure easy installation in jig-drilled holes and long-lasting service due to high-quality materials. That is, your hardware will not loosen easily and will preserve its uncompromised aesthetics throughout years. We have custom solutions, whether you are a custom cabinet maker or a large-scale manufacturer, we can provide you with special solutions such as bulk customization and special support so that our hardware will truly match your precise work.
Conclusion
So to recap it all, the cabinet hardware jig is not merely a tool, but it is your guarantee against crooked handles, time wasted, and do-overs that frustrate you. Installing a couple of knobs in your kitchen or 1,000 cabinet sets, the proper jig and hardware combination will make sure that everything ends up where it belongs, fast and perfect.
From robust build strength to aerospace precision, the correct jig provides confidence every time the drill is made. It is time saving, wastes less material and gives that professional finish that clients notice. Therefore, do not drill, drill intelligently. Begin with the proper jig, and the rest will follow nicely into place.


