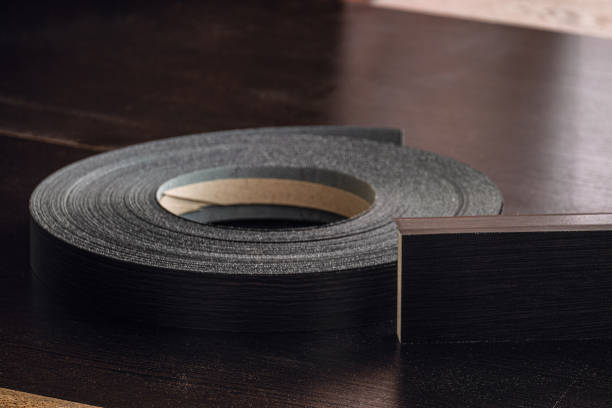
What Is Edge Banding and Its Purpose?
Edge banding is a thin material used to conceal the exposed sides of materials such as plywood, particleboard, or MDF (medium-density fiberboard). It provides a more finished, professional look and hides the less aesthetically appealing ‘raw’ edge of the plywood.
In addition to concealing the raw edges of the plywood, edge banding also serves a protective function. It forms a barrier to prevent damage to the edge, such as chipping or splintering. Further, edge banding protects against moisture ingress, which can lead to material swelling and degradation.
Woodworkers and DIY enthusiasts often question “Can you stain edge banding?” and the answer is, yes, you can. However, how you apply the stain and the results you achieve can differ depending on the type of edge banding used.

The Benefits of Staining Your Edge Banding
Staining your edge banding can significantly enhance the final look of your craft piece. The stain can help to match the edge banding to the rest of the piece, ensuring a seamless look. It can also accentuate the grain in real wood veneer, giving your piece a more rustic and genuine appearance.
Furthermore, stain can protect the wood, particularly beneficial for edge banding in high-wear areas. The stain can penetrate the wood veneers’ pores, providing some resistance to damage and wear over time.
When staining edge banding, you have the latitude to tailor the stain to achieve the desired effect. From a light touch that lets the natural wood shine through to a darker hue that adds depth and drama, you’re in charge of how to apply it.
Choosing Between Oil-Based and Water-Based Stains
Stains come in different forms with varying characteristics, notably oil-based and water-based stains. Your choice between the two would depend widely on your project, the type of material, and the ultimate finish you desire.
Oil-based stains typically penetrate deeper into the wood, providing a rich color. They take longer to dry, giving you more time to work and ensure even application. However, these require mineral spirits for cleanup. They are often used for larger projects or when you require a more vibrant, deeper color.

On the other hand, water-based stains dry quickly, which can be both an advantage and disadvantage-they allow you to finish your work quickly, but they also provide a shorter window to even out the stain. Although they might not penetrate as deeply as oil-based stains, they offer easier clean-up with water and less emitted fumes, making them a more environmentally friendly option.
Choosing between these types of stain bases depends on your particular project needs, aesthetic preferences, and stain edge banding specifics, manifesting the critical nature of recognizing these unique properties.
| Stain Type | Pros | Cons |
| Oil-Based | ·Deeper wood penetration·Richer, more vibrant color·Longer working time | ·Longer drying time·Needs mineral spirits for cleanup·Strong odor and fumes |
| Water-Based | ·Dries quickly·Easier cleanup with just water·Lower odor and fumes | ·Less wood penetration·Shorter working time·May raise wood grains |
Prepping the Edge Banding for Stain Application
Before the stain application, the edge banding must be correctly prepped to ensure an even and smooth finish. It begins with sanding down the veneer edge banding. A fine-grit sandpaper or a sanding block can be employed to smoothen the surface and open up the pores. This process helps the stain to penetrate the wood better and bond effectively.
After sanding, it’s vital to eliminate any residue from the wood surface – a slightly damp cloth can do the trick. The cleaned and dried surface ensures the stain adheres appropriately and provides a smooth finish, devoid of spots or blotched areas that the residue might cause.
Always remember – having an even and properly prepared surface is a vital step in achieving the ideal stained edge banding finish.
Tips for Staining Wood Veneer Edge Banding
Now, when it comes to staining plywood edge or veneer edge banding, meticulousness is key. Start with applying the stain using a clean, soft cloth or brush. Gently wipe it onto the surface, following the wood grain for a more natural look.
Apply it gradually while ensuring the stain has adequately absorbed before you add more. You want to avoid over-saturating the wood or leaving excess stains on the surface. After it has thoroughly penetrated the wood pores, wipe off any remaining stain.
It’s crucial to follow the manufacturer’s instructions on the stain’s drying time – rushing this step can lead to an uneven finish.
Applying Stain to PVC and ABS Edge Banding
While it is popular to stain edge banding made of real wood or veneer, can you stain edge banding made from PVC or ABS?
Technically, staining PVC and ABS is possible, but it might not provide the desired result or have the same effectiveness as with wood. It’s because PVC and ABS are non-porous materials – they don’t absorb the stain like wood does.
If you decide to apply stain to these materials, an essential step to take is using a primer that’s specifically designed for plastics. It helps enhance the bonding of the stain to the plastic edge banding. In spite of these steps, it’s important to remember that the result might not match perfectly with that of the stained-wood on your project.
Achieving an Even, Consistent Stain Coat
Achieving a smooth, even stain coat comes down to technique, patience, and the right products. One tip is to let the stain sit on the wood for a little bit, allowing it enough time to seep into the pores deeply.
Another pro-tip is sparingly applying the stain in thin coats rather than one thick one. Thin coats allow for more control over the depth of color – you can always add more coats until you achieve the desired shade. Applying it this way also ensures that the stain dries evenly.
It’s necessary to keep an eye out for drip marks or areas where the stain may puddle. Wipe these off smoothly to avoid a blotchy finish.
Remember, the goal is to apply the stain so that it accentuates the natural beauty of the wood grain, not to overshadow it.

Protecting the Stained Edge Banding with Sealants
Once you have your edge banding stained to your liking, the next step is to protect it with a sealant. This provides a protective coating that helps preserve the stain and the wood from damages due to heat, UV light, or moisture.
Sealants come in a variety of forms – polyurethane, shellac, lacquer, or even a clear coat of oil-based finish. Polyurethane and lacquer provide a hard, durable finish, making them excellent choices for projects that will see heavy use or exposure to the elements.
Shellac provides a natural, warm color that enhances the grain of the wood. It’s easy to apply with a brush or a clean cloth and dries fast. However, it’s not waterproof and wouldn’t be the best option for areas exposed to moisture.
Using these sealants, you apply a thin coat and let it dry according to the manufacturer’s instructions. You might want to lightly sand the surface between coats to ensure a smooth finish.
Remember – protecting your stained edge banding is just as important as the staining process itself to maintain its aesthetics and durability over a long time.
Troubleshooting Common Staining Issues
Despite careful application, you might encounter some issues while staining your edge banding. Sometimes the stain might appear uneven, or the color might not look as you expected. Don’t worry – these issues are typical and can be resolved.
Uneven staining or blotchiness often results from applying too much stain or not wiping off the excess. This issue can be corrected by sanding the area lightly to remove some stains and reapplying it in a thinner coat.
If you’re unhappy with the stain color, you can adjust it. If the color is too light, applying additional coats of stain can darken it. However, if it’s too dark, you might have to remove the stain by sanding it off and starting over.
When it comes to edge banding, troubleshooting is part of the process, especially for beginners. With patience and persistence, you’ll learn to handle these common staining issues and achieve a quality result.

Conclusion: Staining to Enhance Your Edge Banding
Whether you’re working with a piece of furniture, cabinetry, or any woodworking project, edge banding serves to provide a finished, refined look. Arguably, the question isn’t “Can you stain edge banding?” but rather, “How can you skillfully stain edge banding to bring out the best in your project?”
Staining edge banding requires a careful choice of stain, proper preparation of the banding, and tactful application for a seamless look. It may also require troubleshooting and problem-solving skills to handle any staining issues that might arise during the process.
With the right approach and techniques, staining can significantly enhance the look of your edge banding, adding a touch of personalized color, enhancing the natural grain of wood veneer banding, and adding a layer of protection that helps your project stand the test of time.
So, go ahead! Experiment with various stains and techniques to see what works best for your project and style. With a bit of practice, you will be able to master the art of staining edge banding, transforming your finished edges from merely functional into a standout feature of your craftwork.


