Introduction
DIY drawer slides can upgrade your wooden drawers and give them a new life. With basic woodworking tools and a good idea of what you’re doing, it’s possible to create smooth-gliding, durable slides for your piece of furniture. In this tutorial, we’ll guide you through the process of making your own wooden drawer slides.
Know First: What Necessary Tools and Materials Will You Need?
Before beginning your DIY drawer slides project, you need to gather the necessary tools and materials. As woodworkers, we know that working with solid wood like maple gives the best results. But, the type of wood you choose depends on your personal preference and what is available to you. You will also need plywood for certain parts of the slides.
As for tools, make sure you have a good workbench, a saw for cutting wood to the length of the drawer, and a router table for making the grooves in the slides. Wood glue will be necessary to secure parts together, and you will also need clamps to hold pieces in place while the glue dries. Undermount drawer slides can also be a good idea for more complex designs. Make sure you have your tools and materials ready on your workbench before beginning.

Take Precise Measurements for Custom Fit
After gathering your tools and materials, it’s time to take precise measurements for your homemade DIY drawer slides. It’s crucial to measure the drawer box’s length, the outside edge, and the back of the drawer. Remember to account for the blade width of your saw when taking measurements.
Understanding the exact dimensions of your wooden drawers will help you customize the fit of your DIY drawer slides. You need to measure the distance between the face frame and the back of the piece of furniture. The fit of your drawer slides depends on these measurements.
Cut the Wood Pieces to Size
With precise measurements in hand, you can now cut the wood pieces to size. When cutting for your wooden drawer slides DIY project, be sure to use a saw that can make a clean, single pass.
Begin by cutting the solid wood pieces to the length of the drawer. Make sure to account for the width of your saw blade. Cut the plywood to form the drawer front and the back of the drawer. Your router table is a useful tool for making precise cuts in the wood. For best results, you can make the first pass with your router set to a lower depth, then complete the cut with a second pass.
Shape the Rail and Runner Pieces
Once you’ve cut your wood pieces to size, the next step in your easy DIY drawer slides project is to shape the rail and runner pieces. The rails and runners are integral parts of the drawer slides, and their smooth operation will depend on how well they are shaped and fit together.
Use your router table to create a groove along the length of the rail pieces. The width and depth of this groove should be matched on the runner pieces for the perfect fit. This can be achieved with careful measurement and precision in the initial cut and subsequent passes.
It’s a good idea to make a simple drawer first, with a single groove and corresponding runner, before attempting more complex designs. This will help you understand the principles of wooden drawer slide operation, and allow you to refine your technique before moving on to more advanced projects.

Smooth and Finish the Wood Slides
When you’ve shaped your rail and runner pieces, it’s time to smooth and finish your wood slides. Take time in this step of your DIY drawer project to ensure a quality finish. Humidity can sometimes make wood rough, so smooth all pieces of sandpaper to eliminate any imperfections that could cause the drawer slides to stick or jam.
After smoothing the wood slides, apply a finish to seal and protect the wood. You can choose a finish that matches the rest of your old furniture to provide a uniform look. Let the finish dry completely before moving on to the next step.
Install the Runner Pieces Securely
The next step in the making drawer slides process is installing the runner pieces securely. It’s important to ensure that the runners are securely attached to the face frame of the piece of furniture to ensure smooth operation and stability.
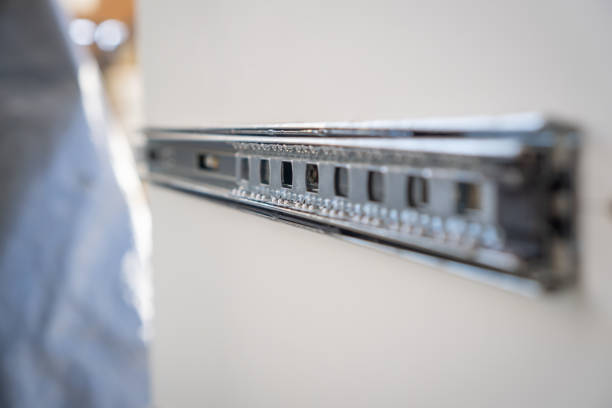
Use strong wood glue to attach the runners, and strengthen the join with pocket holes if necessary. Pocket holes can provide additional strength and stability, and help to keep the runner in place even under heavy loads. You may also consider using metal drawer slides for extra durability.
Attach the Rails to the Drawer Boxes
Attaching the rails to the drawer boxes is a critical step in your homemade drawer slide project. First, apply wood glue to the outside edge of each drawer box. Next, align the rails to the drawer box, ensuring they fit within the grooves created earlier. Use clamps to hold the rails in place while the glue dries.
For a stronger connection, consider drilling pocket holes on the outside edge of the drawer box and screwing the rails in place. This helps ensure your drawer slides can bear weight without coming apart. Remember, the stronger the connection between your drawer box and rails, the smoother your drawer slides will operate.

Test the Fit and Make Adjustments
After attaching the rails to the drawer boxes and letting the glue dry, test the fit of your wood drawer slides DIY project. Slide the drawer in and out several times to check the fit and make any necessary adjustments. This could involve sanding down any areas where the slides are too tight, or filling gaps where they’re too loose.
If the drawer doesn’t slide smoothly, inspect the rails and runners for any obstructions or misalignment. Making drawer slides requires patience and attention to detail, but it’s worth the effort when you see the final result.
Add Lubricant for Smooth Movement
Once you’re happy with the fit of your DIY drawer, add some lubricant to ensure smooth movement. While wood slides might not seem like they need lubrication, a little can go a long way in improving the slide action. Wax-based lubricants are a popular choice among woodworkers because they reduce friction without damaging the wood or the finish.
Apply the lubricant to the rails and runners, then slide the drawer in and out a few times to spread the lubricant evenly. This will help the drawer to slide in and out smoothly and make your DIY drawer slides operate as efficiently as possible.
Troubleshoot Common Issues Like Binding or Tilting
While making DIY drawer slides is a rewarding project, you might encounter a few common issues like binding or tilting. Binding often happens when the drawer doesn’t slide in or out smoothly, while tilting occurs when the drawer doesn’t remain level during operation.
If you face binding, inspect your slides. It could be due to an obstruction, or incorrect alignment, or the slides might just need some lubrication. Alternatively, binding could indicate that your slides are too tight. If this is the case, consider sanding them down for a smoother glide.
On the other hand, if your drawer is tilting, it suggests that the slides are uneven. Check your measurements and alignments. You might need to adjust one of the slides to ensure they’re level. Keep in mind, creating drawer slides requires patience and fine-tuning, but the smooth operation of your wooden drawers is a satisfying payoff for your efforts.
Conclusion: Enjoy Your Smooth-Gliding DIY Drawer Slides
In conclusion, constructing homemade DIY drawer slides may seem like a daunting task, but with careful planning, precise measurements, and meticulous craftsmanship, it’s a project well within the reach of most woodworkers. Plus, the satisfaction of crafting your own smooth-gliding drawer slides for your old furniture is a feeling you’ll be hard-pressed to match.
Remember, the secret to creating successful DIY drawer slides lies in the details. From choosing solid wood to taking into account factors like blade width and humidity, each step holds its significance. So, get your workbench ready and take the plunge into creating your wooden drawer slides DIY project. You’ll not only gain valuable woodworking skills but also breathe new life into your piece of furniture. And remember, practice makes perfect. The more you work at it, the better your drawer slides will become.
So why wait? Start your journey to create easy DIY drawer slides and transform your piece of furniture into a masterpiece. Whether you’re a beginner or an experienced woodworker, this project is an excellent opportunity to hone your skills and add a custom touch to your furniture. Happy woodworking!


