Introduction to DIY Table Legs
Building your own DIY table legs may seem like a daunting task, especially if you’re a beginner, but don’t be deterred. With the right instructions and materials, you can create a durable and unique centerpiece for your dining room, coffee table, or desk. Whether you’re going for a modern look or something more rustic, there’s a DIY table legs project for you. This article will guide you through the process, providing you with ten simple yet creative designs. From hairpin metal table legs to wooden table legs, let’s get you equipped to make your own.
What Are the Benefits of Making Your Own Table Legs?
Creating your own DIY table legs has numerous benefits. Firstly, it’s a cost-effective option. By building your own legs, you can save significantly compared to buying pre-made legs or an entire table from a furniture store.
Secondly, making your own table legs offers the opportunity to customize. You can tailor the legs to fit the exact style, size, and finish that you desire. You can match your decor perfectly or design a standout piece.
Lastly, there’s a sense of satisfaction that comes from completing a DIY project. You’ll take pride in knowing you’ve created a functional piece of furniture with your own hands, adding a personal touch to your home.
Tools and Materials You’ll Need
The tools and materials you’ll need depend on the type of table legs you’re planning to make. Some of the basic tools include a saw, clamps, sandpaper, chisels, and a sander. An orbital sander, in particular, will help smooth out rough edges on your table legs.
| Tool | Importance Level (1-5) | Description |
| Saw | 5 | Essential for cutting materials to the desired size. Highly important for shaping table legs. |
| Clamps | 4 | Important for holding table legs and other components in place during cutting, gluing, or drying. |
| Sandpaper | 4 | Necessary for smoothing surfaces and edges. Highly important for achieving a pleasant touch and professional finish. |
| Chisels | 3 | Useful for cleaning up edges and trimming excess wood. Contributes to detailed work and the overall appearance. |
| Orbital Sander | 5 | Highly important for efficient and even sanding of table legs and other components. Crucial for a smooth, professional finish. |
| Sketching materials | 4 | Important for planning the design, dimensions, and construction of the table legs. Helps ensure proper assembly and execution. |
As for materials, you’ll need your chosen wood, stain, wood glue, dowels, and possibly metal tubes or hairpin legs. If you’re going for a glass tabletop, ensure you have the right supports in place. Most of the materials can be found in a local hardware store or can be ordered online.
Remember, every DIY project starts with a sketch. Plan out your design beforehand, noting down the leg height, cross support, and overall dimensions of your desired table.
| Material | Usage | Description |
| Chosen Wood | Base material | This is the primary material for making the table legs. It forms the structural element of the table legs. |
| Stain | Finishing | This is used to color the table legs and to enhance the grain and textures in the wood. |
| Wood Glue | Joining | Used to bond the pieces of wood together. Crucial for forming strong joints. |
| Dowels | Joining | Used in conjunction with wood glue for creating strong and durable joints in the table legs. |
| Metal Tubes | Base Material/Support | These could be used either as a material for making the table legs or as internal supports for the legs, depending on the design. |
| Hairpin Legs | Base material | These could be used as a ready-made solution for table legs if you prefer a particular style or want to simplify the project. |
| Supports for Glass Top | Support | These are necessary if you plan to use a glass tabletop. They provide a secure base for the glass to rest on. |
Selecting appropriate materials stands as the essential starting point for all DIY table leg construction. The selection of materials will determine the table’s appearance together with its lifespan and price point. The following table presents an extensive breakdown of materials suitable for DIY table legs which includes wood and metal and additional alternative options. This introduction examines each material through its essential characteristics as well as appropriate usage circumstances and economic aspects. You will learn how to select a table leg through this guide which matches your project goals together with your personal preferences.
| Material Category | Material Type | Characteristics | Suitable Scenarios | Cost-Effectiveness |
| Wood | Hardwood (Oak, Maple, Cherry, Walnut) | Very strong and durable, resistant to scratches and dents, beautiful grain. | Tables requiring long-term use and able to support heavy weight, such as dining tables and desks. | Higher cost, especially for rare or imported varieties. |
| Softwood (Pine, Fir, Redwood) | Relatively inexpensive and easy to cut and assemble, but less strong than hardwood and more prone to scratches and dents. | Coffee tables, side tables, temporary or decorative furniture, budget-friendly projects. | Most economical wood option. | |
| Plywood | Made of multiple layers of thin wood sheets glued together, good stability and strength, less prone to warping. | Modern minimalist furniture, designs requiring flat surfaces. | Price varies depending on quality and thickness, generally less expensive than hardwood. | |
| Reclaimed Wood | Unique history and rustic charm, can create one-of-a-kind legs. May require more cleaning and preparation. | Industrial, farmhouse, and vintage style furniture. | Cost depends on the source and rarity, sometimes free but may require additional processing costs. | |
| Metal | Steel | Very strong, high load-bearing capacity, can be welded into various shapes. | Tables needing to support heavy loads, such as large dining tables and workbenches, modern minimalist furniture. | Generally higher than softwood, but varies based on thickness and processing. |
| Iron | More vintage feel than steel, can be forged into intricate designs. | Industrial, vintage, or decorative furniture. | Similar cost to steel. | |
| Aluminum | Lightweight and corrosion-resistant, but not as strong as steel and iron. | Outdoor furniture, lightweight furniture. | Relatively high cost. | |
| Metal Pipes | Such as plumbing or industrial pipes, easy to assemble into unique industrial-style legs. | Industrial style furniture, strongly DIY-inspired projects. | Price depends on material and length, generally cheaper than solid metal but may require additional connectors. | |
| Other | Concrete | Very strong and modern look, but more complex to make and heavy. | Modern and contemporary furniture. | Can be inexpensive for raw materials but labor-intensive. |
| Acrylic | Can create transparent or translucent legs, creating a floating visual effect, suitable for glass tabletops. | Modern and minimalist furniture, especially with glass tops. | Can be expensive depending on thickness and size. | |
| Reclaimed Items | Old wooden crates, metal frames, etc. Allows for creative and unique leg designs. Ensure sturdiness for supporting the tabletop. | Unique, personalized furniture. | Cost varies greatly depending on the item; can be free or require some investment. |
Safety Tips for DIY Woodworking
Safety is the first step in any DIY project. When working with tools, especially a table saw, always wear safety glasses and hearing protection. Be aware of where your hands are at all times to avoid injury.
Ensure your workspace is clean and uncluttered. A tidy shop floor helps prevent accidents and makes for an efficient working environment.
Lastly, never rush the process. Take your time to understand each step and procedure. Careful execution not only results in a better final product but also minimizes the risk of accidents.

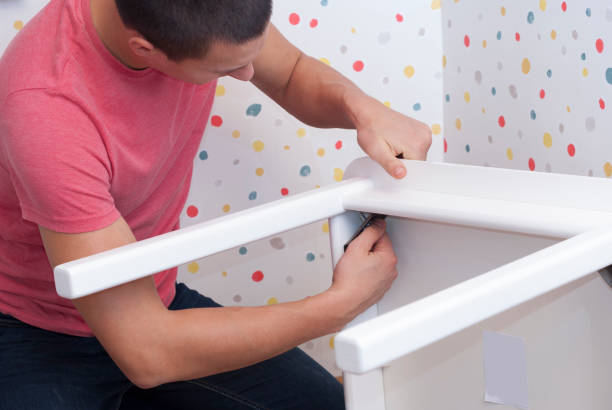
Simple Hairpin Table Legs
Hairpin legs are a popular choice for DIY table legs due to their modern look and straightforward installation. They’re also incredibly versatile and suit a variety of tabletops, from solid wood slabs to repurposed pieces of wood.
You can buy hairpin legs online or in a hardware store in various sizes and finishes. The only thing left is to attach them to your tabletop using screws. For an extra secure connection, consider adding a metal plate underneath the tabletop where the screws will go. This simple project is the perfect way to dip your toe into the world of DIY furniture legs.
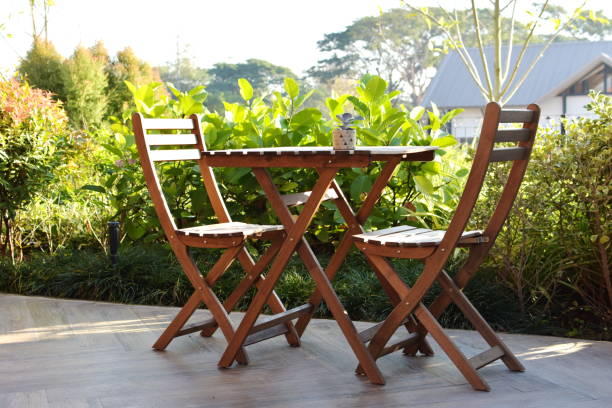
Rustic X-Shaped Wood Legs
For a more rustic look, consider making X-shaped wood legs. Start by measuring and cutting four equal pieces of wood for each leg. You’ll need a saw for this step.
Next, sketch an X on a piece of paper to use as a template. Arrange two pieces of wood into an X shape, using your sketch as a guide. Secure the pieces together using wood glue and clamps. Once the glue has dried, reinforce the joint with screws.
Repeat the entire process for the second leg. After the legs are completed, attach them to your tabletop using brackets or screws. These rustic X-shaped legs are sturdy and can support a heavy tabletop.
Tapered Dowel Legs
Tapered dowel legs add a mid-century modern touch to any table. Start by cutting four pieces of dowel to your desired leg height. The dowel’s diameter should be wide enough to give your table stability.
Next, use a table saw or handsaw to taper the bottom third of each leg, creating a gradual slope from the full diameter down to a smaller one. Sand each leg with sandpaper or an orbital sander to smooth any rough edges.
Finally, attach the legs to your tabletop. You can do this using brackets, or for a cleaner look, consider drilling angled holes in the bottom of your tabletop and securing the legs with glue.
Reclaimed Wood Block Legs
Reclaimed wood block legs are a fantastic way to add a rustic touch to a modern table, especially a glass tabletop. This project involves using four identical pieces of reclaimed wood (or any solid wood) as legs.
The first step is to ensure that the pieces are the same height. Use a saw to cut them to the desired length, then smooth any rough edges with sandpaper. You can leave the wood in its natural state for a rustic look or stain it for a more polished finish.
Attach the legs to your tabletop with brackets or adhesive suitable for your table material. This type of leg works particularly well with a glass or clear acrylic tabletop, where the beautiful, reclaimed wood legs become a focal point.

Quick Pipe and Flange Legs
Pipe and flange legs are an easy and quick DIY project that adds a trendy industrial look to your furniture piece. You’ll need pipes, flanges, and maybe some elbows or T-joints, depending on the design you choose. You can find these materials at any hardware store.
Assemble the pipe pieces to form your table legs, then attach the flanges to the underside of your tabletop with screws. Be sure to measure carefully before drilling holes for the screws to ensure your legs are level.
Minimalist H-Shaped Legs
If minimalism is your style, H-shaped legs are a great choice. They require only a few pieces of wood and some screws. Cut your wood into four pieces – two for the legs and two for the cross support. Form an ‘H’ shape with these pieces, using screws to secure them in place. Repeat this process to create a pair of DIY desk legs. The simplicity of the design gives your furniture piece a clean, modern look.
Beginner-Friendly Turned Legs
Making turned legs might seem intimidating, but with the right tools, even beginners can accomplish this task. You need a lathe for this project, which can be rented from most hardware stores if you don’t own one. Start with a piece of wood, turning it into a cylinder using the lathe. Mark the points where you want the curves and contours to be, then slowly carve away the wood to create your design. These DIY wood table legs can bring elegance to any piece of furniture.
Decorative Accent Legs from Found Objects
Get creative by making decorative accent legs from found objects. This could be anything from branches for a naturalistic look, to old metal pipes for an industrial vibe. You just need to ensure the objects are sturdy enough to support your tabletop. This method of making table legs allows you to create truly unique pieces that are sure to be conversation starters.

Finishing and Protecting Your DIY Table Legs
After you’ve created your DIY table legs, it’s time to finish and protect them. Use an orbital sander to smooth out any rough edges. Then, apply a layer of stain to enhance the color and grain of the wood. Once the stain has dried, apply a clear varnish or polyurethane to protect the wood from scratches, water damage, and UV rays. This not only extends the life of your furniture but also enhances its aesthetic appeal.
Get Creative with Paints, Stains, and Decor
Once your table legs are ready, it’s time to add some personal flair. Paints and stains can drastically change the look of your table legs, transforming them from plain to striking. For a rustic look, try a rich, dark stain. For a fun, vibrant feel, consider bright paints. You can even decorate your DIY furniture legs with carvings, decals, or metal accents. The options are endless, and the choice is yours.

Conclusion and Final Thoughts
Creating DIY table legs is not just a cheap and easy solution to furniture making, but it’s also a rewarding DIY project that allows you to customize your furniture pieces. With a bit of patience, creativity, and the right tools, anyone can make beautiful table legs that fit their personal style. So why not try making your own? You might be surprised at how much you enjoy the process, and you’ll undoubtedly appreciate the final product.


