Introduction
Custom cabinet creation is an emotionally satisfying activity since it combines artistic and functional design to create beautiful and practical storage options for your kitchen, bathroom, or workshop. Prior preparation is of the utmost importance. Choosing the materials and tools and accurately measuring the space are important steps that should not be overlooked. This article outlines everything from building a sturdy cabinet case to attaching the doors, drawers, and assorted cabinet hardware so that your project is durable and visually pleasing. Your cabinet will endure for many years if you put in the required high attention to detail as well as quality craftsmanship.
Planning Your Perfect Cabinet
Building a cabinet requires careful planning before starting construction work for project success. Establish the main function of your cabinet during the initial planning stage. The intended use of your cabinet will determine if it needs to store kitchenware, bathroom supplies, or workshop equipment. The cabinet’s design and materials, together with its dimensions, will be determined by its intended purpose. When considering woodworking for your project, the choice of materials and techniques becomes essential for durability and functionality. You may also need wood filler to fill in any imperfections or gaps in the wood to ensure a smooth and clean finish.
Measure the space precisely where the cabinet will be installed. Evaluate the area for any potential obstacles that include pipes and electrical outlets, and existing fixtures. A basic sketch of the design will enable you to see the finished product while helping you detect possible problems. The number of shelves and drawers, along with their dimensions, must be planned first because they determine the necessary materials and detailed instructions for cutting. You will likely need a sheet of plywood for the cabinet carcass and other structural components, as it provides both stability and affordability.
The selection of materials stands as a vital component during the planning stage. Plywood serves as the preferred material for building the cabinet carcass because it provides stability at an affordable cost. Select the right grade and thickness according to the expected weight load. Solid hardwoods serve as a durable option for face frames and doors, yet it costs more than other materials. Choose a wood species that matches both your budget and design requirements. The cabinet’s functionality and appearance depend heavily on the hardware components, including hinges and drawer slides, together with handles and knobs.
Cabinet Types and Styles: Choosing the Right Look for Your Space
When building a custom cabinet, it’s essential to consider the type and style that best fits the intended space and purpose. The type of cabinet will influence the design, materials, and functionality, while the style impacts the visual appeal and overall atmosphere of the room.
Cabinet Types
| Cabinet Type | Description | Ideal Use |
| standard base Cabinets | Sit on the floor and provide essential storage. Often include countertops or are used for under-sink storage. Typically come with doors and drawers for easy access. | Kitchenware, bathroom supplies, workshop tools |
| Wall Cabinets | Mounted on the wall to save space. Typically feature shelves and can have doors or open shelving. | Dishes, spices, small items |
| Tall Cabinets | Provide vertical storage, often referred to as pantry or utility cabinets. Feature adjustable shelves. | Pantry goods, cleaning supplies, tall appliances (brooms, vacuums) |
| Corner Cabinets | Designed for corner spaces, often include pull-out shelves or Lazy Susans to maximize space. | Storage for dishes, canned goods |
| Specialty Cabinets | Custom-built to serve specific purposes like wine racks, appliance garages, or storage for small electronics or tools. | Wine storage, appliance storage, unique needs |
Your custom cabinet project design needs to focus on selecting appropriate cabinet types that match the functional needs and available space dimensions. Base cabinets rest on the floor to store kitchenware as well as bathroom supplies and workshop tools. These cabinets work with countertops but they additionally provide storage beneath sinks with doors and drawers that allow easy access. Wall cabinets that are installed above eye level use minimal floor space to store dishes and spices in an accessible overhead position. The cabinets typically feature shelves which may be equipped with doors or open shelves for convenient access.
Tall cabinets enable users to store bulky items including pantry goods and cleaning supplies as well as larger appliances like brooms. The storage capacity of these cabinets can be adjusted through their shelves. Room corners become useful storage areas through the implementation of corner cabinets. Special design techniques enable the implementation of pull-out shelves or Lazy Susans, which enhance accessibility in these cabinets. Specific storage needs to find solutions through specialty cabinets which can contain wine racks and appliance garages for customized item storage. The different cabinet designs create functional areas that maintain proper organization.
Cabinet Styles
The style of your cabinet should match the overall aesthetic of your room. Here are some popular cabinet styles to consider:
| Cabinet Style | Description | Ideal Use |
| Shaker Style | Simple, clean style with flat panel doors, minimalistic frames, and no ornamentation. Versatile, fitting both traditional and modern homes. | Timeless and versatile, fits various interior styles |
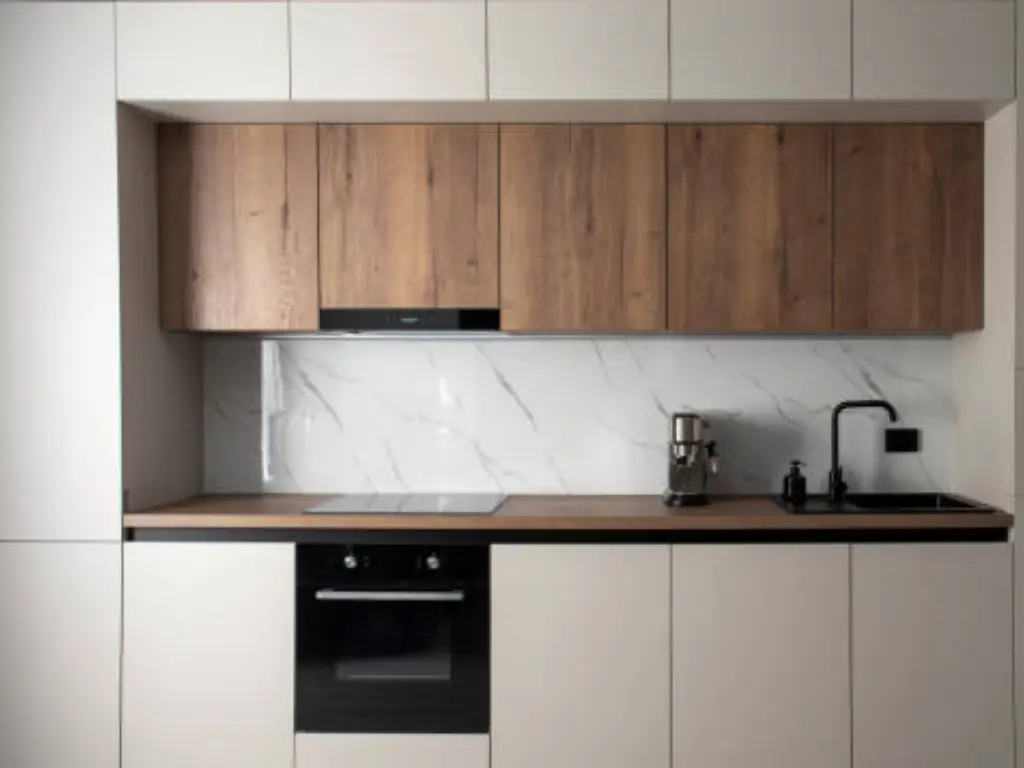
| Modern Style | Known for sleek lines, minimalistic design, and functional surfaces. Often has no visible hardware or streamlined handles, with materials like high-gloss lacquer or stainless steel. | Contemporary, minimalistic spaces |
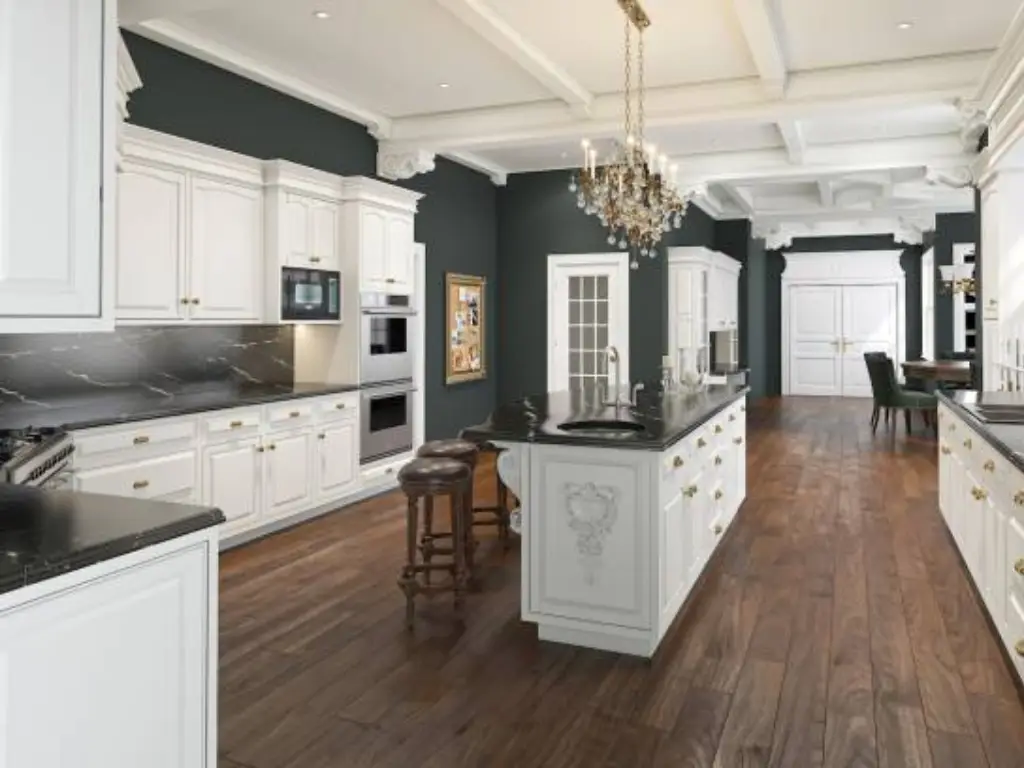
| Traditional Style | Ornate with detailed woodwork, raised panel doors, and intricate moldings. Creates a warm, elegant atmosphere. | Classic or vintage interiors |
| Contemporary Style | A blend of modern and traditional elements with clean lines, subtle textures, and materials like wood, glass, or metal accents. | Relaxed, yet stylish spaces |
| Rustic Style | Earthy, natural look, often using reclaimed wood or rough-hewn materials. Features distressed finishes, open shelving, and visible wood grain for a warm, inviting feel. | Country, cabin, or cozy interiors |
| Industrial Style | Features raw materials like metal and unfinished wood with exposed hardware, open shelving, and a rugged, utilitarian design. Perfect for lofts or modern homes with an edgy feel. | Urban, loft, or studio spaces |
| Farmhouse Style | Inspired by rural living with simple, practical design elements. Includes wood, open shelving, rustic finishes, and vintage hardware. | Warm, welcoming kitchens or living spaces |
The selection of appropriate cabinet style needs to be followed by thinking about its compatibility with your space’s overall theme. The materials together with colors and finish selections will shape the total environment within a room. White or natural wood finishes work best for Shaker and Modern and Farmhouse styles, yet Traditional and Rustic designs benefit from darker tones. Your cabinet functionality needs should be your main focus when making a selection because you need to decide between additional storage, easy access, and visual appeal. Devices like handles, drawer pulls, and knobs function to improve both form and functionality when you use them to match your preferred cabinet style. Your chosen cabinet style needs to match your personal style and support the overall decoration theme of your home interior.
Gathering the Right Tools and Materials for Cabinet Making
| Tool | Purpose |
| Table Saw or Circular Saw | For cutting wood pieces to the required dimensions. |
| Measuring Tape | For accurate measurements of the wood and workspace. |
| Drill | For creating pilot holes and attaching screws. |
| Square | To ensure corners are perfectly square during assembly. |
| Sandpaper (Multiple Grits) | For smoothing surfaces before finishing. |
| Clamps | To hold pieces together while glue dries or screws are driven. |
| Safety Gear (Glasses & Hearing Protection) | To protect eyes and ears during cutting, drilling, and sanding. |
| Router | For creating decorative edges and additional details. |
| Pocket Hole Jig | For hidden joinery using pocket screws. |
| Sander | For surface preparation and smoothing after assembly. |
| Miter Saw | For precise cutting of face frame pieces and door stiles and rails. |
The next step requires you to gather all essential tools following your plan development. A cabinet requires essential tools but also needs additional tools that improve both precision and smoothness throughout construction. The necessary tools for this project include a table saw or circular saw equipped with a straight edge guide and measuring tape and a drill and square and multiple-grit sandpaper. A drill functions as a power tool for creating pilot holes that will help screws and hardware maintain proper alignment. The drying process of glue and screw driving needs clamps to preserve the alignment of pieces. The workshop requires continuous use of safety glasses and hearing protection as protective equipment for all personnel.
Your design complexity will determine whether you need additional tools such as a router for decorative elements and a pocket hole jig for hidden joinery to use pocket screws and pocket hole screws for strong precise connections. The miter saw delivers exact cuts for face frame pieces as well as door stiles and rails. The process requires drilling shelf pin holes when you plan to use adjustable shelving but you must maintain equal spacing between holes for stability.
Your materials should include the selected wood or plywood together with appropriate screws of different lengths and wood glue and finishing elements which include paint and stain and varnish. The depth of the cabinet determines necessary measurements and materials thus proper dimension accounting is essential. Newcomers need to buy additional materials because errors may happen during construction thus requiring an emergency trip to the lumberyard.
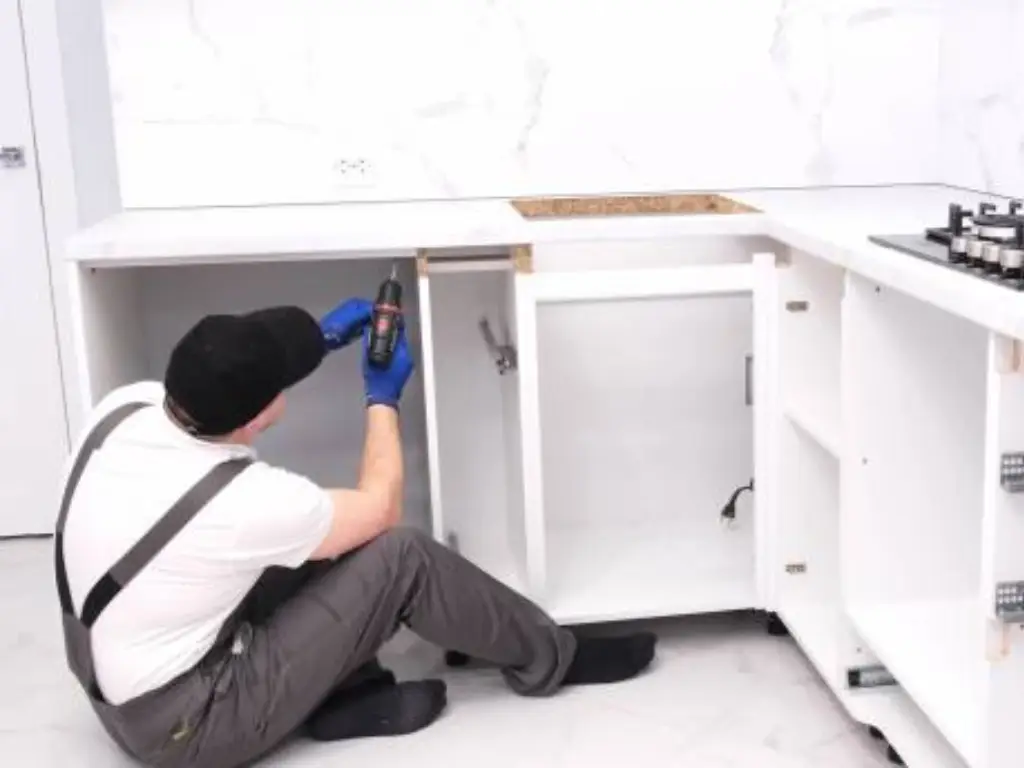
Step-by-Step Guide to Building a Strong and Square Cabinet Case
Your project depends on the cabinet case structure as its foundation. The precision of squareness and accuracy during this stage becomes essential because any current errors will multiply in future construction steps. Start by cutting all case pieces, including frame parts and face frame parts, according to your established cutting list. Every woodworker should follow the essential principle of “measure twice, cut once” when they need to verify their measurements before each cutting operation. If you’re building kitchen cabinets, keep in mind that precise cuts and shortcuts are especially important for upper cabinets to ensure they align properly with the rest of the cabinetry and fit neatly against the wall. Additionally, it’s crucial to account for the cabinet depth to ensure the cabinet fits correctly in its designated space and can accommodate the items intended for storage.
The following step requires you to choose the joinery method for your project. Pocket holes have become popular among woodworkers because they offer strong connections which are easy to execute particularly for beginner carpenters. A joint can be strengthened through screw and glue application or by using dadoes and rabbets as traditional methods to create a seamless connection. Apply wood glue first to the edges then secure the pieces together with your chosen joining method. Your square tool should be used to verify that all corners maintain precise square angles. The joint requires proper clamp pressure to create a strong bond that eliminates all gaps between the joined pieces. Clamps serve as supplementary hands which hold everything in position until the bond reaches its solid state.
The installation of shelves and dividers should be included within your current workflow for building cabinets. Kitchen cabinet interiors normally include shelf pins or pre-drilled holes for adjustable shelves during installation. Integrated supports and dadoes function as shelf stabilizers which allow users to position shelves in different locations. Inside the cabinet, these dividers or shelves help in organizing and segregating items more effectively. Your project strength and stability increase when you add a plywood or hardboard back panel. A panel fulfills two essential roles by reinforcing the structure and providing a mounting surface when wall attachment is needed. Also, ensure the drawer front aligns properly with the rest of the cabinet for both functionality and aesthetics. Check the squareness of the cabinet top and bottom before moving forward with the attachment process. Ensure the back panel stays square before moving forward with its attachment.
Installing the Face Frame: Techniques for a Professional Finish
The face frame serves two essential functions by making cabinets stronger and by offering attachment points for doors and drawers. The face frame enhances both functionality and design because it creates a polished appearance for the cabinet. The face frame consists of vertical stiles and horizontal rails, which typically use solid wood as their material.
Follow your plan to cut the stiles and rails into their exact dimensions. Construct the face frame by joining its pieces with your chosen method between pocket holes, screws, and glue or biscuits. Again, ensuring squareness and alignment of the side panel and bottom panel is critical. After assembly, you should attach the face frame to the cabinet case front by using glue and screws or brad nails. Position the face frame directly against the cabinet case edges. The face frame needs to be clamped to the case to achieve a tight and seamless bond during this process.
Crafting and Mounting Cabinet Doors for Smooth Operation
Your cabinet’s doors serve as its visual presentation, so proper construction and installation matter for both appearance and operational needs. Select the door design between flat panels and raised panels, and shaker-style doors. Measure and cut all door elements, including stiles and rails, and panels when applicable to achieve the desired dimensions. Use your selected joinery approach to construct the door frame. When building panel doors, you must verify that the panel fits tightly inside the frame.
Why Choose Maxave Hinges for Your Cabinet Doors?
Maxave operates as a premier furniture hardware producer that manufactures more than 500 million hinges each year to serve the various requirements of cabinet makers. Our product hinges provide long-lasting performance through multiple closing options, including self-closing and specialized features. Our advanced galvanizing line operates with 50% higher efficiency, which results in 200% better rust protection and delivers 99.1% yield rates. Maxave hinges demonstrate 99.2% product qualification success while maintaining strict quality control standards that include AQL1.5 and ISO9001 and 6S. Maxave hinges represent the best choice for projects that require exceptional quality alongside precise performance. Explore our range: [https://www.maxavegroup.com/hinges]
Building Drawers That Glide Effortlessly: A Detailed Guide
Drawer operation quality stands as a key factor for user satisfaction in cabinet designs that incorporate drawers. Begin by taking measurements of the drawer opening space located inside the cabinet case and on the face frame. Measure the dimensions of your drawer boxes, including the width, by subtracting the required clearances needed for the drawer slides. Use plywood or solid wood to cut the drawer box components, which include the front and back, and sides.
Use your preferred joinery method to construct the drawer boxes. The three main joint techniques for drawer construction are butt joints secured with glue and screws together with rabbet joints and dovetail joints which provide both strength and traditional appearance. Check that all drawer boxes maintain a square shape. Time has arrived to begin installing the drawer slides. Select drawer slides according to their weight capacity and extension type, whether partial or full extension. Mount the slides according to the manufacturer’s instructions on the drawer boxes and the cabinet case interior.
Experience the Difference with Maxave Drawer Slides
High-quality drawer slides serve as essential components because they enable drawers to function with ease and precision just like smooth hinges do for cabinet doors. Having a drawer that sticks or squeaks or fails to extend fully would create severe frustration for any user. Maxave dedicates itself to eliminating such frustrations through its annual production of 30 million drawer slide sets which demonstrates both manufacturing scale and solution reliability.
The Maxave drawer slides exist exclusively for their exceptional performance characteristics which include durability and silent operation. Our product range consists of ball-bearing and soft-closing and under-mount solutions which address different customer needs. Our slides underwent testing through regular and extreme use cycles reaching 50,000 operations beyond the typical slide test standards by 60%. Our advanced galvanizing procedure through our process delivers 50% increased workflow efficiency with double anti-rust protection and 48 hours of superior anti-rust performance. Maxave maintains 99.1% yield rates and 99.2% product qualification standards through its ISO9001 and 6S certifications to deliver top-quality and dependable performance. Upgrading your cabinet drawers to achieve effortless functionality can be done by purchasing Maxave premium drawer slides at [https://www.maxavegroup.com/drawer-slides].

Sanding, Finishing, and Installing Hardware for Lasting Beauty
The final stage includes sanding operations followed by finishing work and hardware installation to achieve long-term beauty.
The finishing process begins after installing doors and drawers because it will both enhance your creation and provide lasting protection. Start your project by using coarse sandpaper to sand every surface of the cabinet before moving to successively finer grits. The chosen finish will adhere better to a surface that has been properly sanded.
Select the surface coating that will best fulfill your requirements. Paint sets forth numerous color options, which also means it has excellent longevity. Wood grain becomes more attractive after staining because the application allows a clear protective seal on top. A durable protective finish comes from applying either varnish or polyurethane. Follow the manufacturer’s directions to finish your project by using proper ventilation. Multiple layers of finished application will produce the best possible results.
After the finish dries, you should install all remaining hardware components onto doors and drawers. Other tiny elements within your cabinet significantly affect its total appearance and atmosphere. Check that all hardware components maintain proper alignment before securing them with tight fasteners.
Conclusion
You will find personal fulfillment through building your cabinet while gaining fulfillment from making something both functional and attractive by yourself. Good luck with building your cabinet, as it takes care as well as a thorough plan and slow execution combined with precise details. The project’s success depends on various steps, starting with design creation and ending with a finished application.
The long-lasting effectiveness and operational efficiency of your cabinet depend heavily on the superior quality of components and hardware that you select. A cabinet requires dependable hinges and drawer slides to match its foundation because both elements are essential for long-term durability. Working with Maxave and similar trusted hardware manufacturers will give you durable options so your handcrafted cabinet remains both attractive and operational throughout extended periods. Take pleasure in your work while facing the challenge because your finished product deserves your pride.


