Importance of Countersinking
Countersinking is a crucial technique in woodworking which ensures that screws are positioned at or below the material’s surface. This technique has both aesthetic and structural significance. By doing this, you create a clean finish where the screw heads do not stick to any other thing they come across, avoiding having them stick out above the surface of the wood. Appearance and functionality are important for both furniture and cabinetry.
Moreover, countersinking helps in distributing load more evenly over wooden surfaces hence reducing chances of wood splitting. Lowering the head of the screw flush will bring about better contact between screw and wood making it stronger in holding while driving into hardwoods as well as for few final appearances on woods surfaces. To achieve professional finishes on your woodworking projects, one must start by understanding the importance of countersinking in carpentry.
Gathering Essential Tools for Countersinking
Before you start screwing in screws and countersinking them, make sure you have all necessary tools. Right tools will not only make work smoother but also lead to better results. Here is what you need:
| Tool | Description |
| Drill | This is your main tool. Ensure that it matches the material you are working with and is strong enough. |
| Tapered Bit | Specially designed for forming a beveled hole in wood, it allows the screw head to lie flush with or below the surface of the material. Select one that corresponds to the shape of the screw head. |
| Drill Bit | Use a drill bit that has exactly the same width as the shank of the screw. It guarantees perfect pilot holes, stops timber from splitting, and provides a secure grip for screws. |
| Screwdriver Bit | Match this with the type of screw head you’re using. This helps ensure that there is no damage when driving in screws. |
| Small Piece of Tape | Wrap around your drill bit to indicate its depth gauge. By doing this simple trick, you can avoid drilling too deep, hence maintaining similar depths of sink. |
| Scrap Piece of Wood | Use it when testing and adjusting settings before starting on your final project. A step that might save you from making errors on finished projects. |
| Clamps | These hold your workpiece steady. Stability during drilling ensures precision and safety. |
These tools form the basis upon which successful countersinking depends on. Good preparations change everything; they enable screws to sit flush against the wood surface thus improving general quality of woodworking project at hand here!
Countersinking Screws Step-by-Step
Step 1: Marking the Locations
The first thing, which consists in marking locations here you will screw. On your wooden surface, just slightly indicate using a pencil. This facilitates accurate positioning and alignment of your screws.
Step 2: Selecting the Drill Bit
Then choose a drill bit that corresponds to the diameter of the screw shank. This is important for making pilot holes that prevent wood from splitting and allow for screw length.
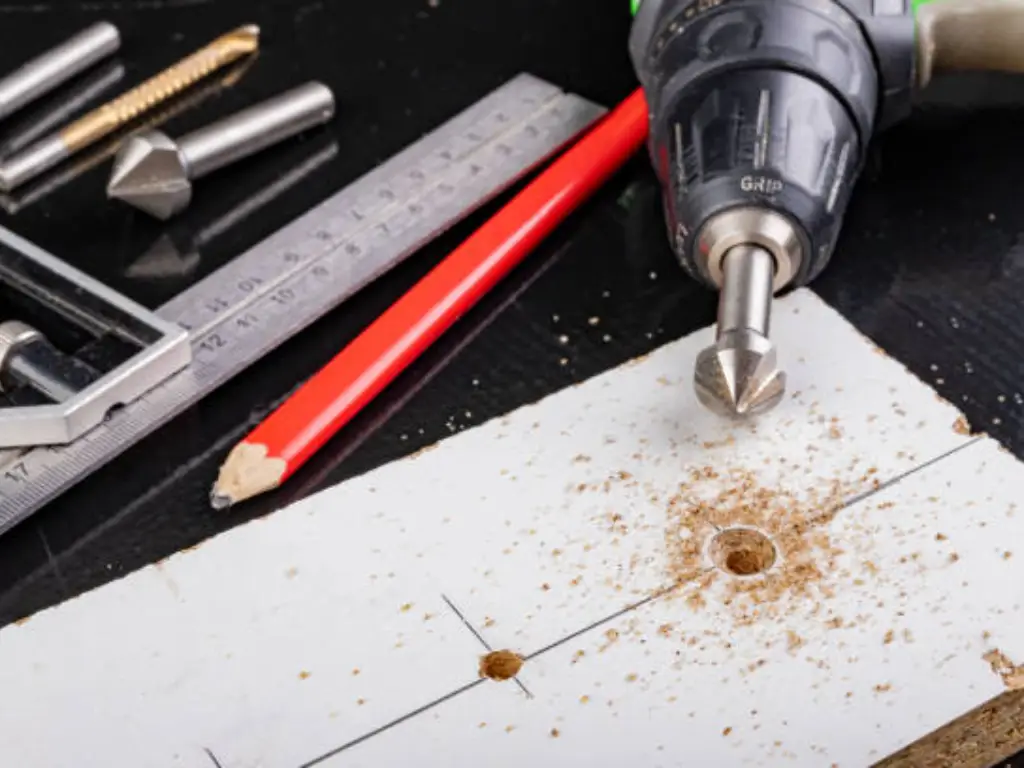
Step 3: Drilling Pilot Holes
At this point, drill pilot holes on the marks you made. For prevention of splitting of wood, make sure such holes are cut to an appropriate depth to allow the screw length inside without splitting it. Screws are guided by these steps and they ensure a tight fit.
Step 4: Switching to The Countersink Bit
Having drilled pilot holes then switch to countersink bit. Place countersink bit into drill chuck and adjust them until they reach the desired height above surface. Such adjustment means it would be possible for them to enable the heads of screws sit flush or sink lower than wood surface.
Step 5: Drilling Countersunk Holes
Drill countersinks at pilot hole positions. At this level, you shape cones necessary for accommodating screw heads which need to sit flush or shallowly recessed below wood surfaces. Holes should be suitably countersunk so that there is no roughness on edges left after insertion of screws.
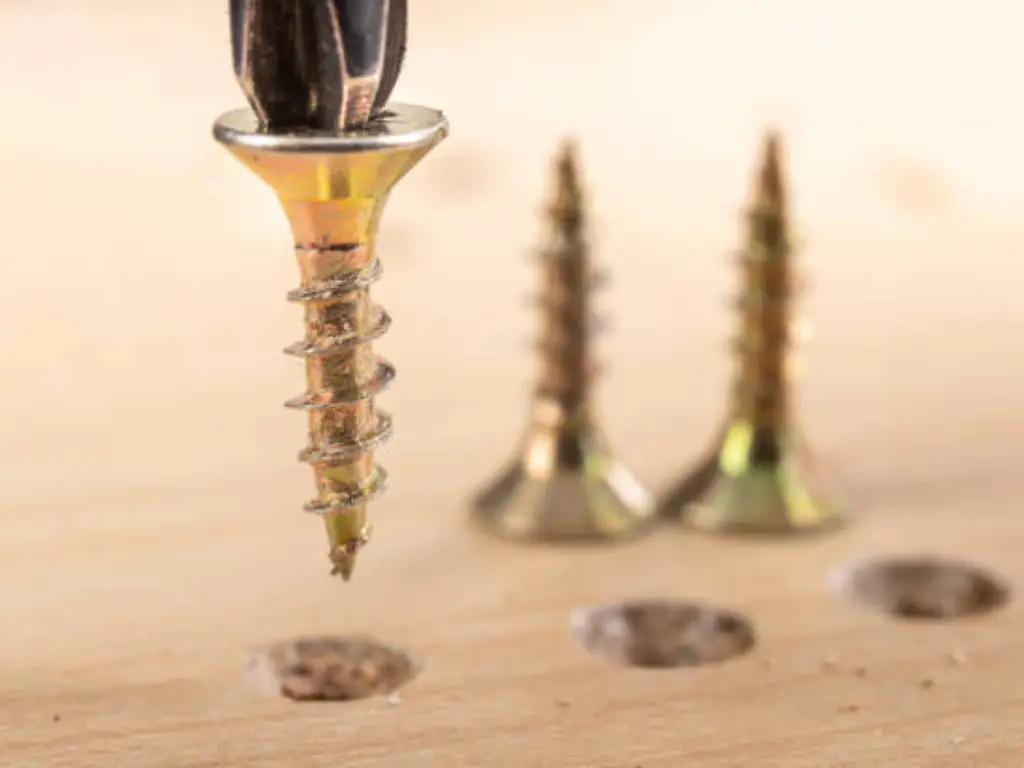
Step 6: Driving The Screws
Lastly using an appropriate screwdriver bit drive screws through these pilot holes till their heads sit either at floor or sunken slightly below it. It is during this last stage when one can talk about complete counter sinking whereby a finished polished appearance is achieved over wooden surfaces by eradicating any kind bumps associated with nail heads sticking out above floors beneath them or extra metals used in joining two materials together via bolts etc.
Selecting the Right Countersink Bit

In woodworking, nothing beats choosing the right countersink bit for that perfect polished professional work. These bits come in varying sizes and angles, usually falling between 82 to 90 degrees, to match the profile of a screw head. Often times when it comes to wood screws, an 82-degree bit works excellently because it aligns with the angle of the screw head perfectly. It should correspond accordingly with regard to its diameter, which is equal to that of the screw head for a tight and precise fit. Additionally, using the right accessories, such as a countersink bit, can contribute immensely towards maintaining a well-presented project.
Another element to consider is what material has been used for making countersink bit. High-speed steel (HSS) bits are especially useful for many woodworking projects since they provide a good trade-off between strength and accuracy. Nonetheless, for heavier materials or when long lasting products are required, carbide tipped bits are recommended. These devices will also last you longer than normal even if you use them heavily as compared to others on sale today. When this type of counter sink bit is chosen well, then either screws heads sit flush or slightly recessed which greatly enchances both appearance and strength of your project at once.
Adjusting Countersink Bits Correctly
Always remember to adjust your countersink bit accurately to get consistent results. To begin with, you need to loosen a set screw on the countersink bit and adjust the drill till it reaches the desired depth. The depth should be such that when screwed in, the screw head is flush or slightly below the surface of the wood. After that fasten the set screw so as to keep the bit in position.
Do a test adjustment on a scrap piece of wood. Drill pilot hole and then countersink it just in case if needed for checking depth. If there are any deviations from flushness, re-adjust your countersink bit according to requirement. This process of testing ensures uniformity while counter sinking screws at end of your project. Fine tuning adjustment helps prevent over drilling and produces clean professional finishes on your woodworking projects.
Drilling Perfect Pilot Holes
Step one in countersinking screws involves drilling perfect pilot holes. These pilot holes help ensure that the screw is guided into place, saving the wood from cracks and having a straight and firm match. The best way to drill an accurate pilot hole is with a drill bit that matches the screw shank’s borehole size. The threads of the screw may then take hold of the timber without splitting it.
To accommodate for its length, ensure that depth remains constant when drilling pilot holes. A strip of masking tape wrapped around the drill bit can act as a gauge for this purpose. This will make sure each hole drilled is at the right depth, giving them uniformity for good secure holding together with screws. You need to have well done countersinks to achieve this kind of surface while inserting screws into wood; it ensures the heads are flush with wood thus enhancing their grip to hold on strongly.
Countersinking Without Specialized Bits
A bigger drill bit can still be used in the absence of a specialized countersink drill bit to make a countersunk screw hole. Pick out a drill bit that is slightly larger than the diameter of the screw head and bore into the pilot hole, making sure it is shallow. This will give you an indentation that allows the top part of the screw to sink below or even with the wood surface.
This method works when time is running out although it is not as good as using a countersink tool. However, keep an eye on your drilling so that you don’t get uneven or too large holes at last. Simply paying attention for little while and checking how deep are you going can help you improve significantly. As such, this technique offers laypersons and those who don’t own special equipment for embedding screws into objects because it can be done without having specialized tools or requiring any previous experience in crafting items at home which makes it accessible even for non-professionals.
Avoiding Common Countersinking Mistakes
Avoiding the common countersinking mistakes is important for a professional finish. One common blunder is choosing drill bit of wrong size for the pilot hole; this splits wood or results in ill-fitting screw. Always ensure that drill bit diameter matches with screw shank’s one.
Another error committed is over-drilling countersink hole leading to a screw head that sits too deep inside wood. This can weaken the surface of the wood and also compromise the structural integrity of the project at hand. Over drilling holes can be avoided by placing a piece of tape on the counter sink bit so as to mark desired depth, preventing over penetration into materials. You will achieve clean and professional finishing in your woodworking projects by avoiding these errors.
Finishing and Concealing Countersunk Screws
When the screws have been countersunk, it is important to finish them and make them invisible in order to improve on the overall look of your project. If you can see the heads of the screws, fill the holes with putty for wooden surfaces. Pick a fitting putty which has the same hue as your wood so that no distinctiveness can be detected. Put this putty around the screw heads then level it using a knife or other suitable tools and give it time to dry for a finished job look.
After drying, sand down until flush with wood surface to ensure an even texture with surrounding wood is achieved. It creates an even, polished surface. An alternative is to use wooden plugs which will blend well giving off a natural effect instead of paint color on wood surfaces. Insert these plugs into dowel holes and smooth till they are same level like wood itself. One way to give your woodworking projects a more professional finish is by hiding and finishing countersunk screws.
Conclusion
Countersinking screws is a useful ability for any woodworker or DIY addict. You can obtain professional results by understanding the relevance of countersinking, picking up appropriate tools and moving through the stepwise procedure. The right selection and adjustment of countersink bits, perfect pilot hole drilling, and avoidance of pitfalls are what make a project to be successful. These pointers and strategies will enable you to conclude as well as hide countersunk screws that result in sleek surfaces on your woodworking projects. Happy woodworking!

For the highest quality screws to use in your woodworking projects, consider Maxave. Maxave is a renowned manufacturer of premium screws, offering a wide range of options to suit all your needs. With Maxave, you can be assured of durability, precision, and reliability in every screw, ensuring your projects have a professional finish every time. Explore Maxave’s product range today and take your woodworking to the next level!


