Introduction
Do you want to renovate your kitchen by changing kitchen doors or you simply want to adjust the hinges on the doors? Well, learning how to drill cabinet hinge holes accurately is a skill that can save a lot of time and frustration. For anyone who is a do-it-yourselfer or anyone who finds themselves in a situation where they need to do a home improvement project such as putting up new doors, knowing the exact way to go about hinge holes can be very crucial. This guide will take you through each of these steps, from the importance of cabinet hinges to drilling those perfect hinge holes, so your doors sit right and open and close like they should.
The task may seem overwhelming at first, but with the right equipment and a little time, you will discover that drilling hinge holes is not a very difficult task. After reading this blog, you will be knowledgeable about this task and be ready to handle it like a professional, enhancing the functionality and appearance of your cabinetry. This will include the various types of hinges and tools needed, right down to step-by-step guidance on how to achieve that perfect hinge location.
Understanding Cabinet Hinges and Their Importance
- Butt Hinges: Often used on traditional cabinetry, they require a significant part of the hinge to be visible when the door is closed.
- Concealed Hinges: Also known as European hinges, these are hidden from view when the door is closed, offering a cleaner look. They are ideal for modern interior designs.
- Overlay Hinges: These allow the door to lay over the cabinet frame, reducing the space between the cabinet doors.
- Inset Hinges: These are used when the cabinet door sits inside the cabinet frame, completely flush with the face of the cabinet when closed.
- Self-Closing Hinges: These hinges pull the door shut when it is within a few inches of being closed and are perfect for kitchens where doors should not be left open.
- Soft Close Hinges: These are designed to prevent the cabinet door from slamming shut, minimizing noise and damage.
Cabinet hinges are one of the most important components in the operation of your kitchen doors. They hold the door’s weight and control its motion. Even the most beautiful door of the cabinet is useless or can be damaged if it has not been fitted with the right hinges. It is crucial to know the type of hinge that is appropriate for the project, for example, a flat hinge for a door that has no handle, or a concealed hinge for a better look. Both types of hinges have their own drilling instructions which if followed properly result in a smooth door operation.
Hinges affect both the usability and durability of the doors. Properly positioned and well fixed hinges help avoid problems such as sagging or scraping, which are rather inconvenient. Drilling hinge holes may sound easy but it is a very delicate process that needs to know the type of material you are working on whether MDF, ply or solid and the type of hinge for each material. This knowledge will help in the drilling process and guarantee the result to be in accordance with the design and use.
Preparing to Drill Hinge Holes
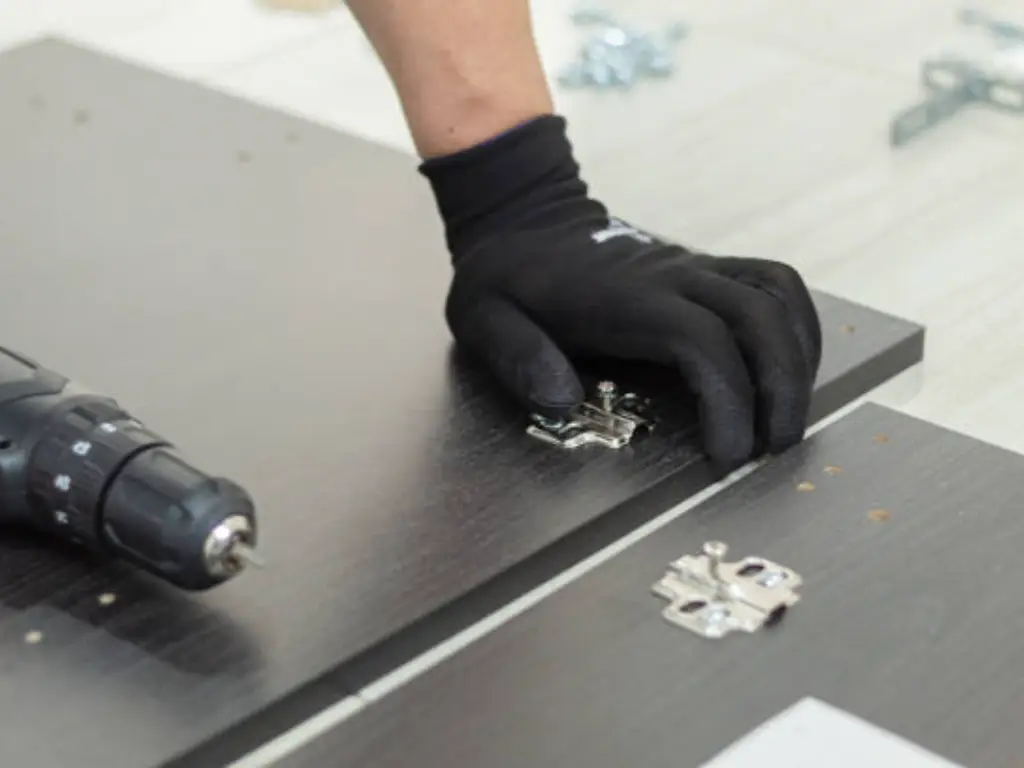
The preparation stage is the most important one even before you turn on the drill to get the perfect hinge hole drilling. To drill the holes for the hinges you will require a drill or drill press, a cabinet hinge drill bit, masking tape, a cutter, a ruler for measuring, and possibly a jig to help you in the drilling process. Make sure that the area where you are working has a flat surface that will allow you to safely support the new door or the kitchen doors you are modifying. It is also advised to have a piece of scrap wood placed beneath to avoid blowout as you drill through the side of the door.
Probably the most important step is to measure and mark accurately where your hinges are going to be placed. With the help of a ruler and a pencil, draw a straight line along the edge of the door and a circle in the middle of the location where the hinge will be installed. These marks will help you to drill the main holes for the hinge when you make small pilot holes at these points. This pre-planning helps in avoiding expensive mistakes and makes sure that the hinge fits properly so that the door can open and close as well as be in the right position to the cabinetry.
| Step | Details |
| Preparation Stage | The preparation stage is the most important one even before you turn on the drill. |
| Required Tools | Drill or drill pressCabinet hinge drill bitMasking tapeCutterRuler for measuringPossibly a jig |
| Working Area Setup | Ensure a flat surface for support.Use scrap wood beneath the door to avoid blowout. |
| Measuring and Marking | Use a ruler and pencil.Draw a straight line along the edge of the door.Mark a circle in the middle of the hinge location. |
| Drilling the Holes | Make small pilot holes at the marked points.Drill the main holes for the hinge. |
| Final Check | Ensure the hinge fits properly.Confirm the door opens and closes correctly. |
Step-by-Step Guide to Drilling Hinge Holes
Step 1: Marking the Door for Your Hinges
The first important stage is to draw the location of the hinges on the door before you even take a drill. This is the area where accuracy is critical because even a small variation may hinder the door’s operation. Ideally, hinges should be placed approximately 5 inches from the top and bottom of the door respectively. With a marking tool and a ruler, draw where the hinges are to be placed and ensure that the markings on both sides of the door are accurate. This makes it possible for the door to be hung in the correct position, that is, level and straight. It is advisable to check your markings; it is always useful to spend a few minutes here in order not to have a headache later.
Step 2: Setting Up Your Drill
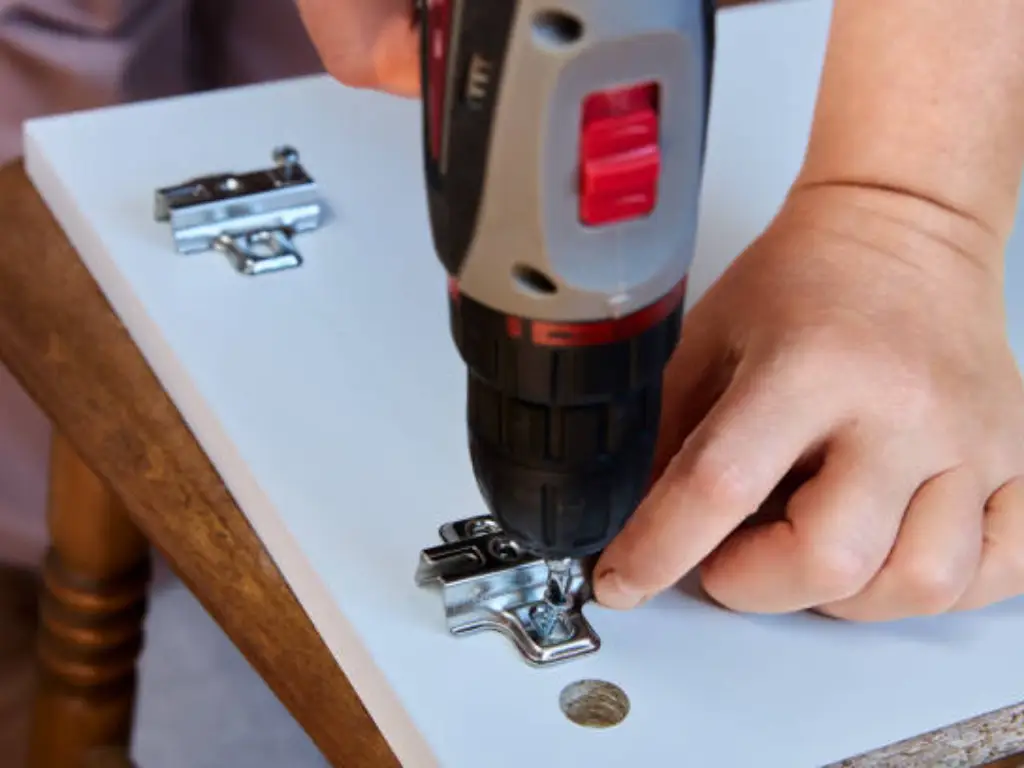
First, choose the right drill bit, which should be a cabinet hinge bit or a forstner bit depending on the material of the door and the type of hinge to be used. Drill press can be very useful for beginners as it provides both stability and precision in comparison to a regular drill. Place and tighten the selected bit into the chuck of the drill until it is tight. When using a handheld drill, it is important to try and keep the drill as perpendicular to the door as possible to avoid having slanted holes which can compromise the installation.
Step 3: Drilling the Hinge Holes
Begin by making small holes on each of the points that have been marked on the kitchen cabinet door earlier. This step is important as it assists to direct the larger drill bit and to avoid the wood from cracking as you drill the main hinge holes. Place the larger end of the bit against each pilot hole and start drilling at a slow pace applying consistent pressure. This process should not be rushed because it is easy to make mistakes that may take some time to be rectified. After the hinge holes have been drilled, it is advisable to use a chisel or sandpaper to clear any debris or sharp edges around the holes where the existing hinges fitting will be placed in the existing holes.
Step 4: Checking the Fit and Making Adjustments
After drilling, place the hinge into each hole to ensure that it fits properly. The best fitting is when the hinge is in contact with the door without any pressure being applied. If the hinge does not fit correctly, then one should slightly change the depth or the diameter of the hole. The fit should be checked on a regular basis since it can affect the performance of the door. Screw and bolt positions may require some iteration, but this is necessary to make sure the hinge fits perfectly with the door, which in turn guarantees that the door will operate smoothly and look good once it is installed.
Installing the Hinges and Hanging the Doors
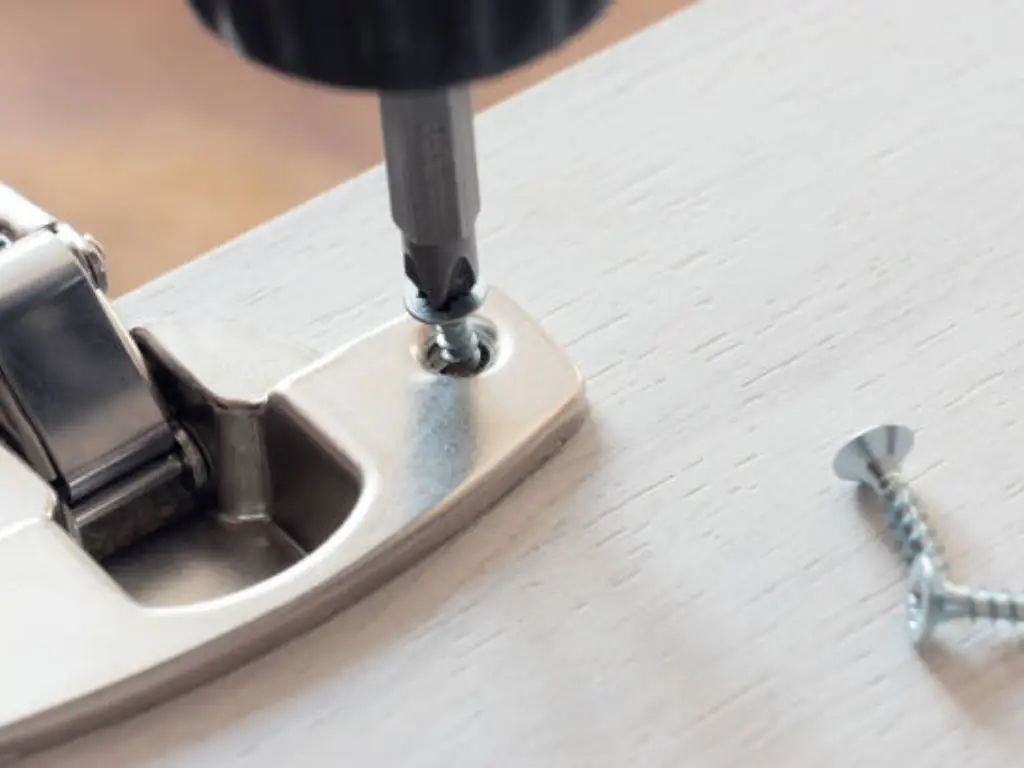
After all the holes are drilled to the right size, the next procedure is to fix the hinges. This entails placing screws into the holes you have just made to fix the hinge in place. Make sure all screws are tightened to the right degree of tightness, but do not over tighten them as this can cause the holes to be stripped. After that, it is possible to install the door on the cabinet frame, which is the final step of the process. This may need some help, especially if the doors are large or if they are made of a very strong material.
Secure the door in place, ensuring that it fits correctly on the cabinet frame. Adjust the hinges if necessary; most of the modern hinges have screws that can be used to align the door in the horizontal, vertical, or depth direction. Once the alignment is satisfactory, check all the screws and tighten them if necessary and make the final adjustments.
Finishing Touches and Maintenance Tips
After the installation process, you may consider fitting kitchen door handles for both practical and aesthetic purposes. It is also important to measure their positioning accurately so that the design is uniform across all doors. As for maintenance, it is recommended to inspect and possibly tighten the screws of the hinges and apply some lubrication to the hinges if they produce a squeaking sound. This upkeep will guarantee that your cabinet doors remain in good working condition for as long as possible.
Cabinetry is not immune to wear and tear but with proper installation and maintenance, problems can be prevented. It is also important to have a small toolkit for adjustments that may be required in the future to help with any necessary alterations.
Conclusion
Congratulations! You’ve learned how to drill cabinet hinge holes. This skill not only improves your DIY skills but also contributes to the utility and aesthetics of your home. Although it is time-consuming and demanding, the outcome is rewarding – a beautiful and efficient kitchen. Remember that the perfection is achieved through preparation, accurate measurements and time during the drilling process. Good luck with the drilling and cheers to the proper installation of cabinet doors!


