Introduction
Although the installation of drawer slides portrays difficulty especially to first time DIYers this ought not to be so. It is only a matter of having the right tools, taking the right measurements, and following a well defined procedure. This guide minimalizes the complexity, covering how to measure a drawer box and how to adjust the slides to ensure they operate optimally. We will also discuss problem areas and outline the right tools to be used to make sure that all the drawers including the ones on your kitchen cabinets, desk drawers and dressers work just as they are supposed to. So let us begin and allow your drawers to glide easily and smoothly.
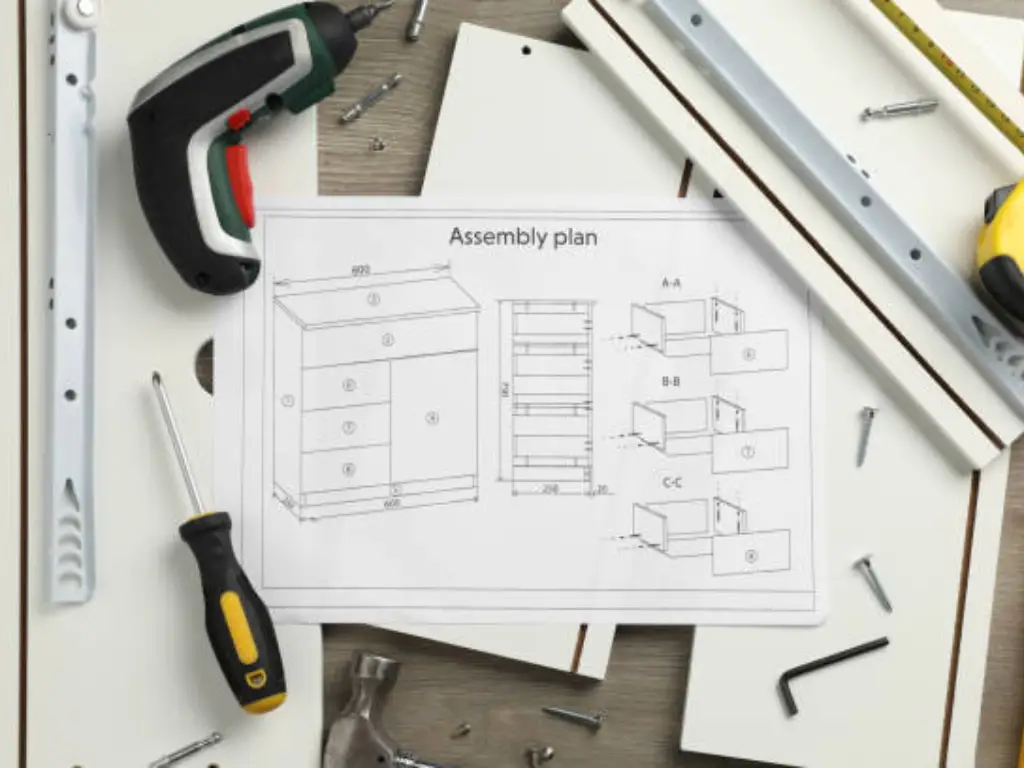
Tools Needed for Installing Drawer Slides
| Tool | Purpose |
| Measuring Tape | For accurate measurement of drawer box and cabinet dimensions. |
| Pencil | To mark positions on the drawer box and cabinet for precise installation. |
| Framing Square | Ensures that the slides are installed squarely to the drawer box and cabinet. |
| Lumber Clamps | To hold the drawer slides or other components in place during installation. |
| Cordless Drill | For drilling pilot holes and driving screws into the drawer box and cabinet. |
| Straight Edge (Plywood) | Used as a guide for drawing straight lines and ensuring accurate alignment. |
| Spacers | (For Side-Mount Slides) Helps prevent the drawer sides from skewing during installation. |
| Auxiliary Supports | (For Under-Mount Slides) Temporary supports for holding the drawer or slides during installation. |
| Adjustment Screws or Tabs | (For Under-Mount Slides) Allows fine-tuning of the drawer alignment after installation. |
Before plunging into installing the drawer slides, it is very important to organize all the needed equipment to guarantee proper performance. The basic tools you will need include a measuring tape, pencil, framing square, lumber clamps, cordless drill, straight edge, and plywood. Additionally, using a jig can be incredibly helpful in ensuring accurate measurements, precise placement of markings, and making sure that the slides are square to the drawer box and the cabinet.
Furthermore, some of the drawer slides you are using may require specific tools. For instance, when installing side-mount drawer slides, spacers often come in handy to prevent the drawer sides from skewing. On the other hand, with under-mount slides, you need to factor in the thickness of the drawer front, or plan for temporary fastening of auxiliary supports. Having the appropriate tools in place, including a jig for precise alignment, not only eliminates mistakes but also makes the entire assembly procedure as straightforward as it should be. Do not forget that proper preparation is key to success when installing drawer slides.
How to Measure for Proper Drawer Slide Alignment
Accurate measurements are a prerequisite for a successful drawer slide installation. Begin by determining the inner width of the cabinet where the drawer box will be installed, as this measurement is essential for determining the size of the drawer box and selecting the appropriate drawer slides. For example, side-mount and under-mount slides require different clearances. Therefore, it is crucial to subtract the width of the slides from the total width of the cabinet to achieve the correct dimensions for the drawer box with proper spacing.
Next, measure the dimensions of the drawer box itself. The length of the drawer box should match the length of the drawer slides. It is advisable to use full-extension slides, which allow the drawers to open completely, providing full access to the contents. However, be sure to position the drawer box slightly inward from the outer edge of the cabinet to prevent any overlap with the back of the cabinet when fully extended. Additionally, for under-mount slides, consider the thickness of your drawer front, as this will affect how much of the drawer is recessed into the cabinet. Accurate measurements ensure that your drawer slides are properly positioned, allowing for smooth and complete movement of the drawers out of the cabinet.
Step-by-Step Guide to Installing Drawer Slides
Side-Mount Drawer Slides
Step 1: Marking the Positions
To begin the process of using side-mount drawer slides, the first action to take, which enables the easy fit of the slides, involves marking the areas to be fitted with the slides. Start by measuring the height where you wish to install the slides on the inside of the cabinet for both the drawer box and the inside wall of the cabinet. Using a simple tape measure and pencil, carefully mark these points. It is crucial that both sides are level at the same height to ensure the proper running of the drawer. Drawing a level line over the side of the cabinet and the front of the drawer box to locate the side mount drawer slides can be accomplished by using a straightedge.
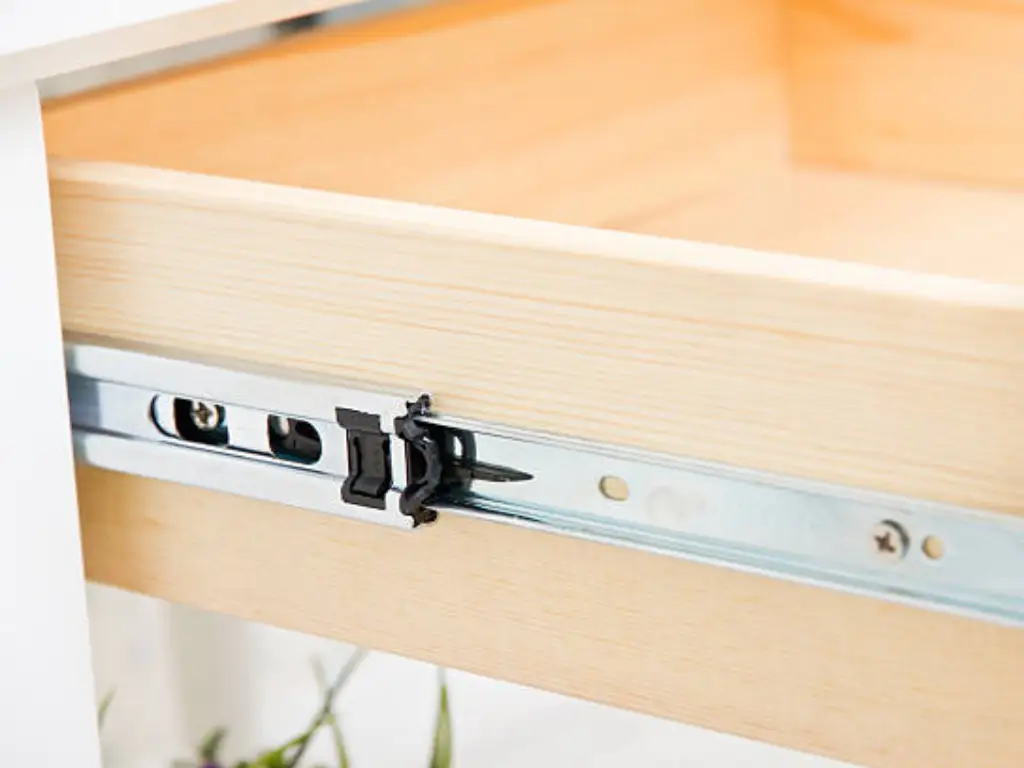
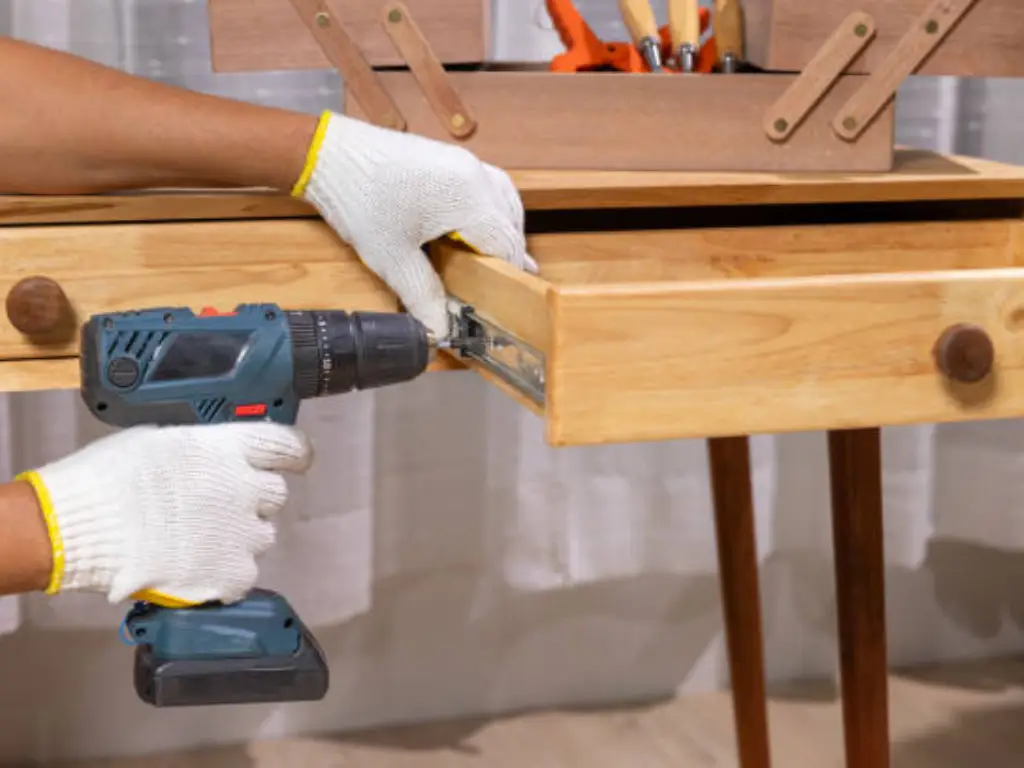
Step 2: Attaching the Slides to the Drawer
After marking their boundaries, the next step is to fix the side-mount drawer slides to the drawer box. Align the slide track against the side edge of the drawer box, making sure it is flush with the front of the drawer box. Use clamps to hold the slide in place temporarily. Then, start screwing through the screw holes on the side edge of the drawer box and the edge of the slide. Be sure to use the screws provided with the slides, as these are specifically designed for this task. Ensure that the slide is securely positioned against the side of the drawer box before fully tightening the screws.
Step 3: Attaching the Slides to the Cabinet
Having put the slides in their respective positions on the drawer, it’s high time to insert corresponding slides within the cabinet. For the case of the drawer, position the cabinet-side slide along the guide line mark drawn previously. Make adjust the slide and its orientation correct. For this attention is of paramount importance to ensure that the slide is flush with the cabinet side as any misalignment may jam the drawer if it is not, or make operational activity of poor grade.
Step 4: Inserting the Drawer
The final task is to fit the drawer inside the cabinet once the two parts of the slides are fixed in position. Make sure the drawer-side slides are inserted into the cabinet-side tracks and then push the drawer towards the right place to the side. The drawer should be firmly placed on the tracks and should move without any restrictions provided there are no discrepancies in placing the drawer within the fixing frame. The next step involves taking out the drawer completely and putting it back if it were to stick at one point for example. If the drawer gets caught while sliding on the adjustment track, it is highly recommended that the position of the drawer needs to be adjusted correctly.
Under-Mount Drawer Slides
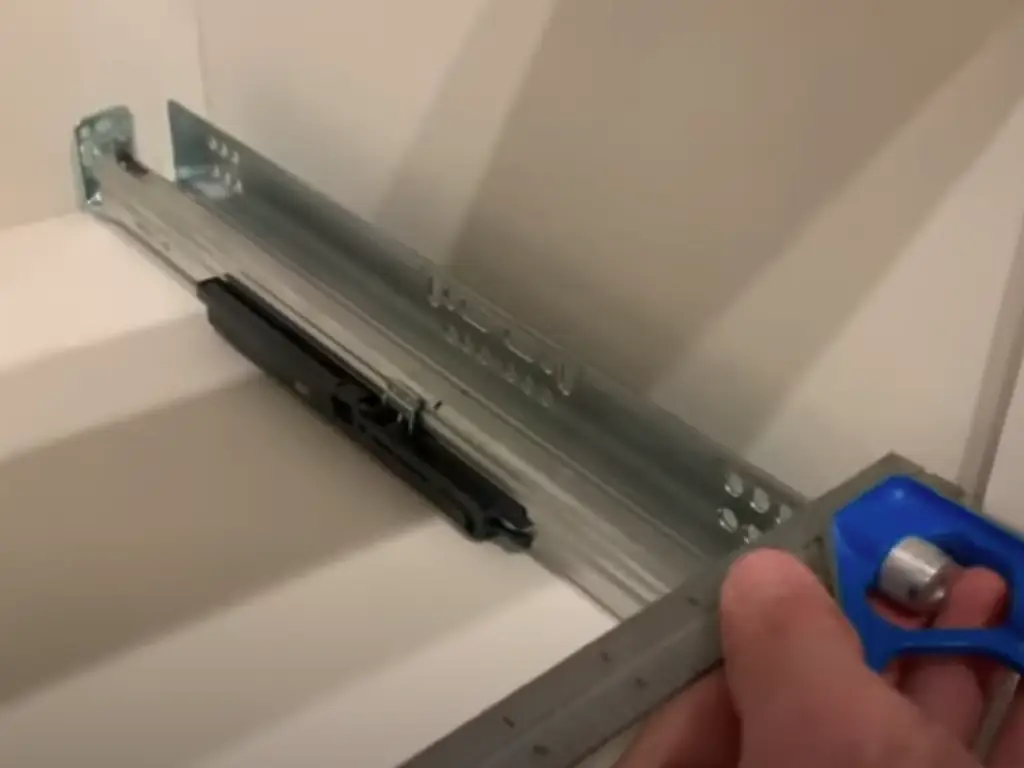
Step 1: Installing the Slide Brackets
The positioning of the slide brackets need to be done meticulously in the cavity for under-mount drawer slides. First of all, the screws are located at the base of the cabinet; do not forget to keep them in horizontal and vertical alignment. Check the horizontal position of the brackets with the help of a level. At the same time, these brackets have to be secured with screws without any lagging as they will be bearing the load of the drawer. Thus the under-mount slides work on proper fitting of the brackets.
Step 2: Attaching the Slides to the Drawer Box
Now it is time to turn the drawer box inside out. When the drawer box is complete, the assembly of the drawer-side components of the slides is in order, wherein the components are situated along the lower edges of the drawer box. These should adequately fit at the lower edge of the drawer and also run parallel to the sides. Mark with a pencil the spots of the screws, and make pilot holes to avoid the wood getting split. With great caution, the slides are mounted on the drawer box using the metal screws supplied for the purpose and ensuring that proper orientation and alignment is observed in this tutorial.
Step 3: Aligning and Securing the Drawer
Once the slides have been secured on the drawer, the next process is reaching out to smith pending or fixing the fitting of the drawer with the cabinet brackets. This process is very delicate because the drawer has to interact with the slides in the right manner so that it slides properly. Pull the drawer in and make sure that the slides have been fitted properly into the brackets and have been locked. As the drawer goes back, you might have to adjust its position such that it is well fitted into the cabinet. After positioning the drawer, try opening and closing it without any snags.
Step 4: Final Adjustments
At times, after placing the drawer back into position, it may become apparent that the adjustments are essential in order to ensure best performance. Anti-tip brackets and leveling feet are commonly used with chest of draws in which you only need to make adjustments to after a removable drawer has been fixed. It is possible to carry out these adjustments to correct some deficiencies so that the drawer fits perfectly at the front of the cabinet. If you want to confirm that the installation was positively completed, try opening and closing the drawer a number of times. Make sure that it operates silently and does not have any jerks.
Center-Mount Drawer Slides

Step 1: Marking the Centerline
Installing the center-mount drawer slides typically begins with marking the centerline on the underside of the drawer box. This is where the slide is positioned and helps to keep it centered. Measure the centre point of the drawer box and extend the line till the bottom length to mark a horizontal line. In the same manner, mark the centerline at the inside bottom of the cabinet where the drawer will be housed. Making accurate markings is critical in working with the center-mount slide.
Step 2: Attaching the Slide to the Drawer
Align the center-mount slide at the center of the bottom of the drawer box. The slide should be parallel to the ground so that it slides straight down the middle. Screw the slide temporarily in place using clamps and then drill pilot holes where the screws are to be fixed. Screw the slide to the drawer box, ensuring that it is well fixed and well aligned to the drawer box. This will make sure that the drawer will run smoothly without tilting to one side of the other.
Step 3: Installing the Track Inside the Cabinet
After preparing the slide, efforts should be made to ensure that the track is secured inside the cabinet. Prepare the track and ensure it is fitted correctly at the bottom centerline you had prepared previously, line in the cabinet’s bottom. The track should sit squarely and straight with no deviation from the center. Use screws to fix the track in place ensuring that the track is not shaking or moving in any way. This track will be beneficial for the smooth operation of the center-mount slide and therefore stability on it is essential.
Step 4: Inserting the Drawer
Once the track has been inserted, the next step is to place the drawer into the cabinet insert and the slide into the track. When centermount slides and centre-mounted cabinets are fitted properly, the drawer should merely push into position. Test the drawer first by pulling it outwards and then pushing it back into the cabinet to see if it can be operated seamlessly. If the magnetic drawer follows the rail but doesn’t glide easily, there might be a problem in alignments. The alignment of the central mounting slides is critical to its smooth functionality.
Bottom-Mount Drawer Slides
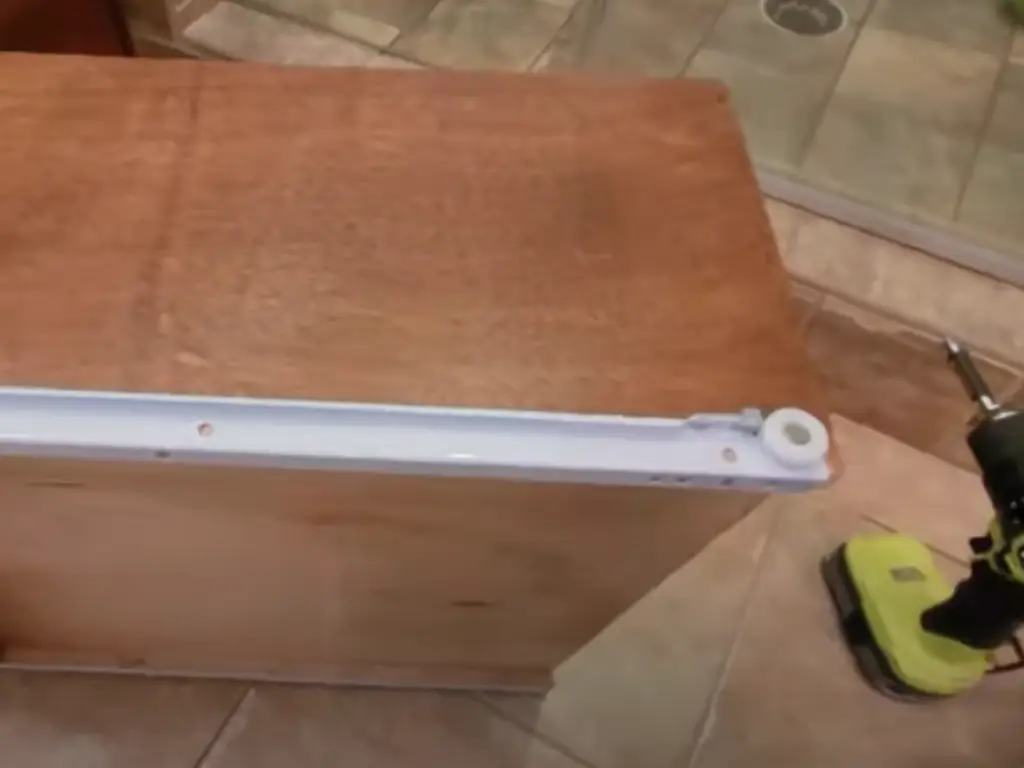
Step 1: Positioning the Slides on the Drawer Box
When starting the installation of bottom-mount drawer slides, place the slides at the bottom of the drawer box. The bottom of the slides should be level with the bottom and should run the full length of the drawer. With a pencil, draw circles around the positions where the screws will be placed to make sure that the slides are aligned to the sides of the drawer. Pre-drill the holes for the screws to ensure that the wood does not crack and then screw the slides to the bottom of the drawer box.
Step 2: Attaching the Slides to the Cabinet Bottom
Then, position the cabinet-side parts of the slides at the bottom of the cabinet where the drawer is to be placed. These slides should be placed in such a way that they are in line with the cabinet sides and at the same level. Locate the positions for the screws, drill holes for the pilot screws and firmly attach the slides to the bottom of the cabinet. It is important to ensure that the slides are flat and well aligned in order to achieve a smooth operation of the drawers.
Step 3: Aligning and Inserting the Drawer
Ensure that the slides are fixed on both the drawer and the cabinet, then properly position the drawer on the cabinet slides. Pull the drawer in until it is flush with the cabinet and ensure that it locks into the cabinet slides. The drawer should be able to slide in if the slides are well fixed and aligned in the right manner. Check the smoothness of the drawer by opening and closing it and making sure that it does not stick or wobble when in use.
Step 4: Securing and Testing the Installation
After the drawer has been installed, make sure that all the parts are well aligned and fixed in the right position. If the drawer does not glide smoothly, then make any required modifications to the slides. After the installation, open and close the drawer to check whether the test is successful or not. Correct installation of bottom-mount slides guarantees that the drawer is stable and does not make any noise when being used.
How to Adjust Drawer Slides for Smooth Drawer Operation
One last but crucial step is to adjust your drawer slides for proper functioning even after the installation process. If the drawer is not sliding out with ease, the first step is to check the alignment of the slides. Even very slight misalignments can cause the drawer to get stuck or not shut completely. Use a square and straightedge to ensure the slides are level and properly aligned. If the drawer is very tight inside the cabinet and difficult to slide, try loosening the screws and adjusting the angles slightly until it moves smoothly.
For under-mount and center-mount slides, you may need to adjust the height or depth of the channels located on the slides. Many under-mount slides, especially in frameless cabinets, have adjustment tabs that allow you to fine-tune the fit of the drawer without removing it entirely. If you’re working with a face frame cabinet, be mindful of the bracket positioning to avoid placing them too close to the side of the mount drawer. Additionally, consider the weight the drawer will carry; drawers bearing much weight may require extra adjustments to ensure they glide smoothly. Proper adjustment ensures that your square drawers move easily and silently, performing as they should.
Common Mistakes to Avoid When Installing Drawer Slides
Inaccurate measurement is one of the most common mistakes that people tend to commit while installing drawer slides. If the measurements taken are not accurate, the slides will not be in the correct position and the drawer will either be too loose or may jam whilst operating. So, to avoid that, you should always insure that you measure twice before you cut or drill any holes. It is even more critical with full extension ball bearing drawer slides which require an accurate installation to operate properly. A step by step guide will help you in the process of measurement in case that proves to be a challenge.
Another frequent blunder is neglecting to put in spacers when attaching side-mount slides. Using spacers is indispensable in these applications to make sure that the slides do not go deeper in the mounting hardware and bottom out the drawer inside the cabinet. For ball bearing drawer slides, it is especially important due to the fact that if they are installed wrongly, their movement will be difficult.
Another problem here is over-tightening screws making the slides or the drawer box tightening them leading to even worse drawer sliding. To prevent this from happening, it is necessary to turn the screws lightly but do not overdo the compressing of the materials. Last but not least, taking for granted the levelness of the drawer can lead to a drawer that either sticks out and won’t close properly or is simply a pain in the ass to open. Use a leveler to make certain the slides are parallel. By avoiding these common mistakes, you’ll save time and energy, achieving a professional-looking installation that allows your drawers to glide effortlessly.
Troubleshooting Issues with Drawer Slide Installation
In case you experience some issues with your drawer slides, here are some things that you can do. First, make sure that the slides are properly aligned. One of the main reasons for the problems with drawers is the misaligned slides. To ensure that the slides are parallel to the drawer box and the cabinet use a square. If the slides are misaligned, then the screws should be loosened, the position of the slides changed and the screws tightened again. If it is hard to open or close the drawer, check the slides for anything that may be rubbing against them.
Another problem could be that the drawer box is not square and this can lead to the slides becoming restricted. In this case, you may have to plane the drawer box or use spacers to bring the drawer back to the right alignment. In the case of under-mount slides, it is recommended that the slides are secured in place with the locking mechanisms of the drawer. If the drawer is sagging, ensure that the bottom-mount slides are properly installed and that the drawer is not filled with too much stuff. If these problems are solved as soon as possible, then your drawers will work fine.
Maintenance Tips for Long-Lasting Drawer Slides

Cleaning your drawer slides is crucial in the maintenance and goodwill of the drawer slides and thus, the inclination to use them for long. It is good practice to clean the slides from dust, debris and food waste on a periodic basis as they can build up with the passage of time. For ball-bearing slides from time to time consider applying a substance which is thankfully from silicone and that would prevent the slides from getting stuck. Avoid using oil-based lubricants, as these can attract dust and grime.
Periodically check whether your drawer slides are steady in their operations and whether there are indicators showing the wear and tear of some parts. Any form of metal slides maintenance capacity should include addressing any form of rust and corrosion if they appear. It can also be wise to inspect screws, and the brackets they’re mounted in. Screws usually need to be tightened since they may lead to disalignment causing problems during drawer functionality as well as being ineffective. By doing these repairs and maintenance you will be increasing the lifespan of the drawer slides as well as returning them to use as new.
Conclusion
Drawer slides installation may sound like a wiring problem, yet this is a workable task for even novices with the right techniques. It is critical to learn about the various kinds of drawer slides and their right installation techniques in order to obtain professional quality. From side-mount to under-mount, although each type of slide has its unique mounting method, certain principles such as accurate measurement, care in alignment, and the like are followed in every slide installation.
As long as you avoid the common mistakes made when assembling the units and you stick to the simple instructions, you will ensure your drawers operate smoothly and serve you for quite a number of years. Maintaining the slide’s quality will also require occasional upkeep of the components after mounting them on the doors. New ones or old ones this guide will guide you to do it as a professional handyman. Therefore, you need to grab your tools, spare some time, and get the maximum satisfaction from a job well done.
Maxave: Your Go-To for High-Quality Drawer Slides
Whatever type of drawer slides your project requires, Maxave offers top-quality solutions. We specialize in producing a variety of side-mount, under-mount, and center-mount slides to meet diverse project needs. Choose Maxave for smooth, durable drawer operation. Contact us today to learn more about our products.


