Introduction
If you’ve ever stood back and admired your kitchen’s cabinetry, you know that the seamless alignment of doors is the secret to a polished look. But did you ever stop to think, “How do I measure cabinet hinge overlay?” As a seasoned woodworking expert, let me guide you through the steps of getting those cabinet doors to sit perfectly. The hinge overlay is the cornerstone of cabinet aesthetics and functionality, whether you’re installing new cabinets or giving your old ones a fresh lease on life. It determines how your cabinet door lays in relation to the cabinet frame, and yes, even a millimeter’s discrepancy can throw off the entire alignment. But don’t fret! With the right tools and know-how, getting your overlay measurements spot-on is easier than you might think.
In this article, I will guide you on all the aspects that you need to understand on how to measure cabinet hinge overlay. We will explain various overlay types, from full, half, or inset, and the range of hinge types that may be involved. Here is a guide that will help you measure hinge overlay like a professional. In addition, we will briefly discuss the basic tools and guidelines that will help to make the measuring process easier and prevent such mistakes that can result in improper fitting of the cabinet doors.
What Is Cabinet Hinge Overlay?
Cabinet Door Hinge Overlay, while appearing rather technical, is actually easier than it sounds. It represents the part of the cabinet door that overlaps or covers the face frame. That little extension beyond the edge of cabinet framework when closing your cabinet’s door – yeah, that becomes an overlay. The entire appearance and functionality of your cabinetry can be affected by different designs and styles of overlay doors depending on your cabinets. We have to be very precise when measuring for door overlay as a means of ensuring visual symmetry as well as avoiding any collision between them during opening and closing.
When you dive into measuring overlays, you will come across terms like ‘full overlay’ and ‘partial inset’. However, these aren’t just fancy names as they refer to differing amounts of overlay which are significant in picking the right hinge and obtaining a perfect fit. If wrong hinges or incorrect measurements of overlay are used, doors can be misaligned leading to an unseemly lopsided look when they are closed or even damage when operated. Consequently, we begin our quest towards a flawless kitchen excursion with what is cabinet door overlay?
Different Types Of Cabinet Hinges
| Hinge Type | Description | Typical Application |
| Full Overlay | Door covers almost the entire cabinet frame. | Modern, seamless look. |
| Half Overlay | Door covers part of the cabinet frame. | Common in double door cabinets. |
| Partial Overlay | Allows some of the frame to be visible. | Traditional kitchen style. |
| Inset | Door sits entirely within the frame. | Offers a clean, tailored appearance. |
- Full Overlay Hinges: These let the door cover almost the entire cabinet frame for a modern, seamless look.
- Partial Overlay Hinges: These allow part of the cabinet frame to be visible, a common feature in many kitchens.
- Inset Hinges: These are used when the door sits entirely within the frame, offering a clean, tailored appearance.
- Half Overlay Hinges: A midway option between full and partial, found often when two doors share a single cabinet side.
‘’With Cabinet hinges, it’s like the pandora box is opened for you.’’ But don’t worry; I’ll go through different types of cabinet hinges that you might find during your measure overlay quest as an insider. It is important to familiarize yourself with these since each type affects how to measure hinge overlay. They are “full overlay” where the door conceals almost the entire cabinet frame, “partial overlay” where the door permits some parts of the frame to be seen, and “half overlay” which is a balanced choice where the door covers half of the cabinet frame, allowing two doors to share a single cabinet side without interference. Additionally, there’s also “inset” – a type of cabinet hinge in which a door fits snugly inside an opening defined by its frame – each one has its own way of being dealt with when measuring cabinet overlay.
Different types of cabinet hinges are needed for these various overlays to reveal cabinet frames as desired and allow doors to close smoothly. A case in point is the full-overlay hinge which helps the door to hide the majority of the frame, whereas a partial-overlay hinge, on the other hand, allows the door to recede slightly, thus exposing more of the frame. Half overlay hinges provide an excellent middle ground, giving a modern appearance without the complexity of full overlay installations. As you can see; it is important that you choose the right kind of hinges- whether it’s half overlay or inset or even full ones- for your cabinets. In this case, what matters is cabinet door overhang; therefore selecting an appropriate hinge will save you from dealing with doors that shut incorrectly and hang crookedly all around.
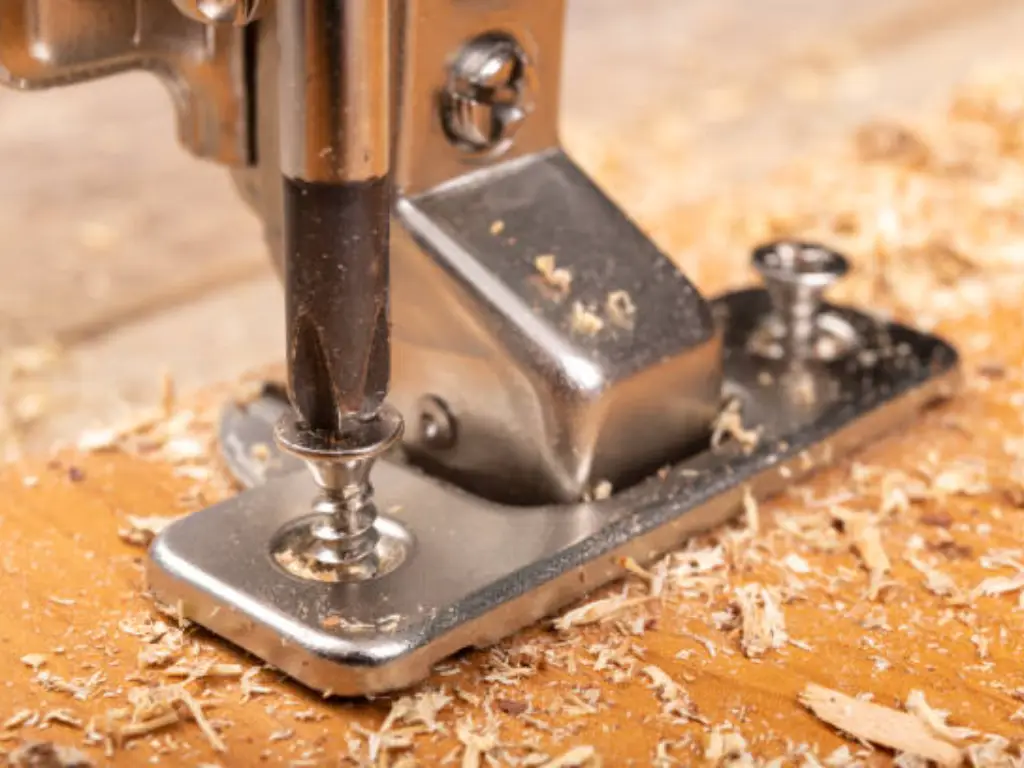
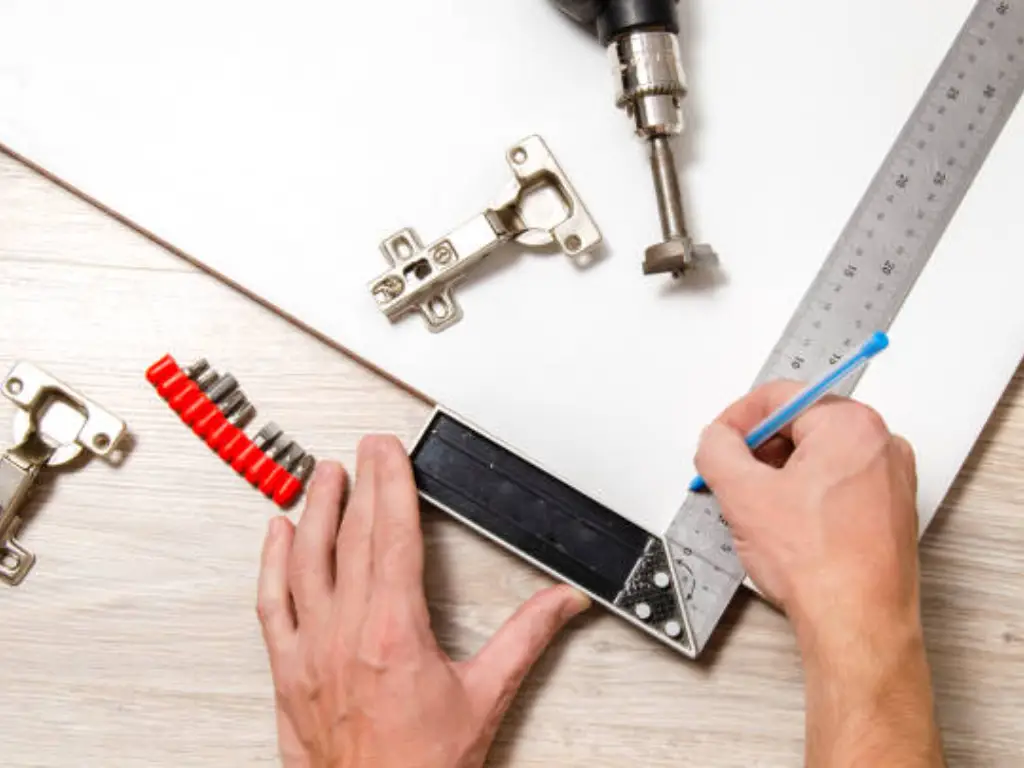
Tools Needed For Measuring Hinge Overlay
I’ve been a craftsman for a long time now, so I’ll let you in on something – the secret to overlay measurement accuracy lies in using right tools. Before starting to measure overlay hinges, take your time and gather all your weapons. It is not necessary to have many tools; all you need is just a good tape measure or ruler, maybe some tape to help mark the distances out and a pencil for most jobs. Most of the time, the golden rule when doing cabinet overlay measurement is having clear and precise measurements. These simple tools help you adhere to them.
But hold on, sometimes even such simplest things as masking tape can be of great assistance. By attentively attaching the tape along the door’s edge and that of the cabinet frame you make an apparent line that can offer guidance while measuring it up. Oh yes, don’t forget about paper or digital devices which are useful since they record important numbers; you wouldn’t want any missing number that resulted into doubling measurements? Be armed with those ones before embarking on this task. Nevertheless, before we begin measuring cabinet overlays bear in mind that patience and thoroughness are key-precision is everything here!
Step-By-Step Guide
Are you ready to embrace the challenge of how to measure the overlay area for a cabinet hinge? Get your hands dirty because we will be going deep into the heart. First things first, make sure that all tools are in place. Do you have a tape rule? Yes! Masking tape? Check. Pencil and paper? Now, with just a few other items in place, you will be ready to start measuring, I guarantee this is child’s play once you have learned the ropes!
| Step | Description | Instructions |
| Step 1 | Identify Your Cabinet Hinge Type | Locate the hinge side of the door where the hinge is positioned.Note the type of overlay (full, half, or partial inset doors). This will help guide you on how to measure effectively. |
| Step 2 | Understanding Overlay Specifications | Learn the specific overlay specifications related to your hinge type.Understand how far the door extends beyond the cabinet frame to determine where to measure from (e.g., hinge side or another reference point on the closure mechanism). |
| Step 3 | Align And Secure The Cabinet Door | Ensure the door is correctly aligned with the cabinet’s frame.Use masking tape to secure the door if necessary to prevent any skewness during measurement. |
| Step 4 | How To Measure Cabinet Hinge Overlay | Full Overlay Hinges: Close the door, measure from the inside edge of the frame at the hinge mounting position to the outer edge of the door.Half Overlay Hinges: Measure from the middle of the hinge cup on the door to the closest part of the frame.Inset Hinges: Measure from the opening of the frame to the exterior part of the hinged door.<br>- Partial Overlay Hinges: Measure the space from the edge of the cabinet frame to the edge of the door.Ensure the tape measure remains parallel for accurate readings. |
| Step 5 | Record Your Overlay Measurement Precisely | Record the measurements carefully.Use a pencil to mark the tape where measurements are noted.Write down the numbers precisely.These measurements are crucial for selecting the right hinge, ensuring a smooth, invisible closing system and perfect alignment. Double-check for accuracy. |
Step 1: Identify Your Cabinet Hinge Type
You can start by locating the hinge side of the door. Your cabinet’s hinge is positioned here and this is why it becomes very important to establish its location before knowing how to measure hinge overlay for a cabinet. Some of them have full, half or partial inset doors which might confuse you in terms of measuring them. Examine your hinges first they will guide you on how to get accurate measurements that we aim at.
Step 2: Understanding Overlay Specifications
The next step is to familiarize yourself with overlay specifications that correspond to the hinge type you have identified. These may appear complicated, but, in short, they indicate the overlay amount—that is, how far the door extends beyond the cabinet frame. In this regard remember that information is power because when it comes to determining cabinet overlay dimensions being able to easily recall specifications off by heart greatly helps at all times. This helps decide whether one should measure from the hinge side or from any other point of reference on the closure mechanism.
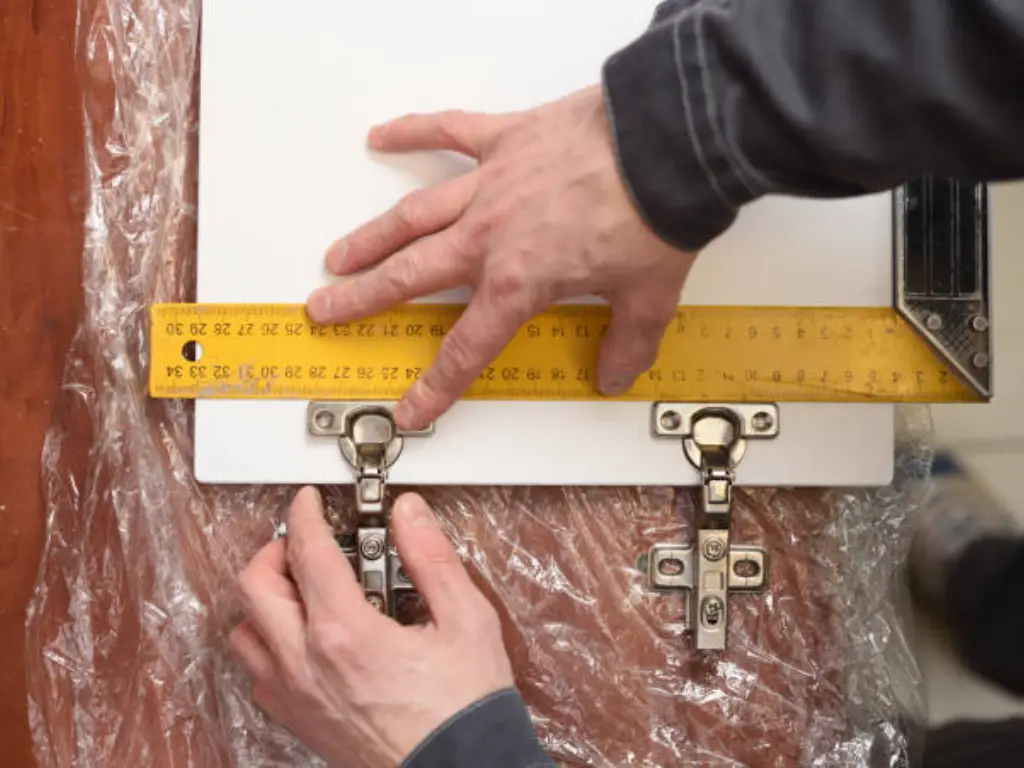
Step 3: Align And Secure The Cabinet Door
Before commencing the measurement, ensure that the door of the cabinet is well positioned as per the cabinet aperture. This is not a time to mess up because even a slight skewness in your door can ruin your overlay measurement. If necessary, employ some masking tape to fasten it in its rightful position. It’s all about setting that perfect stage for a measurement show that ends with applause rather than “back to the drawing board.”
Step 4: How To Measure Cabinet Hinge Overlay
- Full Overlay Hinges
For excellent measurement outcomes with the Full Overlay Hinges, one cannot ignore precision. Begin by closing the cabinet door so that it aligns exactly with the frame. Laying out your tape measure from the inside edge of the cupboard frame at the hinge mounting position to the outer edge of your door gives you this measurement. It is also revealing on how much of a gap exists between an overlay size and a door’s extension beyond cupboard frames. Make sure this figure is recorded because as we will see later in this post, it determines what kind of hinge to attach for that sophisticated frameless look which is mainly void of any visible impression from where it was hinged on the main body.
- Half Overlay Hinges
In Half Overlay Hinges, the process requires the observation of how the door fits into the frame and how it fits with the adjacent doors. Start by determining the middle of the hinge cup on the door. Stretch your tape measure from this point to the closest part of the frame of the cabinet. This distance represents the overlay, which is usually half of the frame of the cabinet. Make sure that the tape is aligned properly and parallel to the ground for better results. Take down this distance accurately because it will determine the right hinge that will enable the door to open and close without hitting the other doors.
- Inset Hinges
Calculating for Inset Hinges requires gauging how much the door recesses into the cabinet frame. Close up your cupboard’s door and extend a ruler from the opening of its frame to the surface of the closed door so as to be in even with it. Start your tape measure at innermost edge of your frame and go to the exterior part of the door where the hinge is going to rest on. It helps you know how far back it’s set and has to be exactly right for that chic seamless look when you close with it straighten out.
- Partial Overlay Hinges
Measuring for partial overlay hinges is something that calls for keen eyes. For starters, close the cabinet door and look at the space you observe between the edge of the door and your cabinet frame; that is your overlay. The next step is to take a tape measure’s hook and place it right on edge of the cabinet frame, then go over to the door’s edge; this will be your overlay measurement. Make sure that your tape measure remains parallel to the edge in order to make an accurate reading. Usually partial overlays provide for 1-inch overlays but double-checking with relevant cabinetry information ensures an exact match and trouble-free operation.
Step 5: Record Your Overlay Measurement Precisely
Record your findings upon measuring. Use a pencil to leave sharp marks on the tape showing where measurements are noted, then write down the numbers in full. For standard overlays or custom scenarios, these exact measurements are important for a tailor made appearance and they serve as a blueprint for selecting the right hinge which will allow an invisible closing system and perfect alignment. These figures should be recorded correctly because it affects the cabinets’ overall look and style which makes it possible for them to fit well in your home. Always double check yourself to make sure you have obtained accurate dimensions before finalizing on them.
Adjusting Hinges For Perfect Alignment

Have you ever thought about the secret sauce for those seamlessly aligned doors of cabinets? I will tell you—it’s in tweaking. You’ll be ahead with your exact measures. But it is knowing how to tweak these hinges in order to make them fit like a glove that makes the difference. It is an artistic skill of slight changes to depth, side, or height screws which ensure perfect positioning. Sometimes all it takes is a mere twist of the screw to correct hinge alignment. Your tape method measurements are just your starting point; however, adjusting and fine-tuning your hinges is key.
Remember, in this dance tune adjustment, the tape measure becomes your partner. Depend on its accuracy, recheck overlay size if necessary, and wait for some time. Use a pencil mark to note the exact positions. As much as one may need to adjust their hinge in order to meet their overlay amount several times before they get it right, this can be likened to learning new steps in dancing. Once done correctly though, it results in a perfectly well-coordinated kitchen waltz. Therefore, go ahead and embrace overlay adjustments so that you can see your cabinet doors swinging shut with grace and precision. Ensure to align the edge of the tape correctly to maintain consistency in your measurements.
Tips For Accurate Overlay Measurements
Consider measuring cabinet overlay. It is complicated but here are some tips that will help you achieve the right measurements which result in professional look. The first thing to do when taking measurements is ensuring that your tape measure or ruler is lying flat on the surface to give an accurate reading. Even the slightest tilt can throw off a measurement. Employ masking tape or painter’s tape temporarily for reference—think of it as leaving signs before departing so as to find back easily to an exact measurement.
You can also use digital measurements for even more accurate results. There is also the golden rule: you always need to measure twice or thrice before making any cuts or changes. Simply like the culinary proverb, “Measure twice, cut once,” but here if it were onions that chance of cutting off too many would alter the symmetry of your cabinetry. Also take note of things like how thick a piece of tape is or whether there are any layers of paint which might affect how wide and deep you are measuring.
Common Mistakes To Avoid
The world of do-it-yourself (DIY) is very stringent, since a little carelessness could result to a major mishap. Avoid common mistakes such as the use of tape measure that is worn out or bent—accuracy may become an issue if your instruments are compromised. Don’t ignore standard overlays norms like assuming all “full” overlays are the same; there are variations, and overlooking them can cause regretful errors. Also, failing to consider the closing mechanisms and other added accessories might hinder how well the cupboard functions.
The greatest mistake, maybe? Hurrying the work. Take as much time as you need to perform it thoughtfully. The overlay measurement is not a competition. Additionally, do not fall prey to thinking that your cabinets are all the same size, this is wrong. One has to check numerous doors in case of old homes where time may have brought about a change in position. In conclusion, don’t underestimate the value of selecting the right kind of hinge because it’s just as important as measuring itself—no craftsman or homeowner wants to see a misaligned door due to an error with hinges.
FAQ About Measuring Cabinet Hinge Overlay
Q: What does a 1/2 inch overlay hinge mean?
A: A 1/2 inch overlay hinge means that when the cabinet door is closed, it extends over the side of the cabinet frame by 1/2 inch. This precise measurement ensures that the door aligns correctly with the frame for a clean, uniform appearance.
Q: How to determine overlay hinge size?
A: To determine the hinge size, you’ll need to measure the distance from the edge of the cabinet opening to the edge of the door when it’s closed. This distance is the overlay, and knowing it allows you to select a hinge that accommodates this specific overlay measurement.
Q: How do you measure overlay on cabinet hinges?
A: Measuring overlay on cabinet hinges involves three steps:
Close the cabinet door and determine if you have a full, half, or inset overlay.
Place the beginning of your tape measure at the edge of the opening or the frame of the cabinet (not the door), depending on the type of overlay.
Measure the distance to the corresponding edge of the closed door to find the overlay. For full and half overlay hinges, measure to the door’s outer edge; for inset hinges, measure to the door’s inner surface.
Conclusion
Being able to measure cabinet hinge overlay is a skill that every cabinet redefining Robin Hood must have in his toolbag. Though it might appear like a minor thing, its importance on the functionality and beauty of your space is colossal. Understanding and executing accurate measurements is the road to achieving the ideal cabinet look, whether through full overlays that provide a contemporary finish or inset doors for a classic touch. As you walk into your kitchen armed with a tape measure and new found knowledge, remember—the difference between tolerating a room and adoring it could be just few millimeters. Therefore go well when measuring; may your cabinets always close gracefully and elegantly.


