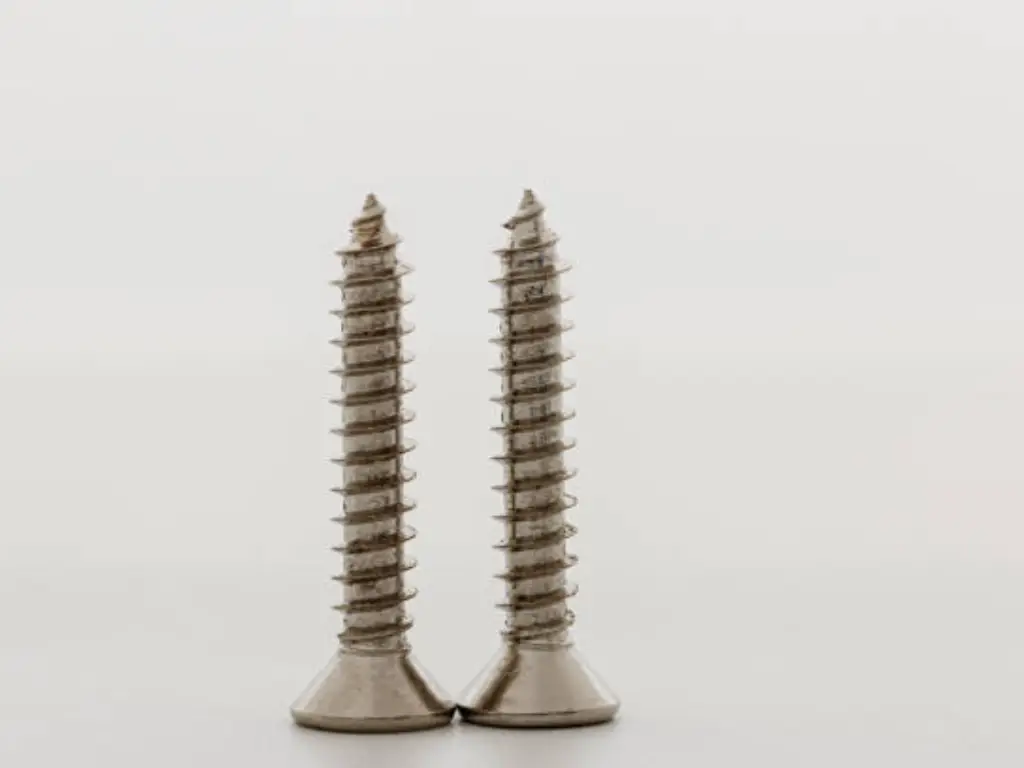
Understanding Screw Extractors: Your First Step
When facing the daunting task of how to remove a broken screw, knowing your tools is crucial. A screw extractor is akin to a superhero in the world of DIY and repairs. Think of it as the Excalibur that’s going to help you slay the dragon – or, in our case, remove that pesky broken screw. Screw extractors come in a set – often called a screw extractor set – and they are specifically designed to take out screws where the head has been sheared off, leaving no obvious way to unscrew them.

The magical thing about screw extractors is their unique design. They have a dual head: one side drills a pilot hole into the center of the broken screw, while the other side grips into this hole and extracts the screw when turned counter-clockwise. It sounds simple, but the process requires a finesse that borders on artistry. The trick is to apply just the right amount of pressure. Too little, and you won’t get a good grip; too much, and you risk further damaging the material around the screw or even the extractor itself.
Tools You’ll Need to Remove a Broken Screw
Prior to embarking upon the procedural guidelines for the extraction of a fractured screw, it is imperative to assemble the necessary toolkit. The task of removing a broken screw transcends mere physical force; it necessitates the strategic deployment of appropriate instruments. Among the quintessential tools, the screw extractor stands out for its indispensable role in fastening removal. Moreover, an electric drill is paramount for the initiation of pilot holes. Depending on the specific characteristics of the screw under consideration, the selection between a flat head or Phillips head screwdriver becomes necessary. For certain extraction techniques, the utilization of locking pliers or vice grips is non-negotiable, providing the essential traction on the screw shank. Additionally, instruments such as a hammer and a center punch are crucial for preparing the damaged fastener for extraction.
| Tool Type | Specific Tool | Purpose |
| Extraction Core | Screw Extractor | Essential for screw removal. |
| Drilling Need | Electric Drill | Initiates pilot holes. |
| Screw Engagement | Flat/Phillips Head Screwdriver | Adjusts screws by type. |
| Mechanical Advantage | Locking Pliers/Vice Grips | Offers grip on the screw shank. |
| Preparation Gear | Hammer, Center Punch | Prepares fastener for extraction. |
| Lubrication | Penetrating Oil | Loosens oxidized screws. |
| Heat Application | Heat Gun | Softens stubborn screws. |
| Precision Cutting | Rotary Tool with Cutting Disk | Creates new slots in stripped heads. |
Envisioning oneself perusing the aisles of a hardware store, it becomes apparent that items such as penetrating oil, for the amelioration of screws afflicted by oxidation, or a heat gun, for the amelioration of particularly obstinate cases, may be deemed requisite. Furthermore, for tasks demanding utmost precision, a rotary tool equipped with a cutting disk emerges as a pivotal asset. This arsenal, metaphorically akin to a treasure chest, is not laden with conventional riches but stocked with instruments embodying steel and determination. It is essential to underscore that the successful extraction of a broken screw is not solely reliant on brute strength but on the meticulous application of each tool, discerning the opportune moment for its utilization to ensure triumph in this endeavor.
Identify the Type of Broken Screw You’re Dealing With
Before you embark on the heroic quest of screw removal, you must understand the beast you’re dealing with. Is it a stripped screw head, where the screwdriver just can’t get a grip? Or perhaps it’s a rusted screw, welded to its material by time and neglect? There’s also the dreaded sheared screw, with its head snapped off, leaving an unseemly shank sticking out, mocking your efforts to remove it. Identifying your screw type is paramount, as each villain requires a different approach.
For stripped or rounded heads, the good ol’ rubber band trick or using a slightly larger size screwdriver can provide that extra grip necessary for removal. Rusted screws might succumb to the penetrating power of oils or the wrenching force of locking pliers. And for those headless horrors, a screw extractor or drilling out might be your only hope. Think of it as knowing your enemy. You wouldn’t bring a sword to a magic fight, right? Similarly, choosing the right tool and method is half the battle won.
Step-by-Step: Drilling Out a Broken Screw
Proceeding to the quintessential phase, the excavation of a fractured screw presents itself as a formidable challenge, yet, with meticulous precision and enduring patience, it is entirely achievable. Initiation of this procedure demands the precise center punching at the apex of the screw. This action facilitates a pivotal guide for the drilling process and effectively mitigates any deviation of the drill bit. Utilizing an electric drill endowed with a diminutive bit, one must commence by meticulously drilling a preliminary hole directly into the screw’s nucleus. This phase can be likened to a surgical operation, where precision reigns supreme. Upon successfully establishing a suitable pilot hole, transition to the designated extractor bit is imperative.

In this undertaking, a gradual and deliberate pace is paramount. Configuring the drill to a low velocity and setting it to reverse enhances control over the operation. Carefully navigating the extractor into the established pilot hole, applying moderate pressure, initiates the extraction process. The sensation of the extractor securing its grip and consequently initiating the removal of the fractured screw is profoundly satisfying, almost bordering on the miraculous upon first witness. It is crucial to resist the temptation to expedite the process; an overly hastened approach may compromise the newly established grip or, in dire circumstances, result in the extractor’s fracture, thus exacerbating the dilemma. The amalgamation of patience, precision, and diligent application of force is quintessential to surmount this ordeal.
Using Locking Pliers for Screw Removal: A How-To
Imagine you’re in a standoff with a broken screw, no head in sight, just the shank staring back at you, defying your every attempt. This is where locking pliers turn from tools to heroes. Start by cleaning around the screw. Steel wool can help give you a clean work surface and might just provide enough friction for the pliers to grip onto. Adjust the pliers so they clamp down tight on the screw shank. You want a good grip, but don’t turn these pliers into the Hulk; too much force, and you could damage the material around the screw or the pliers themselves.
Once you’ve locked on, it’s all about leverage. Turn the pliers slowly, counterclockwise. You might need to apply a bit of force, but here’s where you channel your inner zen. It’s less about strength and more about persistence. If the screw doesn’t budge, a quick spray of penetrating oil or a gentle tap with a hammer on the pliers can help break the bond. It’s a simple, yet effective method, especially for screws that aren’t deeply embedded.
Applying Penetrating Oils: Tips for Stuck Screws
For those screws that seem to have fused with their material over time, penetrating oils become your best friend. These lubricants work by seeping into the tiniest crevices, breaking down rust and corrosion that’s locking your screw in place. It’s a waiting game, though. After applying a generous amount of oil around the screw head or shank, give it time to work its magic. This might mean walking away for a few hours, or even overnight, to let chemistry do its thing. The patience often pays off, making the removal process smoother and less damaging to the surrounding areas.
But remember, not all oils are created equal. While some swear by WD-40, others find that homemade concoctions or specialized penetrating oils work best for their particular predicament. The key is to apply it liberally and allow it ample time to penetrate. Coupling this method with others, like using locking pliers or a screw extractor, can amplify your success rate. It’s all about layering your strategies, much like adding layers to a cake, ensuring the final outcome is as sweet as victory.
Screw Extraction without a Drill: Alternative Methods
Confronted with the predicament of a fractured screw and the absence of a drill, one should not succumb to trepidation, as the repertoire of alternative methodologies for extraction is considerably vast. A notable technique involves the employment of a standard flathead screwdriver in conjunction with an elastic band. By strategically positioning the elastic band over the apex of the screw, one can significantly enhance the friction between the screwdriver and the screw, thereby facilitating a grip sufficient for the operation of extraction. This approach, while seemingly rudimentary, has proven time and again its efficacy in resolving what may initially appear as insurmountable challenges.
In scenarios where the screw shank remains visible and accessible, the application of locking pliers emerges as an invaluable strategy. This method necessitates the exertion of physical effort, yet its effectiveness in securely grasping and subsequently maneuvering the screw from its lodged position is indisputably potent. Moreover, in instances where the screw’s immobility can be attributed to oxidation or corrosion, the targeted application of thermal energy via a soldering iron or heat gun may induce a minor expansion in the metallic composition of the screw. This thermal expansion can substantially alleviate the extraction process. It is imperative, however, to proceed with utmost caution to mitigate the risk of thermal damage to the adjacent materials, moving carefully to ensure a strategic resolution is achieved without collateral degradation. Employing these alternative techniques can dramatically alter the outcome in situations where conventional tools are unavailable, showcasing the power of innovation and adaptability in overcoming mechanical adversities.
Leveraging Rubber Bands for Extra Grip
Rubber bands might just be the unsung heroes in the realm of DIY and repair. Their utility in extracting screws, particularly those with stripped heads, is invaluable. Placing a rubber band between the screw head and your screwdriver can provide the necessary friction to get a good grip on a stripped screw. This method enhances the grip, allowing you to apply the necessary torque to unscrew it. It’s a simple trick, but its effectiveness is undeniable, turning frustration into relief as the stubborn screw finally gives way.
This technique works wonders not just for stripped screws but also for screws with damaged heads where the screwdriver can’t catch properly. It’s a testament to the ingenuity found in everyday objects, proving that you don’t always need high-tech tools to solve common problems. Whether you’re dealing with stripped screw heads or just need that extra bit of grip, reaching for a rubber band might just be the clever, low-tech solution you need.
Chemical Aids: Loosening Screws with Household Items
In instances where conventional penetrating oils are unavailable, or an expedient resolution is sought, one may find efficacious solutions within the confines of typical household provisions. Substances commonly found in the culinary or sanitation areas of a domicile, such as vinegar or lemon juice, possess inherent acidic properties capable of undermining the structural integrity of rust. This characteristic renders them as commendable substitutes in the facilitation of screw loosening procedures. The application of these agents in proximity to the afflicted screw, followed by a period of inactivity, can effectively dissolve the oxidative bonds responsible for the screw’s immobilization. Although this strategy may not deliver immediate results, its potential to significantly ameliorate the condition over a duration should not be underestimated.

For individuals inclined towards a more assertive approach, the synthesis of a paste from baking soda and water presents another viable strategy. The deliberate application of this concoction around the screw head, permitting it adequate time to cure, initiates a chemical reaction conducive to the loosening of the screw. Utilizing this method in conjunction with mechanical tools such as a screwdriver or pliers can substantially elevate the likelihood of success. This approach underscores the principle of ingenuity, highlighting the fact that oftentimes, the most potent instruments at one’s disposal are those entrenched in everyday utility.
The Glue Trick: Securing Bits to Stripped Heads
Confronted with the troublesome scenario of a stripped screw head, where traditional extraction techniques prove inadequate, the innovative utilization of adhesive materials emerges as a resourceful stratagem. Indeed, the application of cyanoacrylate adhesive, commonly referred to as super glue, constitutes a judicious interim solution to augment the engagement between the extraction tool—be it a screwdriver or a drill bit—and the compromised screw head. One must exhibit meticulous care in administering a mere droplet of the adhesive onto the apex of the extraction tool, subsequently aligning it with precision against the screw head until the adhesive solidifies. This procedure culminates in the establishment of a temporary, yet robust, linkage between the tool and the screw, thereby facilitating the exertion of the requisite torque for screw removal.
The successful implementation of this technique is contingent upon the practitioner’s dexterity and patience, ensuring that an excessive quantity of adhesive does not inadvertently affix the tool to the screw head, an occurrence which would unduly exacerbate the complexity of the extraction endeavor. Additionally, it is imperative to select an adhesive that possesses sufficient tensile strength to maintain this temporary union, yet can be removed post-extraction without inflicting damage upon the surfaces in question. This inventive tactic underscores the importance of adaptive problem-solving skills, demonstrating that venturing beyond conventional methodologies can indeed yield efficacious solutions to challenges that initially appear insurmountable.
Cutting a New Slot: Using a Rotary Tool
In instances where conventional attempts have been exhausted and the integrity of the screw head has been compromised beyond the feasibility of engagement, the deployment of a rotary device, armed with a cutting disc, emerges as an indispensable solution. This sophisticated apparatus is adept at inscribing a new groove atop the compromised screw, thereby facilitating the accommodation of a flathead screwdriver. This process not only resurrects the possibility of unscrewing but also underscores the paramount importance of precision to ensure that the newly crafted slot is devoid of irregularities that could potentially mar the adjacent material.
This technique proves exceptionally efficacious for screws whose heads have suffered extensive damage, rendering traditional extraction tools ineffective. It necessitates meticulous manipulation and unwavering control, yet the gratification derived from rejuvenating a fastener that seemed irrevocably seized is indeed profound. This method serves as a vibrant testament to the innovative spirit and relentless determination characteristic of individuals devoted to the realm of do-it-yourself endeavors, adeptly converting formidable challenges into feasible tasks.
Destroying the Screw: When to Drill It Out
Sometimes, the only way out is through — quite literally when it comes to removing a broken screw. When the head is damaged beyond recognition, and no extractors, pliers, or chemicals make a dent, drilling the screw out could be your last resort. This method involves using a drill bit slightly larger than the diameter of the screw shank to carefully drill through the screw itself, effectively destroying it but freeing your material from its grasp. It’s a method that requires a steady hand and a precise eye, as you don’t want to damage the surrounding material more than necessary.
Before you start, it’s important to accept that this method is destructive. You’re not just removing the screw; you’re obliterating it. Once you drill down on the center of the broken screw, you’ll essentially be creating a new hole where the screw once was. This can be filled with a wood plug or another screw if you’re dealing with wood, or left as is if the integrity of the material allows. It’s a last-ditch effort, no doubt, but sometimes the only way to move forward is by taking drastic measures.
Finishing Touches: Cleaning Up After Removal
After the battle to remove a broken screw is won, it’s time to assess the battlefield and clean up. Regardless of the method used, there’s likely to be some residue or damage around the screw hole. Using steel wool or fine-grit sandpaper to clean up around the area can help remove any rust or debris left behind, preparing the surface for whatever comes next. If you’ve had to drill out the screw, you may find yourself with a hole that’s slightly larger than before. Depending on the situation, this can be filled with a wood plug, putty, or left as is, especially if you plan to reinstall a new screw.
This cleanup process isn’t just cosmetic; it’s also about ensuring that the integrity of the material is maintained for future work. If a new screw is going back in, it’s crucial to choose the right screws for the job. That might mean selecting a screw of a different material to prevent corrosion or using a screw that’s slightly larger to account for the enlarged hole. The aim is to leave the project not only looking good but structurally sound, ensuring that your hard work lasts.
Preventing Future Breaks: Screw Selection and Use
The adage that prevention supersedes cure holds particular veracity within the context of screw integrity, where the judicious selection and application of fastening hardware preemptively averts complications. Forethought in the selection of screws, with diligent consideration of the substrate into which they will be embedded and the environmental conditions they will endure, is paramount. For instance, external endeavors markedly benefit from the employment of stainless steel fasteners, renowned for their resilience against corrosion, whilst applications involving robust materials may necessitate screws engineered to accommodate significant loads without succumbing to fracture.
Furthermore, the precision of installation emerges as equally pivotal, necessitating the utilization of tools congruent with the dimensions of the fastener, the application of torque that aligns with manufacturer specifications, and a vigilant avoidance of over-tightening to mitigate the propensity for breakage. Occasionally, the formation of a pilot hole serves as a conduit for the seamless entry of the screw, effectively distributing stress and circumventing material compromise. This holistic approach to hardware selection and application underscores a profound respect for the integrity of both the materials and the fasteners, ensuring meticulous installation that forestalls potential complications, thereby preserving the longevity and integrity of the project at hand.
Troubleshooting: What to Do When Standard Methods Fail
Confronted with the vexing scenario where conventional techniques for screw extraction prove ineffectual, the initial course of action should entail a moment of composed reflection. Succumbing to frustration only exacerbates the complexity of the predicament. Subsequently, an evaluative reconsideration of the amalgamation of different methodologies may offer a pathway to resolution. In certain instances, the synthesis of applications—such as the adept application of penetrating lubricants, followed by the measured application of thermal energy, culminating in the strategic utilization of locking pliers—may collectively surmount challenges that each method, when deployed in isolation, could not.
In instances where an impasse persists despite the innovative layering of techniques, the engagement of a seasoned professional should be contemplated as a judicious next step. Enlisting the expertise of a specialist carries no detriment to one’s esteem but instead signifies a pragmatic acknowledgment of the limits of one’s expertise. Skilled professionals, equipped with a repository of experience and specialized tools, possess the capacity to introduce novel strategies and insights that may decisively address the core issue. It is essential to recognize that the do-it-yourself ethos encompasses not only the execution of tasks independently but also the discernment to seek external expertise when the situation mandates.
Conclusion
Learning how to remove a broken screw is a rite of passage for any DIY enthusiast. It teaches patience, creativity, and the importance of having a well-stocked toolkit. While the process can be challenging, it’s also incredibly rewarding, providing valuable lessons that apply well beyond the workbench. Whether you’re a seasoned handyperson or a novice, the key is to approach each broken screw as an opportunity to learn and grow. And remember, the next time you face a stubborn screw, you’ve got this — one twist and turn at a time.


