Understanding Screw Removal Challenges
When you try to remove a screw that has no head, it feels like the screw is making fun of you. It blocks your way to the project completion. The head of the screw is essential for application of the force. Without it, it is as difficult as trying to open a door without a handle.It’s a common problem. It occurs when the screw’s head is stripped off due to too much force, rust, or wear and tear. This problem may even prevent you from working. But, don’t worry. That a screw without a head is not the end is the first step. By making use of the correct tools and methods, you will be able to overcome this difficulty. You can do this without hurting the surrounding area or damaging the object you’re repairing.
It becomes really annoying when you see that the screw’s head has come off and other tools don’t work. This is when you should apply your ingenuity and try to find different ways to remove it. When you understand that this task is like a puzzle, it changes the way you go about it. It requires time, discipline, and understanding that you might have to use different methods to succeed. The goal isn’t to just remove the screw. It’s about doing it without damaging anything and letting you keep working on your project.
As part of the introduction to the challenge: “It’s a common problem. It occurs when the screw’s head is stripped off due to too much force, rust, or wear and tear. If rust is part of the issue, you might find this helpful guide How to Remove Rusted Screws: Top 5 Effective Methods useful for addressing it.
Tools for Headless Screws
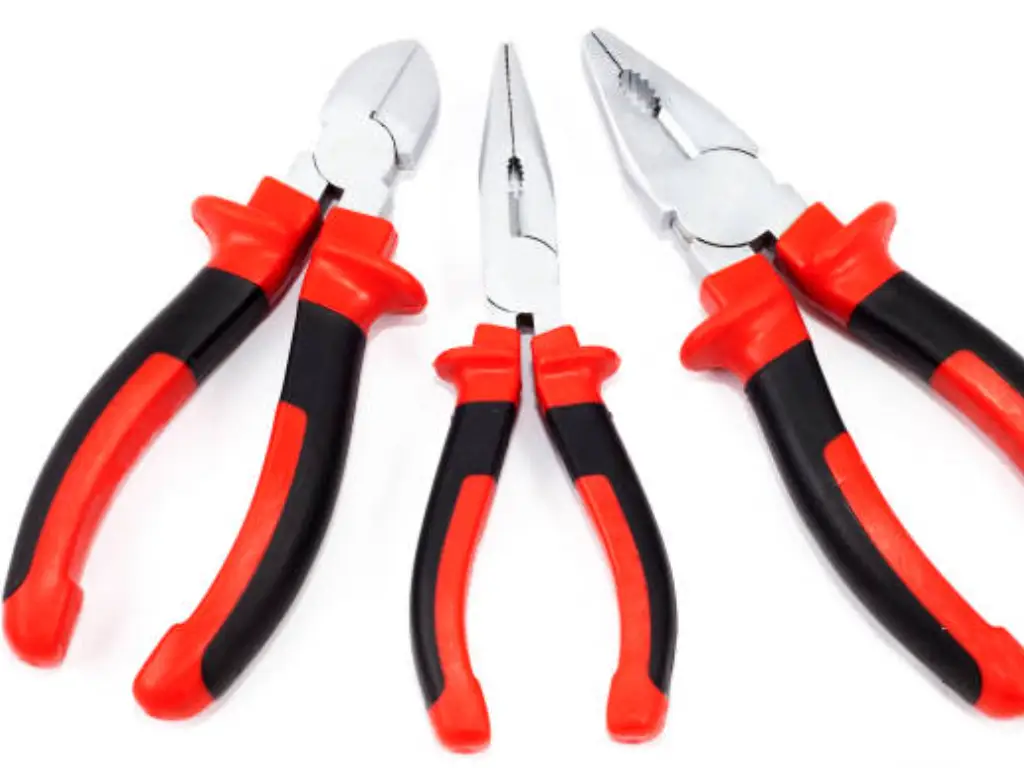
First we will discuss the tools that you might need before we talk about how to remove a screw with no head. This toolkit may not be the same as the usual one. Needed tools are pliers with lock, screwdrivers, drill bits that rotate left and some simple things like rubber bands and glue. For the screws that are hard to remove, using a welding tool or a drill machine might help. Besides that, safety equipment should not be forgotten. This includes gloves and goggles for your eyes. Every tool has its own role in the removal process. It depends on what the screw is made of, where it is, and how tight it is. If the screw won’t come out, you may need to combine methods, such as using heat or lubricants to loosen it, or drilling into the screw to make it easier to grip.
Knowing which tool to use and when is key to successfully removing a broken screw or one without a head. The tool you choose depends on the problem. It might be a screw with a stripped head in metal, a small screw broken in wood, or a big, old steel screw. Pliers help you hold on; tools to take out screws offer accuracy; drill bits dig out the inner part of the screw, and heat can soften the metal. Choosing the right tool means carefully looking at the problem. Sometimes, you need to use a mix of tools and methods. This is especially true for tough materials or if the screw is deeply stuck.
Method 1: Locking Pliers Method
The locking pliers method is great for removing screws with no head, especially if you can see part of the screw.This method is simple. It utilizes the locking pliers’ strong grip. To make it work, you need pliers that can grab firmly and you should keep your hand steady. Grab the pliers onto the exposed part of the screw tightly. Next, hold evenly and turn the pliers slowly to the left. This approach requires one to be patient and not to give up. If you are lucky, the screw will come off. You may feel like you’ve done a magic trick.
However, this can be a difficult path. You need to have enough space around the screw to use the pliers. Occasionally you won’t have this space. The screw might be too close to the surface or in a place that is hard to reach. Finding a good grip is the most difficult part. This instructs us about the removal of screws.If a way you tried doesn’t work, it’s not the end. It just means, you need to switch to another thing from your tool set.
Method 2: Using Screw Extractors
Now, let’s discuss a tool made for this job: the screw extractor. Consider it as a superpower tool that helps in removing the screws without the head from metal or wood. The extractor is designed for cutting into the center of the space where the screw head was screwed in. This enables the screw to be rotated outwards. How to use a screw extractor? First, you drill in a tiny hole into the screw. Next, you take the extractor and put it into the hole you made and then turn it to the left. One of the best features of a screw extractor is that it pinches tighter as you turn it. So, it is excellent for the situation when you are ready to deal with screws that are difficult.
Although screw extractor makes you careful, though. You have to be careful to drill the small hole in the center. If you don’t, you may be compounding the problem. You might overdrive the screw in the process and cause harm to the surrounding area. When using a screw extractor, it’s important to follow these steps precisely to avoid further complications. Therefore, whenever you use a screw extractor, take a breath. Breathe your best, choose your target with caution, and step forward with courage. Please keep in mind, that powerful tools are to be used cautiously.
Method 3: Left-Handed Drill Bit Usage
Have you ever come across that saying of “two wrongs never make a right”? In some cases, they may be unscrewing it. Next, let us get into the left-handed drill bit. This tool is ideal for when the screw is stuck and it won’t turn. Different from usual drill bits, they turn the hand in the opposite direction. This means that as you tighten the screw, you are also unscrewing it. It appears to be a good idea, does it not? How to drill out a screw? It is vital to drill in a careful manner. You are required to exert just the right amount of force to grab the screw without causing more damage. First, select the right drill bit size that matches the screw head, then drill slowly and apply steady pressure. Gradually increase the drill speed as the screw starts to loosen.
On the other hand, it is good to remember that we can’t rush things. This method is based on drill bit capturing the screw rightly. This is not so certain, especially when you are dealing with very tight or rusty screws. If the screw is severely damaged or stripped, you may need to start with a small pilot hole to gain better control. This can also happen to the drill bit, which might break in the screw. If the screw breaks, you can click on this article to learn methods on How to Remove a Broken Screw: A Comprehensive Tutorial. This complication is the reason why it is even more difficult to find a solution to the problem. Thus, although this way of thinking is wise, it calls for an element of hope and caution. Like any other worth it, it takes your patience and a bit of luck.

Method 4: The Rubber Band Technique
Frequently, when we are looking for a solution to something, the easiest one goes unnoticed. The rubber band is an illustration. It is a non-standard technique to take screws out without the heads. You just put a rubber band with a strong grip on the top of the screw. After that, align your screwdriver with the rubber band and rotate. The rubber band applies pressure. This fills in the place where the screw head used to be and helps you turn the screw.
This approach might seem unbelievable, but it does work, especially with small screws.However, it’s not perfect. The rubber band trick is not always the savior when you are dealing with larger and more difficult screws. Or with screws that have a lot of rust. It is evidence that in some cases, the simplest solution is the best one. So, it is better to try to test this hypothesis because if it doesn’t work, you’ve just wasted a little time. And a rubber band for that matter.
Method 5: Welded Nut Method
At times, screws simply won’t budge. Here is the moment when you should weld it. The welded nut method is indeed mighty. It’s used only for very stubborn screws. Here’s what you do: weld a nut to the screw’s end. And, finally, use a wrench to turn the nut. It can thereby turn the screw. It is the same as a screw, but with a new head. But what if you need to remove a screw with no head? In such cases, you can use locking pliers to grip the screw’s remaining shaft or opt for a screw extractor. These tools allow you to apply the right amount of force to remove the screw even without a head.
And, you must have a sense of it to weld. Welding may also overheat the area surrounding the screw and can thus, damage it. Thus, you will have to factor in the relevance of the screw being removed. However, if the larger screws don’t budge, especially in metal, then welding can be the best solution. It’s strong, but sometimes it is a must.
Method 6: Hollow Screw Extractor Strategy
Is a screw without a head, hiding its secret so tightly? With the hollow screw extractor, you should be able to remove the screw. It is like a key to a locked door. You keep on hitting this tool to the screw. By doing it, it holds the screw. The next step is to employ a wrench or pliers to turn the extractor and the screw The inside of the extractor engages the screw. This way, you can spin the screw and remove it.
This method is straightforward and generally doesn’t damage the area around the screw. However, this is not always so simple. The screw must be placed tightly into the extractor. If not, the extractor might be jammed or broken. Nevertheless, it can be the most effective method when nothing else works.

Both these techniques can be a great help to fasten or unfasten a screw with no head. They reveal to you the power of imagination and persistence. At times it is necessary to take many different approaches to solve a problem. No matter whether the screw is in wood or metal, persistence is the key. It is always possible to find a solution.
Method 7: Applying Heat & Cool Methods
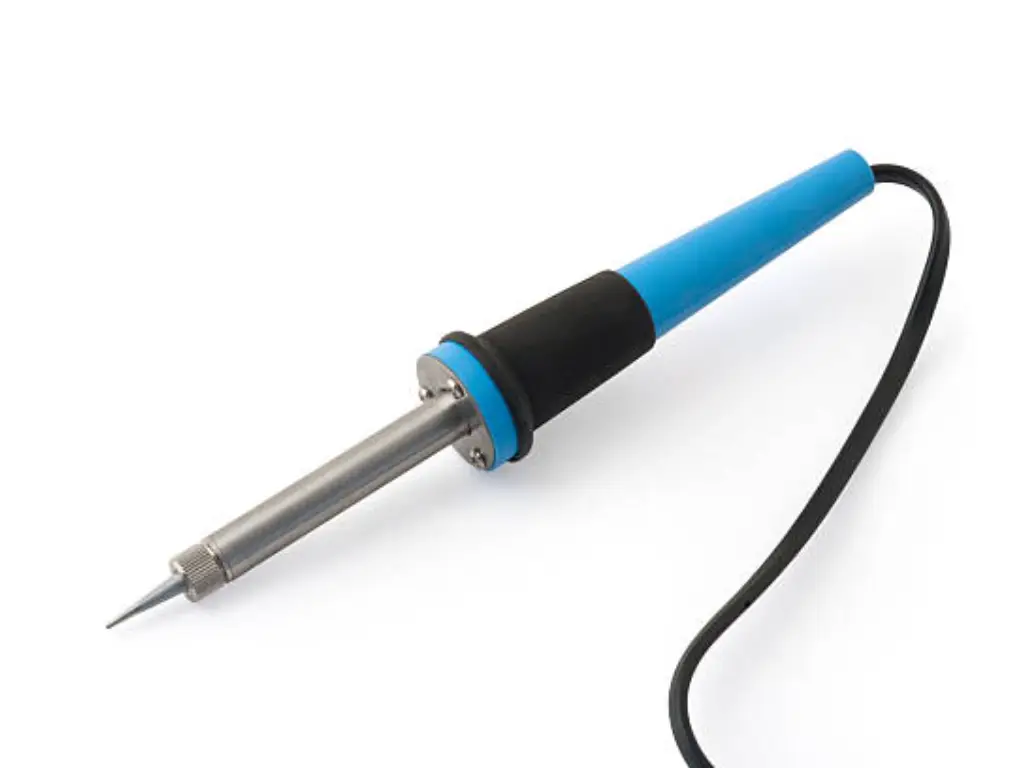
Do you find a screw that has no head frustrating?Try using extreme temperatures.This could really help. Heated metals get bigger and cooled down metals become smaller. Using a soldering iron or a torch to heat the screw is also an option.But be careful. Immediately after heating, make a quick cooling down with some ice or cold water. This is the reason why the metal is shifted. These rust-breaking moves can be the result of small movements. This may be your option to unscrew it.
On the contrary, heat should be used with care. It is all about the balance here! It is not recommended to heat it to the point that you end up harming what is surrounding or making the screw too weak. This way is very detail and delicate. If you have a possibility of causing damage to the area surrounding the screw, think of this as the last solution. However, if you do it right, it may bring you some success.
Method 8: Creating a New Groove
Suppose the screw is missing its head. But how do you get a broken screw out? Be inventive, and you might manage to create a new one. This might be your first try at carving out your own groove directly in the center of where the screw head should be. You can use a Dremel tool or a thin cutting disk for this purpose. To start, you could use a center punch to mark a guide hole, ensuring your cut is precise. Make a notch deep enough for the screwdriver to fit and engage.
This task requires accuracy. A steady hand is crucial here. Without it, there’s a risk of the tool slipping, which could damage the surrounding wood surface. Alternatively, you might not cut a deep enough hole, leaving the stuck screw immovable. However, if performed correctly, this technique can be surprisingly effective in extracting the screw. Solving the issue with this creative approach can be highly satisfying. If the screw refuses to budge, creating a new groove might be the only way to apply much-needed pressure and make it work.
Method 9: The Epoxy Bond Technique
Occasionally, unscrewing a screw whose head has been broken off calls for some inventiveness. Epoxy glue can be a good solution for this purpose. The nut or some other screw is placed on the top of the screw with the broken head and then the wrench is used to remove the stubborn screw. Fundamentally, that is what you are doing: making a new “head” that can be turned. After the epoxy or the super glue has been applied to the top of the screw shaft, it is then pressed onto the nut or another screw. Patience is the key as glue takes time to set. After which, you’ve made a new part that can be gripped or twisted with pliers, or even a wrench, helping you to remove the original screw.
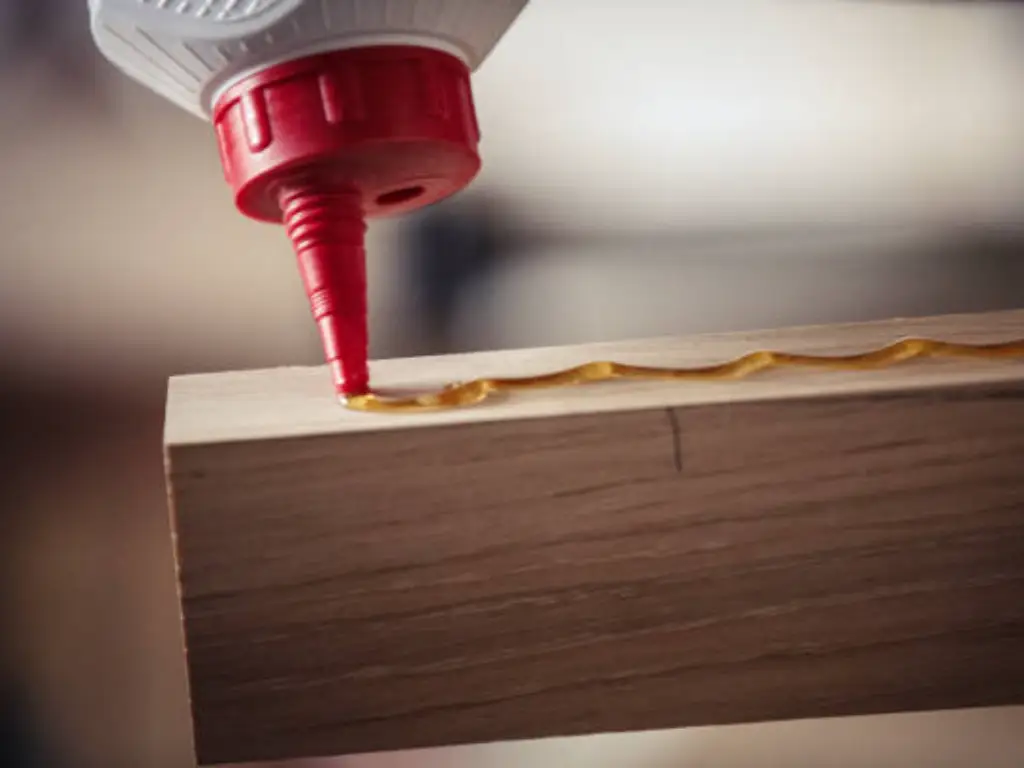
This technique is simple, but the success of it depends on the detail, such as how long the glue takes to dry and how strong it is. An adhesive cannot be too weak for this application, and applying too much force early on could lead to failure. Moreover, the adhesion performance is significantly affected by the quality of the surface. The oil, rust or dirt surrounding the area can adversely affect the bonding process. Nevertheless, when the process is carried out correctly, this approach can be a very useful tool for any kind of screw removal, especially the Phillips head screw, which act up when the usual tools are used.
Method 10: Destructive Method
When all the other methods have failed and the screw is as stubborn as ever, only the last resort of the destructive method may be adequate. Visualize it as a precise demolition job aimed at pulling out the screw cap. A drill bit is used for the task, and if possible, a drill press is used for extra precision. The aim is to replace the screw’s center with a hole slightly larger than the screw’s diameter. But how do you remove a screw with no head? In this case, you can use locking pliers to grip the exposed part of the screw shaft, or you can use a screw extractor designed specifically for headless screws. This requires specific care to be taken so that the threads are not undermined or the surrounding material is not damaged. This technique entails the need for one to be careful, especially because there is a possibility that the screw may not be pulled out intact.
It is not for the timid or those who are not prepared to take a step that cannot be undone. At certain times, the replacement of the old parts with the new ones is inevitable. A slow, steady rate of drilling, with continued pressure, is essential to ensure that only the screw shaft is targeted. The protection of the project under consideration should be the top priority. Despite the fact of the hardness of this method, it still adds a significant victory in the struggle with the intractable screws, which shows that even the most recalcitrant screws can be overcome using the proper strategy and tools, such as penetrating oil for oil penetration and thus easing the process.
Safety Precautions for Screw Removal
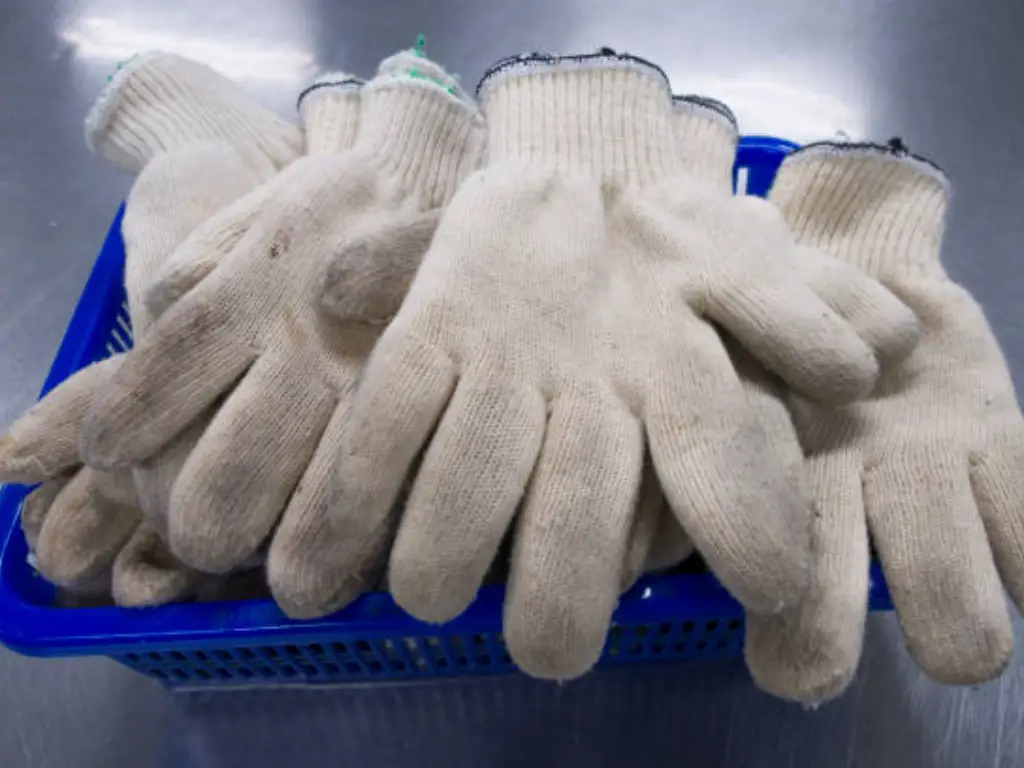
When taking out a screw with no head, always be sure to keep in mind safety as your priority.Wear protective eyewear. This will prevent your eyes from getting hit with any debris or sparks. In addition, gloves will serve as barriers from sharp edges and heat. Safety is number one. It takes time, so be patient. This minimizes the possibility that you will get hurt or harm your project or equipment. When the chosen approach is not working, try to find an alternative solution. The primary objective is to drill out the screw using proper tools and techniques.
| Method | Suitable for | Advantages | Disadvantages |
| Locking Pliers Method | Exposed part of the screw is visible | Simple, uses tools at hand | Requires space around the screw; may not work for all screws |
| Screw Extractors | Stripped head in metal or wood | Precise, tight grip as you turn | Requires drilling; precision needed; equipment needed |
| Left-Handed Drill Bit Usage | Screws stuck due to tightness or rust | Unscrews while drilling | Risk of drill bit breaking; requires careful force |
| Rubber Band Technique | Smaller screws, not deeply entrenched | Simple and does not require special tools | Not effective on larger, more stubborn screws |
| Welded Nut Method | Very stubborn screws, especially in metal | Strong approach, creates a new head | Requires welding equipment and skill; risk of heat damage |
| Hollow Screw Extractor Strategy | Deeply embedded screws | Straightforward; minimal damage | Tight fit required; risk of jamming or breaking |
| Heat & Cool Methods | Screws with corrosion bonds | Can break corrosion bonds | Requires careful temperature management; can damage materials |
| Creating a New Groove | Screws too close to surface for pliers | Effective way to apply pressure | Demands accuracy; risk of damaging surrounding area |
| Epoxy Bond Technique | Broken head or shaft | Creates a manipulable new head | Glue must be strong; surface must be clean |
| Destructive Method | When other methods fail | Can remove any screw | Damages the screw; risk of harming the project material |
Post-Removal Repairs and Finishing
After you take the screw out, you may need to repair some things. The hole left might be bigger than you have ever imagined. You may find some marks on your project or there might be some. You can fill up the holes with wood plugs, filler, or sand the surface to restore the original appearance. Each time you are unscrewing a bolt, you are getting a lesson. You are able to do a small repair by yourself. This makes your work look fantastic.
Conclusion
Pulling out a screw with no head may be a real struggle at times. It asks you to be resourceful, persistent, and ready to test different approaches. You might fail at the beginning.But don’t give up. There are a lot of ways to overcome this hurdle. You might resort to locking pliers, try gluing a nut to the screw, or other means. Each of those options has a different way to help, depending on the situation. No matter if you’ve done this before or this is your first time, remember this: There is no screw which cannot be removed. It is all about using the right tools and means to make it possible.


