Understanding Different Types of Cabinet Hinges
| Hinge Type | Visibility | Best Used For | Pros & Cons |
| Concealed | Hidden | Modern cabinets | Pros: Clean look.Cons: More complex installation |
| Overlay | Visible | Cabinets needing extra door coverage | Pros: Easy installation.Cons: Visible hardware |
| Traditional | Visible | Classic style cabinets | Pros: Easy to replace.Cons: Visible when door is closed |
It is therefore important to first of all understand the various types of cabinet hinges that are available. Concealed hinges are preferred in modern kitchens since they are not visible when the cabinet door is closed. Other common types of hinges include overlay hinges that allow the door to be placed over the cabinet frame and traditional hinges that are visible on the outside of the cabinet doors. There are various types of hinges that are available for kitchen cabinets and each type has its own advantages and disadvantages in terms of its functionality and aesthetics.
Another important consideration is the type of hinge used in areas such as the face frame or frameless cabinets. Frameless cabinets may use hidden hinges for a clean look while face-framed cabinets may use hinges that attach to the cabinet’s face. Understanding the type of cabinet box and door is important in selecting the right hinge that will fit and operate well in the kitchen without major changes to the kitchen’s appearance.
Tools Needed to Replace Cabinet Hinges

| Tool Name | Purpose | Notes |
| Screwdriver | To remove/attach screws | Ensure it fits the hinge screw heads |
| Drill bit | For pre-drilling holes | Match the size to the screws being used |
| Utility knife | For trimming | Used for wood putty or laminate |
It is important to have the right tools to replace cabinet hinges. A basic toolkit should consist of a screwdriver bit that is compatible with the new screws, a drill bit for drilling pilot holes, and a utility knife for trimming the wood putty or loose laminate. If you are patching old screw holes on the cabinet frame, wood filler or putty is very important to use before installing new hinges.
For more complicated changes, a screw hole locator or template may be required to correctly identify new hinge positions, especially if you are switching to a different type of hinge with different screw hole locations. These tools will help in ensuring that each new hinge is placed in the right position with respect to the cabinet door and frame so as to avoid problems such as misalignment or uneven spacing of the door.
Step 1: Preparation Steps For Replacing Hinges
It is important to prepare the work area and to gather all the materials required to remove the old hinges. First, empty the cabinet opening and place a drop cloth or other protective surface to catch any debris or screws. Using your screwdriver bit, remove the screws from the top hinge first, supporting the cabinet door to avoid it from falling. It is also a good time to clean the inside of the door and the cabinet box, removing old grease or dirt that may interfere with the new installation.
Determine the size of the cabinet and the current hinges to make sure the new cabinet hinges will fit. This is important for the door hinges and also for the installation process. Pay attention to any unique characteristics such as overlay hinges or frameless cabinets that might need a particular kind of hinge or installation method. This preparation step is not just about getting rid of the old components but also making the installation process easier and faster.
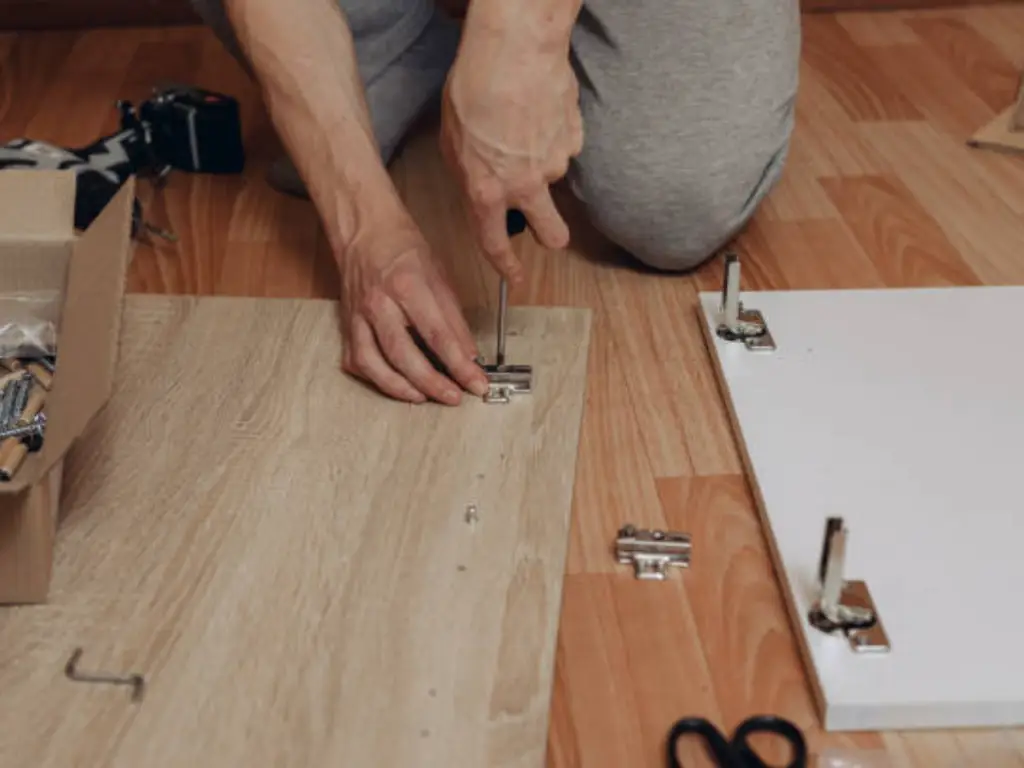
Step 2: Removing Old Cabinet Hinges
It is important to note that removing old cabinet hinges can be a delicate process to prevent damaging the cabinet door or frame. Start by unscrewing the hinge screws from the door side of the hinge and then from the cabinet frame using a screwdriver. If the screws are rusted or jammed, using a little bit of penetrating oil can make them come out without exerting too much pressure on the wood.
After the old hinges are removed, inspect the condition of the existing holes. If you are replacing with similar hinges then you might be able to use these holes again. But if the old holes are worn out or you want to change the type of hinge, you will have to fill them with wood filler. Wait for the filler to dry before drilling new holes for the new hinges and make sure the holes are solid and will hold the screws tightly.
Step 3: Choosing the Right Hinges for Cabinets
There are a number of factors that need to be taken into consideration when selecting hinges for cabinets; both aesthetic and practical. Concealed hinges are ideal for a modern look as they do not show when the cabinet door is closed and this keeps the appearance clean. For traditional styles, visible or decorative hinges can be used to enhance the look. The weight of the cabinet door and the frequency of use should also be taken into account since these factors dictate the durability required in the hinges.
Also, think about the door’s relationship to the cabinet frame: whether it sits on top of it or inside it (inset). Each type has unique hinge specifications that may affect the alignment and functioning of the door. It is possible to match the new hinges to the existing hinge holes to save time on the installation process, but sometimes it is better to create new holes for the new hinges to improve their appearance.
Step 4: Installation of New Cabinet Hinges
It is therefore very important to install new cabinet hinges properly to ensure that your cabinet doors work and look right. Start by positioning the new hinge on the cabinet frame and make sure it is in the right position before marking the screw holes. Pre-drill the wood to prevent it from splitting and reattach the hinges with new screws. Be careful not to over tighten the screws as this could strip the wood.
The next step is to attach the door side of the hinge with the door in the correct position with the frame. This might mean that you need to move the hinges a little bit to ensure that they are in the right position and this is normal as you try to achieve perfect alignment. Open and close the door a few times to check whether it operates smoothly without any noise or friction.
Step 5: Aligning and Adjusting Cabinet Hinges
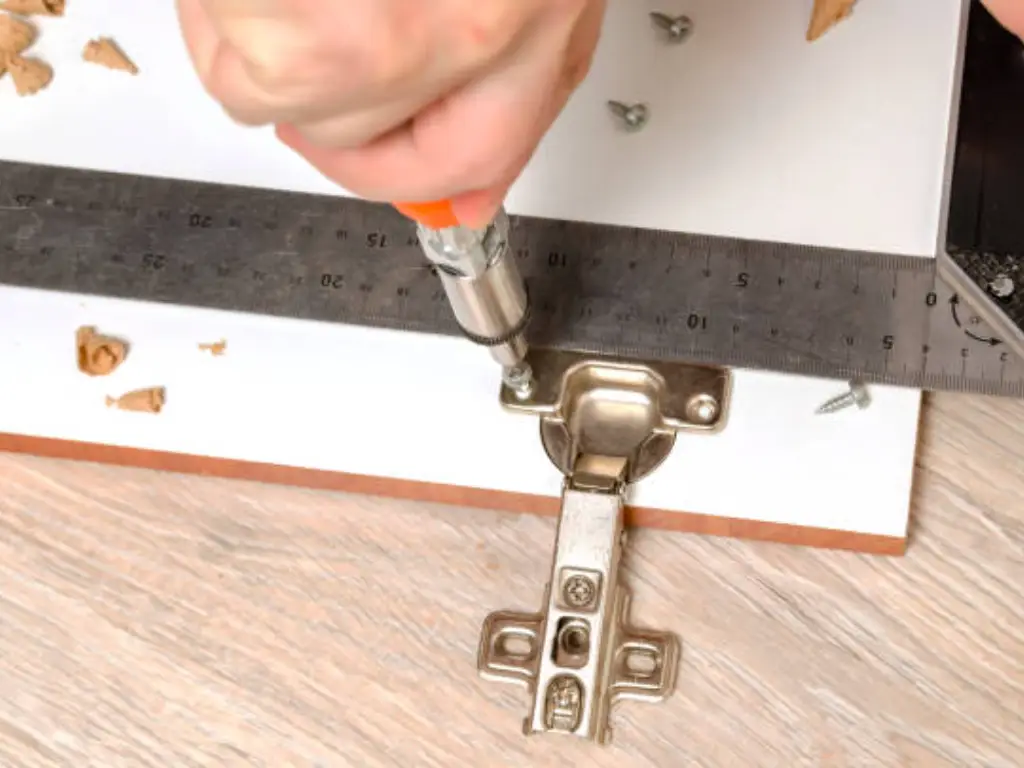
After installing the new hinges, there is a need to make some adjustments to the doors to ensure that they are hanging correctly. Contemporary hinges have adjustment screws that allow for the vertical and horizontal alignment of the door. These adjustments can be used to correct any minor misalignments that may occur during the installation process and make sure that the cabinet doors are level and have even gaps around them.
If the doors are not closing smoothly or are not closing at all, check the alignment again and make minor adjustments. This step is very important in order to achieve a professional finish and to make sure that the doors work properly and in a uniform manner. It is important to note that even slight changes can make a significant difference in the performance of your kitchen cabinets.
Step 6: Solving Common Hinge Replacement Issues
Problems that may arise during hinge replacement include: the screws do not fit the holes; the door hangs unevenly; the hinges are not aligned with the frame. To overcome these problems, first, make sure that you use the right drill bit for the screws and that you have measured the screw locations properly. If the door does not hang straight, check the alignment of the hinge and adjust it using the adjustment screws.
If the hinges are not aligned with the frame properly, it may be required to move the hinges or to drill new holes. Take your time and be patient to make sure that everything is aligned. In some cases, a level can be used to make sure that everything is horizontal or vertical which is very important for the door to work properly.
Step 7: Finishing Touches After Hinge Installation
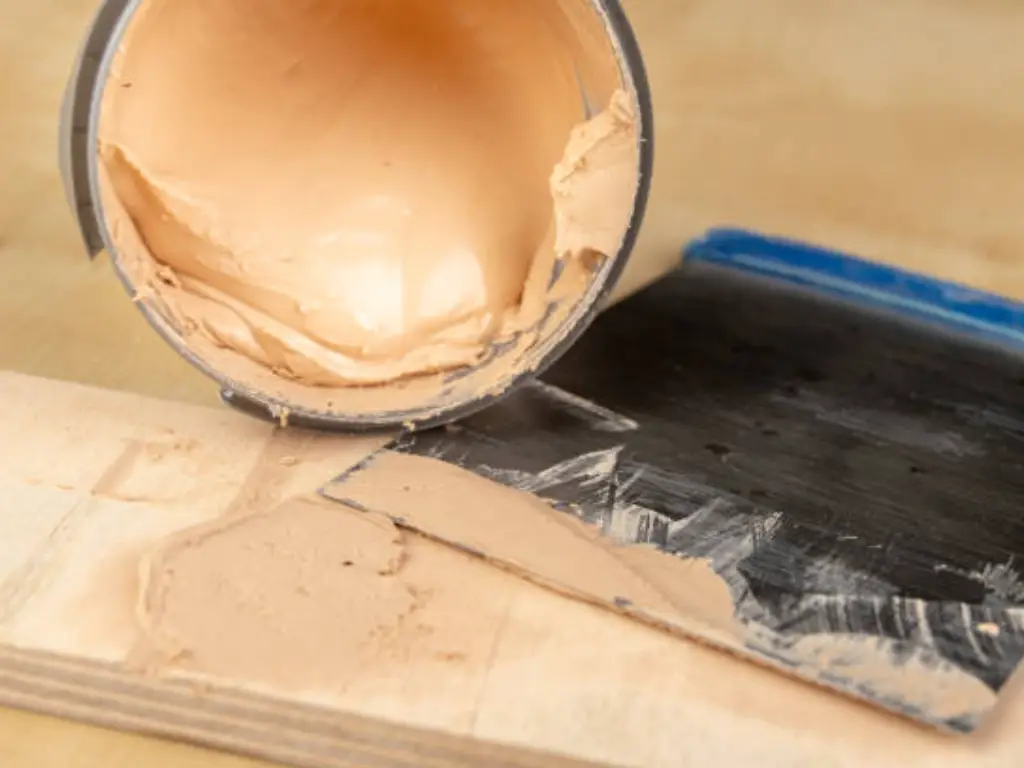
After the new hinges are installed and adjusted, the finishing touch can make a big difference in the appearance and longevity of your project. Use a small amount of wood putty to fill any screw heads or small gaps around the hinges to achieve a smooth finish. After the putty dries, a little bit of paint or stain that is similar to the color of the cabinet can be used to cover any repairs or alterations that were done.
Also, cleaning the cabinet doors and the surrounding area will help to get rid of the dust or debris that may have been generated during the installation process. This not only enhances the beauty of the cabinets but also protects the material and guarantees the durability of the hinges and doors.
Maintenance Tips for New Cabinet Hinges
The maintenance of the new cabinet hinges is also important to make them last longer. It is also important to check the hinge screws from time to time to make sure that they are not loose because of excessive use. It is also important to lubricate the hinges with a light oil to prevent squeaking and wear which also helps the doors to operate smoothly.
Dust and grease should be removed from the cabinet doors to prevent it from sticking to the hinges or causing the hinges to wear out prematurely. These simple steps will help you to maintain the hinges and keep your cabinets in good condition for a long time.
Conclusion
Replacing cabinet hinges can help restore the functionality and beauty of the kitchen, laundry room, or any other cabinets in the house. It is possible to get a professional result by knowing the types of hinges that are available, using the right tools, and following the step-by-step instructions. It is important to note that the right hinges do not only enhance the appearance of your cabinets but also their efficiency which makes this a good home improvement project. The selection and installation of the right hinges in the kitchen will go a long way in improving the value and beauty of a home.


