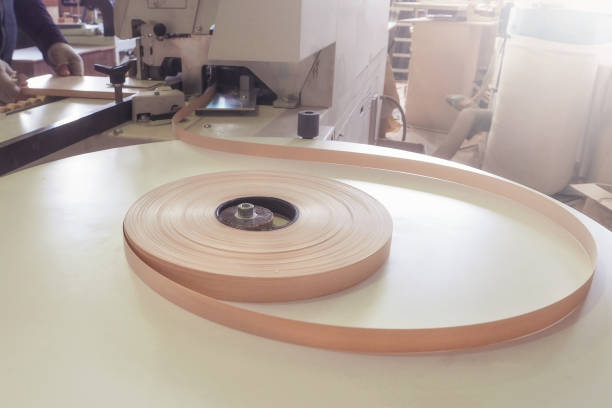
Introduction to Edge Banding and Its Benefits: Why Does It Matter?
Edge banding serves as a veneer, a thin layer of material, mostly used to conceal the exposed and unsightly edges of plywood and other materials like MDF. This decorative concealment helps provide a perfectly finished look by mimicking the appearance of solid wood edging.
One of the primary types of edge banding materials commonly known and broadly applied is the adhesive-prepped veneer, also referred to as the ‘iron-on.’ Plywood sides, furniture, cabinet backs, and countertops are some of the many applications of edge banding, demonstrating its wide use in interior decor and furniture-making industries.
The benefits of using edge banding are immense. First, it covers the rough edges of your substrate, improving aesthetics while aiding in resilience against wear and tear, hence extending the lifespan of your furniture. It curtails any chances of splintering, providing clean finishes and smooth edges, whether straight, circular, or radial edges.
Given the variety of thicknesses, materials, and widths of edge bands, there’s virtually no limit to the range of applications for this transformative element of DIY and commercial projects.
Edge Banding Materials: PVC, Veneer, ABS, and More
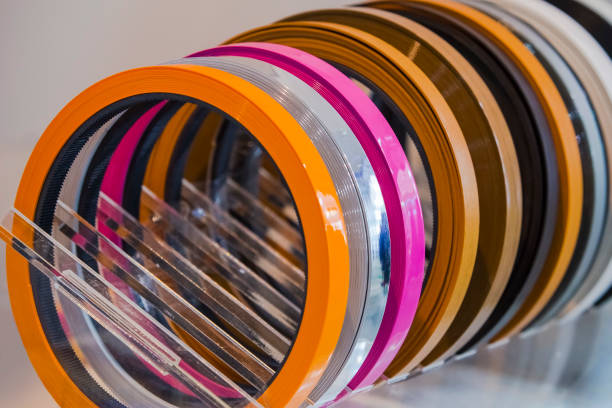
There are many different types of edge banding, the most popular being PVC, veneer, ABS, and melamine.
PVC edge banding, which stands for Polyvinyl Chloride, is favored for its durable properties, resilience to moisture, and a wide variety of colors, making it a fitting choice for kitchens and bathrooms.
Veneer edge banding is a thin layer, typically made of real wood veneer such as walnut, maple, mahogany, or cherry. This edge banding material offers the aesthetic appeal of real wood and matches perfectly with wood panels, making it great for furniture edge banding.
On the other hand, ABS, or Acrylonitrile Butadiene Styrene, is a plastic edge banding material renowned for its impact resistance and high temperatures endurance.
Melamine, another prevalent type of edge banding, provides a clean, glossy finish and is a favored edge banding for cabinets.
Each of these materials possesses unique attributes, making them better suited to certain projects over others. Therefore, understanding the pros and cons of each type of material can prove beneficial in determining the right one for your specific needs.
Pros and Cons of Common Edge Banding Materials
When you’re selecting the right material for edge banding, considering its advantages and disadvantages can guide you toward an informed decision.
For instance, PVC edge banding is remarkably durable and moisture-resistant, making it suitable for rooms with high humidity. On the downside, some individuals perceive its aesthetic as a bit synthetic compared to real wood veneers.
ABS, like PVC, is durable and flexible. It’s environmentally friendly since it’s made without chlorides. The drawback, though, may not provide as natural an appearance as a veneer or solid wood edging.
On the other hand, veneer edge banding provides an authentic wood finish, enhancing the overall aesthetic appeal of your project. But the cost can be a bit high compared to PVC and ABS, and veneer might not offer the same level of moisture resistance.
Edge banding made from melamine is heat resistant and offers a fine and smooth finish. Still, it might chip over time, more so than the other materials.
Edge Banding Sizes: Thin, Medium, and Thick Options
Edge banding comes in various sizes catering to different applications. The common classifications are thin, medium, and thick options, typically ranging from 0.018 inches to 3mm in thickness.
The thin edge banding, usually below 1mm, is suitable for projects requiring a near-seamless product like decorative panels and top-quality furniture work.
Medium-width edge banding typically falls in the range of 1mm-2mm and is often the go-to choice if you’re designing furniture that requires a strikingly smart design and product durability.
Lastly, thick edge banding often exceeding 2mm, adds a substantial feel to your products, making it ideal for more demanding applications such as worktops and areas exposed to heavy wear.
Choosing the Right Thickness for Your Project
Choosing the right thickness is pivotal for your project. It would be best to consider the usage and visible durability of the final product. For instance, you may use thin or medium-thickness banding for cabinets or bookshelves that receive light to minimal wear. On the contrary, thick banding is suitable for high-wear applications such as kitchen counters and office desks.
| Edge Banding Size | Thickness Range | Features | Suitable Applications |
| Thin | <1mm | ·Provides seamless finish·Flexible and easy to apply | ·Decorative panels·High-end furniture |
| Medium | 1mm – 2mm | ·Strong and durable·Visually striking finish | ·Furniture with smart design·Products requiring durability |
| Thick | > 2mm | ·Very durable·Substantial feel | ·Worktops·High wear areas |
Edge Banding Adhesives: Pre-Glued, Iron-On, Laser, and More
Edge banding adhesive comes in several forms: Pre-glued, iron-on, hot air, hot-melt glue, and laser. Pre-glued edge banding consists of a hot-melt adhesive on one side that, once heated, adheres firmly to the substrate.
Iron-on edge banding, as the term suggests, requires the application of a household iron or a hot air gun to melt the adhesive and stick to the edge.
Hot-melt adhesive is popular for larger projects due to its strong bond, quick set-up time, and resistance to heat and chemicals. Laser edge banding, on the other hand, uses the laser’s heat to liquefy the adhesive and bond the edge banding with the panel.

Picking the Best Adhesive Type for Your Needs
Picking the best adhesive type depends on the scale of your project, the materials you’re working with, and the type of edge banding you choose.
For small, DIY projects, pre-glued or iron-on edge banding is often suitable. They’re user-friendly, and the required heat can be applied with a household iron or a cheap hot air gun.
However, for more massive, professional-grade projects, hot-melt adhesives or even laser techniques might be preferred. These methods promise a firmer bond, which is essential for furniture pieces experiencing frequent use or are in commercial settings.
Applying Edge Banding: Techniques for Each Adhesive
After deciding on an adhesive, the application process follows. For iron-on or pre-glued edge banding, the edge band is aligned on the plywood’s edge, and a hot iron is used to melt the adhesive. A block of wood or roller can be used right after to secure the banding in position.
For hot-melt adhesives, a hot-melt glue roller applies the adhesive on the edge band, which is then positioned on the substrate. The banding is held in place till the adhesive cools and sets, creating a strong bond.
The laser technique, although typically found in industrial settings, involves using a laser to melt a special glue layer on the edge of the banding.
Achieving Smooth Results: Trimming and Finishing Edges
After applying and setting the edge banding, the next steps are trimming and finishing. Most likely, there will be an overhang of the edge band, which now needs to be trimmed off.
An edge trimmer helps create a clean and smooth finish. A word of caution, though-avoid pressing too hard when trimming to prevent denting or damaging your workpiece.
Achieving a smooth finish involves sanding the edges after trimming. Filing and using sandpaper to polish rough edges gives you a clean, smart-looking project outcome.
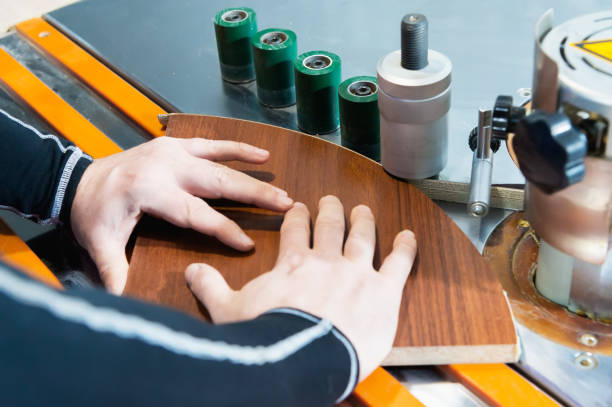
Edge Banding for Curved Surfaces and Corners
Edge banding is not limited to straight edges. With a bit more patience and care, you can apply edge banding to curved surfaces and corners.
For such applications, flexible types of edge banding, like PVC, come in handy. The edge banding material should be firmly pressed and adhered to avoid any gaps or detached areas. It might take a couple of trials to get a hang of it, but the result is worth the patience.
Caring for and Maintaining Edge Banding Over Time
Proper care and maintenance can extend the life of edge-bonded materials, ensuring they look good and function well for a long time. Regular cleaning with a mild detergent is essential to prevent the buildup of dirt and grime.
Over time, the adhesive may weaken, causing the edge banding to come loose. In such cases, the problem can be fixed by reactivating the adhesive with heat from a clothes iron if it’s a hot-melt adhesive. If the edge banding is too damaged or worn out, removing it and applying a new one might be the best option.
For solid wood or veneer edge banding, it’s good to note that fluctuating temperatures and humidity levels can cause expansion and contraction. This fluctuation could lead to loosening of the edge banding over time, and in such cases, re-gluing or reapplying may be necessary.
Conclusion: Finding the Right Edge Banding Combination
Identifying the different types of edge banding and understanding their properties is critical for selecting the perfect one for your project. Edge banding materials, whether PVC, veneer, ABS or melamine, all offer unique benefits and potential drawbacks, and choosing the right one requires careful consideration of the project’s requirements.
Furthermore, selecting the right thickness and adhesive type affects not only the aesthetic result but also the durability and longevity of the final product. Therefore, combining the best choice of material, ideal thickness, and the most suitable adhesive, can guarantee the success of your project.
There’s an edge banding solution out there for every application, from plywood to laminate, for modular furniture, cabinet doors, or high-end woodworking pieces. It’s about finding the right combination tailored to your needs.
With this comprehensive guide, one can navigate the types of edge banding, matching the most suitable options that will best serve the form and function of your project. With due practice and patience, the result can be as appealing and satisfying as a professionally crafted piece, enhancing both your craftsmanship and your piece’s longevity.
Ultimately, edge banding proves to be a versatile and practical solution in the carpentry and DIY-building worlds, rightly earning its place as a staple in achieving high-quality, polished finishes.


